Release Notes: 2018
- Ongage OngageConnect
Table of Contents:
December 2018: v4.19.0
New Features / Changes
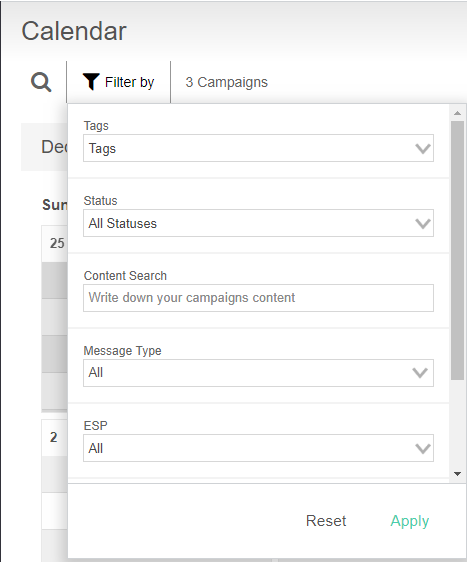
- Campaign filter added to the Campaigns → Calendar view.
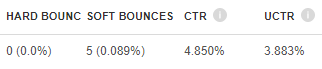
- Added CTR and uCTR to Transactional Analytics.
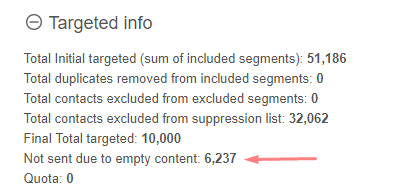
- In the case of campaigns using dynamic HTML/XML we now show in the campaign Snapshot Report the sum of how many messages were not sent due to empty content.
- For SparkPost connections you can now set a custom Return-Path from the ESP setup screen This is an optional setting that when left empty (by default), the Return-Path is set according to the sending domain (as has always been till now).

November 2018: v4.18.0
New Features / Changes
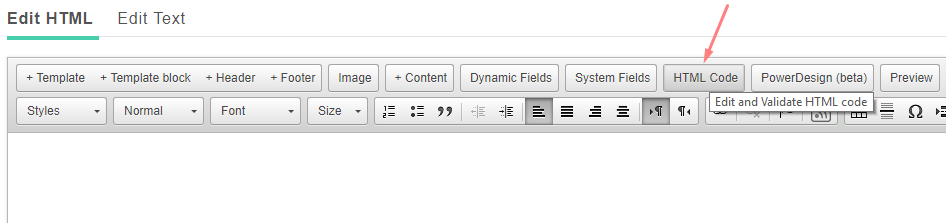
- New color coded, auto-fill, HTML code editor. Clicking on the 'HTML Code' button in the default HTML Editor, opens an HTML Code editor. Previously that editor was a simple monochrome editor. We've now embedded the Ace editor, a high performance code editor, which offers: color coding, HTML auto-complete as well as Ongage system and list field auto-complete. Users can also choose from a variety of code editing color-themes.
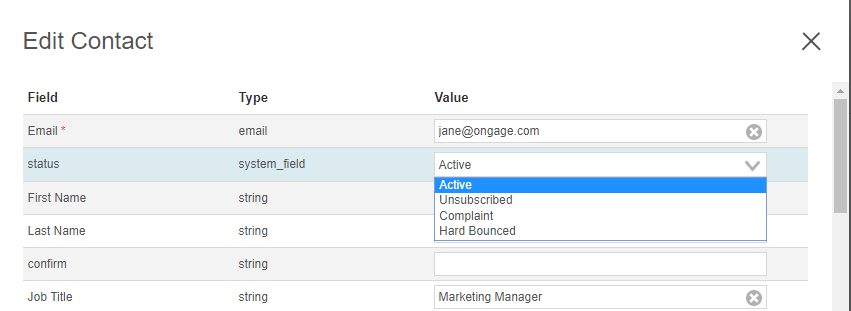
- When editing a contact, for convenience we've added the ability to also update their status directly from the edit contact UI. Till now one would have needed to proceed to the List Settings → Contacts Manager → Change Status/Delete screen in order to update their status.
November 2018: v4.17.0
New Features / Changes
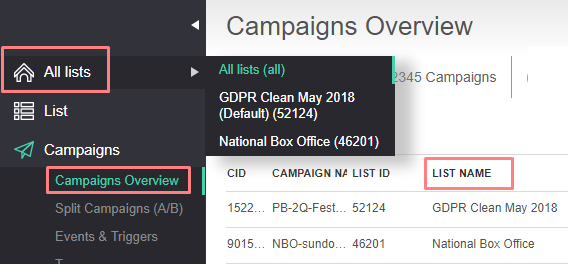
- The 'Campaigns Overview' screen is now available from the 'All Lists' view. This feature enables Admins (and General Users with access to more than one list), to view all campaign overviews across all lists. A new 'LIST NAME' column has been added to this view to easily see which campaigns belong to which List.
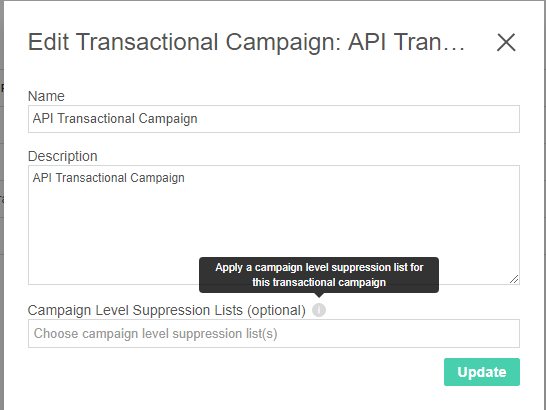
- We've added the ability to indicate a campaign level suppression list, from the transactional campaign UI (Campaigns → Transactional Campaigns). In September (see below) we added the ability to indicate a campaign level suppression list, when issuing a call to the transactional API method. Now we've added that same functionality when editing the Transactional campaign via the UI.
- Change in Litmus Email Preview offering, due to changes on the Litmus end. When selecting the 'Test with Litmus' button, on the 'Email Design Page, you will now have 3 options: (1) Run a Test; (2) Connect your Litmus account to your Ongage account; (3) Sign up for Litmus directly. When a Litmus account is connected, you will be able to directly test a message in Ongage, and have this information stored in your Litmus account. All pricing and payment is managed via Litmus directly. For more information about this, please speak to your Ongage account manager or Ongage support.
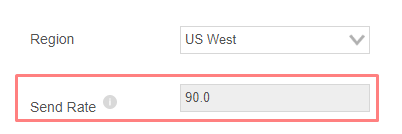
- Amazon SES sending rate added to the ESP Setup connection page. Each one of your Amazon SES connections has an allotted max sending rate per second, determined and set by Amazon. Ongage now pulls that value from Amazon and displays it for you right here in your Amazon ESP setup connection page:
- We now support nested if-then-else blocks. This provides increased flexibility for marketers using this method for generating dynamic content. For more about this feature see: 'Dynamic Content Blocks Using if-then-else Conditions' in our online Content help section.
October 2018: v4.16.0
New Features / Changes
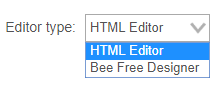
- Ongage has integrated and released a new BEE Free Drag and Drop Editor. In Ongage there are 2 steps when editing/creating an email message: (1) 'Email Settings' and (2) 'Email Design'. By default the editor in the design step is a WYSIWYG editor. But on the upper-right-hand corner of that page you'll find a drop-down menu (see screen capture below), where you can select the 'BEE Free' drag and drop email editor. BEE Free aims to be a user friendly drag-&-drop email builder for designing mobile-responsive emails, quickly and easily. (customers with HTML designers will likely prefer to continue using the default WYSIWYG editor).
- To our WYSIWYG editor, we've added a new PowerDesign (beta) integration. PowerDesign is an AI (artificial intelligent) powered email message designer. With a click of a button it will take your current design and offer you several improved designs that you can choose from. Try it out and take your email messages to the next design level.

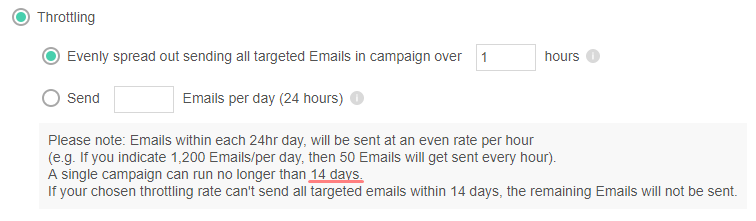
- Campaign throttling has been increased from 7 days to 14 days! See the throttling setting under the 'Sending Options' on the the 'Campaign Scheduling' page.
- We now support multiple-if-then-else blocks in the same email message! This provides increased flexibility for marketers using this method for generating dynamic content. For more about this feature see: 'Dynamic Content Blocks Using if-then-else Conditions' in our online Content help section.
- AdStation by InboxMobi, have stopped their email ad service and thus this integration has been removed from Ongage. In its place Ongage has quickly developed and deployed a new integration to SiteMath which serves up ads into your email messages sent from Ongage. For more about how to setup and use this feature see our online SiteMath help section.
September 2018: v4.15.0
New Features / Changes
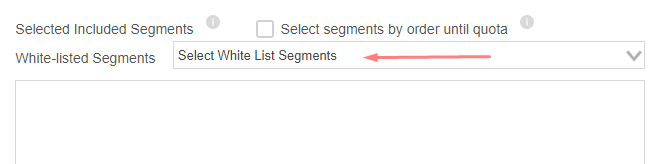
- We've added the ability to send all versions of a split test to a White-list segment. White-list segments (released back in February), are designed to ensure that internal staff members and stakeholders will receive email messages sent to them from Ongage. In the case of Split Campaigns, stakeholders are often interested in seeing all the different versions that were sent (i.e., all the different subjects or all the different email messages). This can now be achieved by selecting the White-list segment when setting up your Split Campaign. So while your target audience will randomly receive one of the versions from the split test, email addresses appearing in your White-list segment will receive all versions!
September 2018: v4.14.0
New Features / Changes
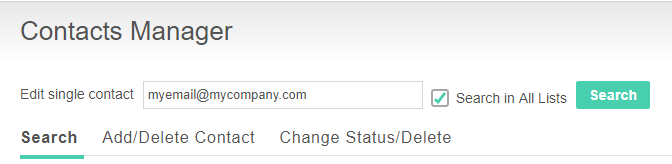
- To List → Contacts Manager: we've added: search and edit a single contact. Moreover, that search also offers a checkbox to search for that contact across all lists. When checked you'll get a table of all the lists that contact was found on, it's status in each list, and an action edit icon to edit it on each list. Note: This search also searches across suppression lists as well, and as always the search is limited to those lists you have access to.
Update on Click: update a list field with URL parameter value of clicked-on link: we've added the 2nd and final part to this feature introduced last month (see below). Last month we enabled updating the value of a field, with the value of a URL parameter when that link is clicked on. In that previous release you could only update/replace a value in a list field, in this release we've added the ability to append, sum and subtract! To simply update/replace the value, you should use the 'ocxf_' prefix. To append (in case of a string field), or add (in case of numeric field) use 'ocxfa_'. To subtract in the case of numeric field use 'ocxfs_'. Going back to last month's example. If the name of the list field is 'dest' (for destination), and this time you use 'ocxfa_' (add/append), and a subscriber clicked on both the 'New York' and 'California' links, then the list field 'dest' (type string) for that contact will contain the value: "NY,CA". For more info see 'Update on Click' in our online List help section.
<a href="https://www.my-travel.com?ocxfa_dest=NY">Visit New York</a>
<a href="https://www.my-travel.com?ocxfa_dest=FL">Visit Florida</a>
<a href="https://www.my-travel.com?ocxfa_dest=CA">Visit California</a>
<a href="https://www.my-travel.com?ocxfa_dest=WA">Visit Washington</a>
- Improved delivery stats reporting for SMS vendor twilio. In the case of SMS vendors (ONLY), till now Ongage did not pull delivery stats back from the SMS vendor (like it does for all SMTP/ESP integrations). Meaning that till now there were only stats for 'Sent' but not 'Success', 'Hard Bounced' and 'Soft Bounced'. These have now been added to the integration of twilio. Ongage's integration with MessageMedia (another SMS vendor) is next in line to get this enhancement, and we'll announce about that here as soon as it is released!
We've added support to indicate a campaign level suppression list when issuing a call to the transactional API method: POST /api/notify_transactions. To the body of JSON request simply add the parameter 'campaign_suppression_list_ids' with an array containing the IDs of one ore more campaign level suppression lists. See the following example.
campaign_suppression_list_ids : [50242, 34495, 53749]
- Also, there's a new flag to indicate, whether the transactional API call should take into a account list level and global (aka account) level suppression lists. The new flag is called: 'check_global_and_list_suppression' and values are 'true' or 'false' with the default being 'false'. For backward comparability the previously named flag for this same functionality 'check_suppression' will continue to be supported.
August 2018: v4.13.0
New Features / Changes
- To the send-by-timezone feature, we've added the ability to also use the nearest Airport Code of the contact. Marketers particularly in the travel industry, may not have the time-zone of their users, but might have their Airport Code (e.g., JFK, LAX, etc.). They can now use a list field that contains the Airport Code of their contacts, in order to send-by-timezone. For more about this feature see our online Campaigns section and search there for 'Send by Timezone'.

- Now you can add (inject) & manage custom email message headers from the ESP setup connection page! Till now marketers had to place an X-Header Replacement tag in the body of the email message, or ask Ongage support to "hard-code" it into the connection. For more information about this feature see our online Customer Header help section.

Update on Click: update a list field with URL parameter value of clicked-on link. So for example, let's say you're running a travels newsletter with several destinations, NY, FL, CA, WA. With this feature, you can populate a list field with the destination value that a recipient clicked on. Here's how: Let's say the destination List field name is 'dest'. In that case your links will look as following. Notice the 'ocxf_' prefix, which indicates, that the field name 'dest' will get populated with value in the link when clicked on for that given recipient. This feature mostly supersedes our Post-Back Links, and in the future will eventually replace it altogether once we add the ability to also append and sum values, and not just overwrite the list field as in this current release.
<a href="https://www.my-travel.com?ocxf_dest=NY">Visit New York</a>
<a href="https://www.my-travel.com?ocxf_dest=FL">Visit Florida</a>
<a href="https://www.my-travel.com?ocxf_dest=CA">Visit California</a>
<a href="https://www.my-travel.com?ocxf_dest=WA">Visit Washington</a>
- On the User Management page, you can now filter users by lists. Marketers managing multiple brands on multiple lists, with multiple users managing each brand-list may find this feature of particular interest.

- New API methods for contact search and activity reports:
- api/contact_search: previously served both contact search and contact activity (when "include_behavior":true), now should only be used for contact search.
- api/contact_activity: new dedicated API call for contact activity.
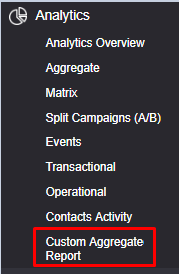
- api/aggregate_activity: new API call for the new 'Custom Aggregate Report'.
- The API POST api/contacts/lookup method has been depreciated and replaced with GET /api/contacts/by_id/<id>
- To the transactional API method: POST /api/notify_transactions we've added the ability, when sending to multiple recipients, to indicate for each recipient their own set of key value dynamic parameters, providing marketers with additional versatility and efficiency when issuing transactional mailings.
- Added the ability to iterate (loop) over an array of key values within the API method: POST /api/notify_transactions. This features enables marketers to generate customized invoices, reservations and itineraries when sending 1-on-1 transactional email messages and therefore might be of particular interest to marketers operating in the eCommerce and Travel verticals.
July 2018: v4.12.0
New Features / Changes
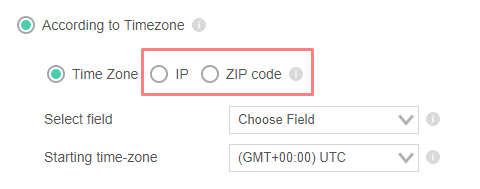
- To the send-by-timezone feature, we've added the ability to also use either the IP or US ZIP code of the contact. Marketers may not have the time-zone of their users, but more often may have the IP and/or ZIP Code. They can now use a list field that contains either the IP or US ZIP code of the contact, in order to send-by-timezone. Only US ZIP codes are supported for this new addition. For more about this feature see our online Campaigns section and search there for 'Send by Timezone'.
- The new new system fields added last month, have now been added to the UI. You can find them when pressing the 'System Fields' button in the email editor. Typically customers may want to add these to their email message links, or in dynamic feeds, for external analytic purposes.
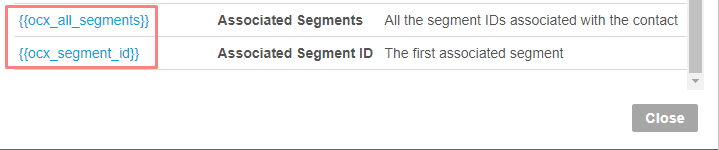
- In addition to the above, two new system fields have been added: {{ocx_segment_id}} and {{ocx_all_segments}}. When included in the body of the email message (or on a link in the email message), they will get populated with the targeted segment id of that that campaign for each contact. If your campaign targets several segments and a contact may reside in more than one segment, then {{ocx_all_segments}} will contain all the targeted segment ids in that campaign that each contacts is associated with. The ids will be delimited with the pipe "|" character e.g., 15434672|14841301|14677013.
- Back in February we released a new White-list segment which allows users to ignore the inactive status (unsubscribe, hard bounce and complaint) for a set of contacts (up to 100). The feature was designed to ensure that internal staff members and stakeholders will receive test and campaign email messages sent to them from Ongage. Clients who have a need for more than 100 email addresses (which is typically rare), can now contact Ongage support and ask them to increase it. Clients using Return-Path seed-lists, may want to add those email addresses to a white-segment, in which case a limit of several hundred or more may be required.
- For API method POST /api/mailings, the distribution parameter is now optional, just like it is in the case of transactional mailings (POST /api/notify_transactions), so long that either an account level, or list level distribution is in place.
June 2018: v4.11.0
New Features / Changes
- New 'Custom Aggregate Report' added to our Analytics section. This new report enables marketers to view aggregate stats, grouped by 1 or 2 List fields. For example, if one of your list fields is called source_id (designating the source of a contact, e.g., search, conference, social media, etc.), with this report you can now get aggregate stats of sent, opens, clicks, unsubscribes and complaints grouped by source_id, in order to determine which source performs best for you!
- Send According to Timezone has been made generally available for all Ongage accounts! When first released in March 2018 (see below), it was only available on request. For more about this feature see our online Campaigns section and search there for 'Send by Timezone'.
- New option to add a new list field to all your lists.

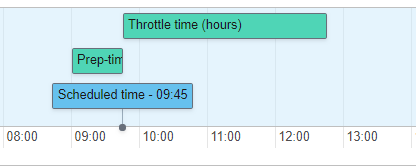
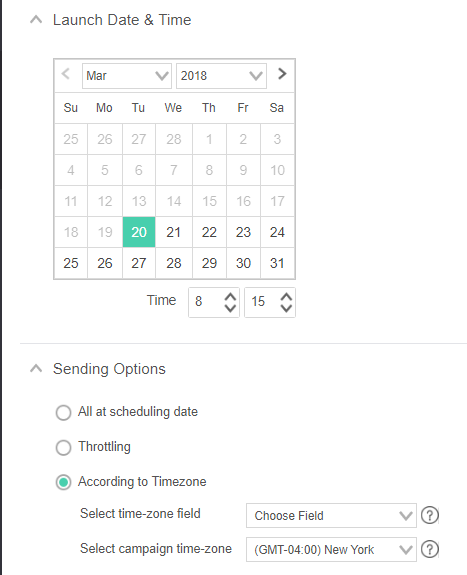
- A new time-line has been added to 'Campaign Scheduling' page as a visual aid. This aid is particularly useful when using campaign throttling and time-zone features.
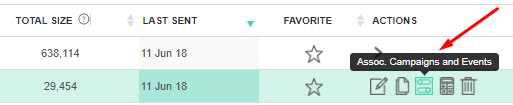
- In the List → Segments screen, the report to see in which campaigns / events a given segment was used in, is now available from 'ACTIONS' column icon 'Assoc. Campaigns and Events'.
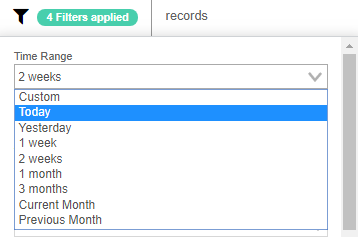
- 'Today' added as a new predefined date filter to all aggregate type reports in the Analytics section.
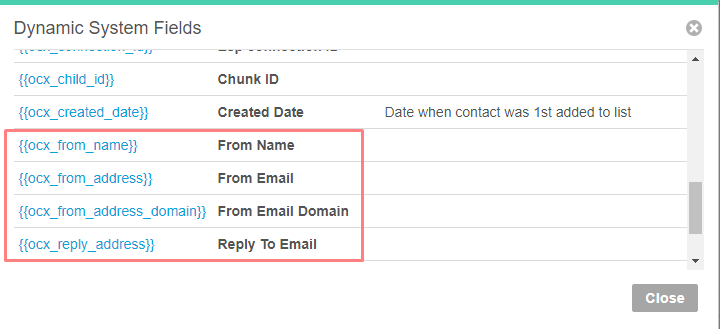
- We've added the following new system fields: {{ocx_from_name}}, {{ocx_from_address}}, {{ocx_from_address_domain}}, {{ocx_reply_address}}. Typically customers may want to add them to their email message links, or in dynamic feeds, for external analytic purposes.
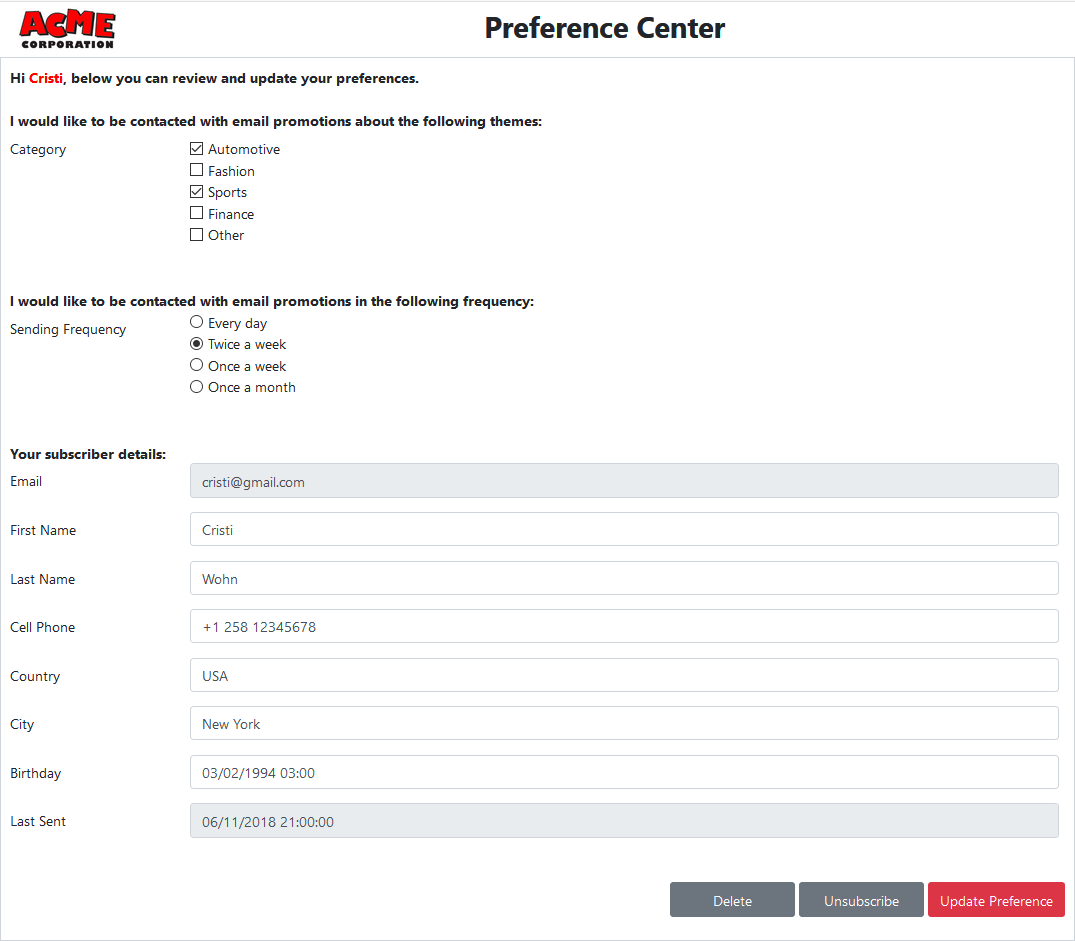
- New Ongage Preference Center using 100% configurable PHP & JavaScript code. You can now setup a fully tailorable preference center on your website, that communicates directly with your Ongage account in order for your subscribers to update their details and preferences as well as unsubscribe and/or delete themselves from your Ongage list. You choose which options/buttons and fields are accessible to them. This preference center addresses GDPR requirements for those that require it. Download the following zip: contact_preference_sdk.zip. The files there are completely configurable and there's no need for Ongage API coding as the code is built-in. All you need is for your webmaster to configure these into your website, if it is a PHP based website. Here's one example of how this page can be configured to look like:
May 2018: v4.10.0
New Features / Changes
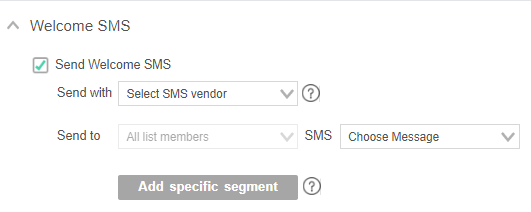
- Added the ability to configure a welcome transactional SMS message from the List-Settings page. Till now one could setup to send a transactional email message to new contacts added to a given Ongage list. Now you can also send a welcome SMS text message. Till now, if you wanted to send a welcome SMS text message, you had to do it via the API, now you can set it up on the List Settings → General page in the 'Welcome SMS' panel. For more about Ongage's built-in welcome email feature see our List online documentation.
- Added the ability to setup Default UTM / URL Parameters on the List & Account levels. Till now you were able to set this on the campaign level under the 'Email Settings'. Now you can set default values under List → List Settings → General (see there 'URL Parameters') and/or under the Account General Settings (see there 'URL Parameters'). Moreover, you can use Ongage dynamic list fields and/or system fields as values for those parameter. For more about this feature see 'Automatically add URL parameters to all links in an email message' in our 'Content' online documentation.
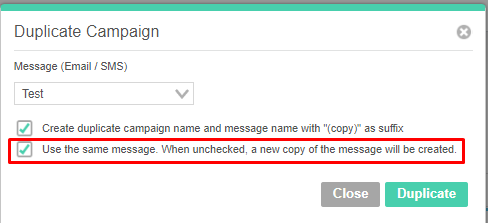
- When duplicating a campaign, you now have the option to reuse the same message. Till now when you duplicated a campaign, a copy of the message used in that campaign, was also created, which can cause unnecessary clutter, if you're reusing the same message.
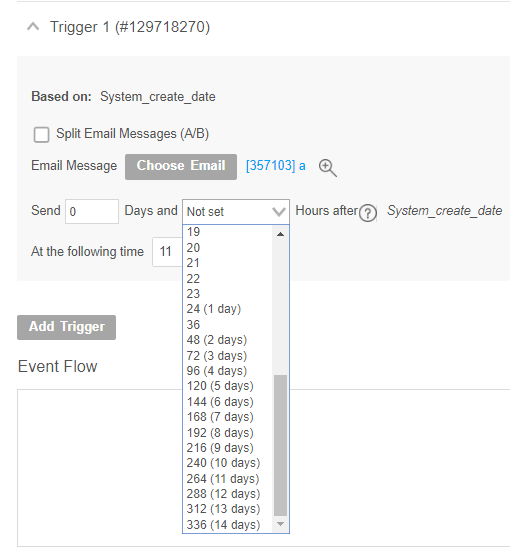
- For triggers based on a date field, we've now extended the number of hours that you can send a triggered message. This feature, enables marketers to setup a series of on boarding messages, set to the same time that the contact got added to the list. So if a contact added themselves to your subscription list at lets say 9pm, you'd may want the follow-up email, 1 day after the transactional welcome email, to go out at 9pm as well and on day 2 at 9pm, and so on a so forth. The assumption being, that if they signed-up at a certain hour, then that is the time of day they are more likely to be active.
- You can now use dynamic list fields and system field values when inserting / injecting custom X-Headers. See under Advanced Topics the sub-section The Ongage Webhook for more about Injecting Custom X-Headers and what values can be injected into a customer header.
- You can now setup Ongage Webhooks directly from the 'Account General Settings'. Till now, if you wanted Ongage to push to your back-end CRM, unsubscribes, bounces and complaints, you had to open a support ticket and provide the endpoint URL. Now you can set that endpoint URL directly from the UI (User Interface). See under Advanced Topics the sub-section The Ongage Webhook for more about Ongage Webhooks and how to set them up.
- UI (User Interface) enhancements.
- In the 'Account General Settings' and List General Settings we've implemented collapsible panels for a cleaner and more streamlined page design.
- In all Analytics reports the 'Date' filter has been renamed to the more accurate 'Stats Date'. See tool tip next to this label for further explanation about this..
April 2018: v4.9.0
New Features / Changes
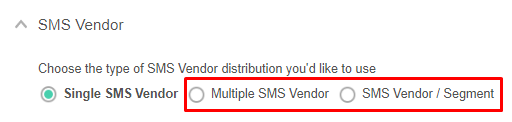
- Added SMS multi-vendor routing. Till now you could use multiple SMTP/ESP vendors for sending an email campaign, but you could not use multiple vendors for SMS campaigns. Now you can!
- In Segment criteria, for improved targeting, we've added an hour resolution indication, to List and System date fields, when choosing the 'Relative' date option.

So when you choose the 'Days' option it will be evaluated according to calendar days, from when the segment is counted/processed, while 'Hours' is the exact number of hours from when the segment is counted/processed for a campaign. For example, at 10:00, ‘less than’ 1 Day, will evaluate back to 00:00 of that same day, while ‘exactly or less than’ 12 Hours, will evaluate back to 22:00 (10:00pm) of the previous day. Times are according to the time-zone of the Ongage user. - A variety of UI and in-product notification enhancements including:
- Remember last selected list when logging back into Ongage.
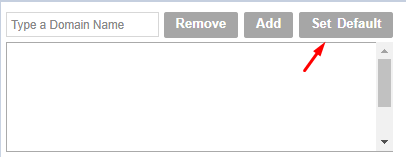
- Added 'Set Default' button, on the 'Tracking and Image Domains' account setting page, for clearer indication of how to set the default tracking and/or image domain. For more on this topic see our Account Settings online help page.
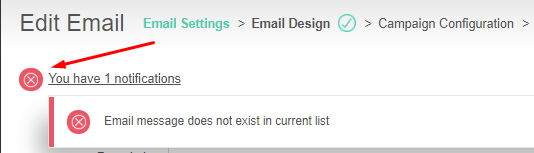
- Improved in-page information, warning and error messages, e.g.:
March 2018: v4.8.0
New Features / Changes
- Send by Time-Zone. This is a new feature that enables marketers to schedule one campaign that will send at different times, based on the time-zone indicated in each contact's list field. So you can schedule one campaign, that will send out at 8am to all contacts in ET, then at 8am to all contacts in CT, and so on and so forth. For more about this feature see our online Campaigns section and search there for 'Send by Timezone'. If you're interested in this feature, please reach-out to Ongage Support to open it for you.
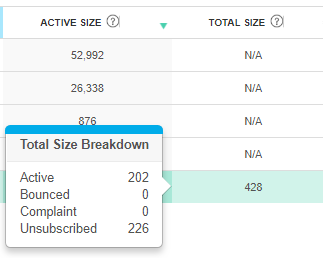
- Segment Count Active and In-Active Breakdown. In the Ongage List → Segment page there are now 2 columns related to segment size: 'Active Size' for active contacts in segment and 'Total Size' which also includes the inactive contacts that are not sent to. Hover over the 'Total Size' count number, and you'll get a full breakdown as illustrated in the following screenshot.:
- A new user role has been added called 'General User (No Export)'. This user type, has the exact same access as a General User, but is restricted from doing any type of export from the Ongage platform. For more about the Ongage user roles and permissions see our 'Settings' help page.
February 2018: v4.7.0
New Features / Changes
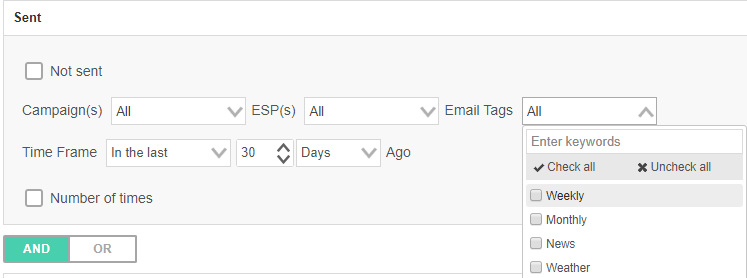
- You can now create segments based on Tags. Till now Tags were only a method for analyzing stats in the aggregate report. Now when editing and creating a segment, you'll find the Tag criterion in behavioral fields such as 'Sent', 'Opened', 'Clicked'.
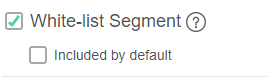
- New White-list segment feature allows users to ignore the inactive status (unsubscribe, hard bounce and complaint) as well as suppression lists for a set of contacts (up to 100). This feature is designed to ensure that internal staff members and stakeholders will receive test and campaign email messages sent to them from Ongage. You'll find this feature in the advanced configuration of creating/editing a segment.
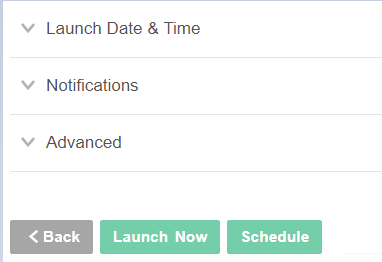
- Redesign of the 'Campaign Scheduling' step, offering a clearer, more streamlined and less cluttered screen.
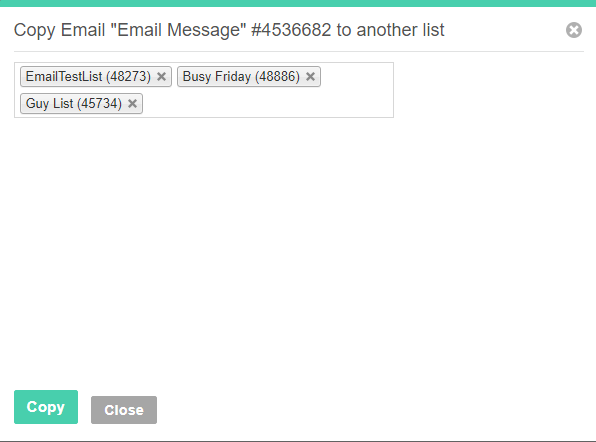
- You can now copy an email message to multiple lists. Go to Content → Email Messages. In the 'Actions' column, choose 'Copy to another list'. The UI now allows for indicating multiple lists.
- New Email Message ID column has been added to the 'Contacts Activity' '→ Export Combined Detailed Report. So when analyzing sent, open and click data of contacts, users can now easily see which email message id was used. Prior to this, users would have to retrieve this info separately from the campaign id.

February 2018: v4.6.0
New Features / Changes
- A new 'Account Limits' table has been added to the Account Profile page, providing for full transparency to account owners, as to their Ongage account limits (based on their package), and current usage of those limits. For more about this see the 'Account Profile' section in our online Settings help page.
- We've increased the number of variants that can be tested in an A/B Split Campaign from 10 to 20. For example, now you can test 20 different subjects instead of 10, in one a/b test campaign. By default Ongage accounts come with the ability to test 5 different variants. You can ask support to increase it for you to 10 or 20 as needed. For more about Split Campaigns see our online Campaigns help page.
January 2018: v4.5.0
New Features / Changes
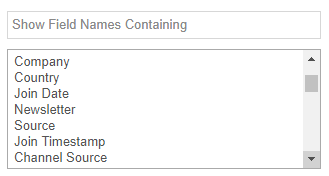
- Added the ability to export list data fields within the Contact Activity report. You can now select which list fields you'd like to include in your Contact Activity, which will allow you to slice and dice your analytics in lots of new ways. For example you can examine sent, opens, clicks, by source, or channel source, or advertiser id, or affiliate id, or any other data point, you have on each of your contacts in the Ongage database. For more about the Contact Activity report see our online Analytics help page.
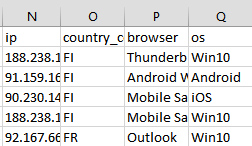
IP, Country, Browser and OS columns have been added to the Contact Activity export combined detailed report. You can now get the IP (as well as Country aka Geo, Browser and OS, if those are available in your account), of each Open and Click for each contact in the contact activity report. For packages that Geo, Browser and OS are not available, you'll still get the IP, as that is available for all accounts! For more about the Contact Activity report see our online Analytics help page.
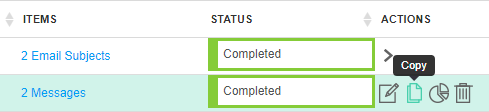
- Added edit and duplicate action buttons to the Split Campaigns page. Till now you could only edit and duplicate completed regular bulk campaigns. Now you can also edit and duplicated a completed Split Campaign.
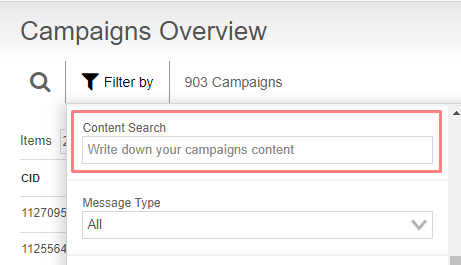
- "Content Search" function added to the the "Campaign Overview" page. You can now search all email messages you used in your campaigns, for a certain string (aka sequences of alphanumeric characters). E.g. 'Spring Sale'.
- Added to Import File Archive table, on the List → Import page, a new 'Welcome Email' indication column, thus preserving the history for each import of whether the 'Send welcome email' option was checked for that import or not.

- New inline date format syntax added. Typically you set the desired date format for date list fields in the List Settings → Fields Setup page. Though Ongage system fields have a default date format which you can't set. Now, you can set the date format in the body of your email message in the following manner: {{ocx_created_date[format=d/m/y]}}. For more about using dynamic list fields and this feature, see our online Content help page.