Table of Contents:
Table of Contents minLevel 2
List Settings General
| Info |
|---|
The List → List Settings → General tab: is a page to manage general default settings for this List. |
How to setup URL parameters
This feature can be used for Google Analytics URL utm parameters as well as any other website traffic tracking technology that uses URL parameters.
...
| Info |
|---|
You can also set default values for these parameters under Content→ Email Message → Email Settings. The URL Parameters configured at Email Message level will overwrite the default setting at List or Account Level. |
How to Setup a List Welcome Email Message
![]() Ongage provides this feature so you can send a transactional welcome email to each and every new contact that joins the List (without any need to code a transactional API message).
Ongage provides this feature so you can send a transactional welcome email to each and every new contact that joins the List (without any need to code a transactional API message).
By setting this up, every new contact that is added to this List, will receive the welcome email message you select in the setup below:
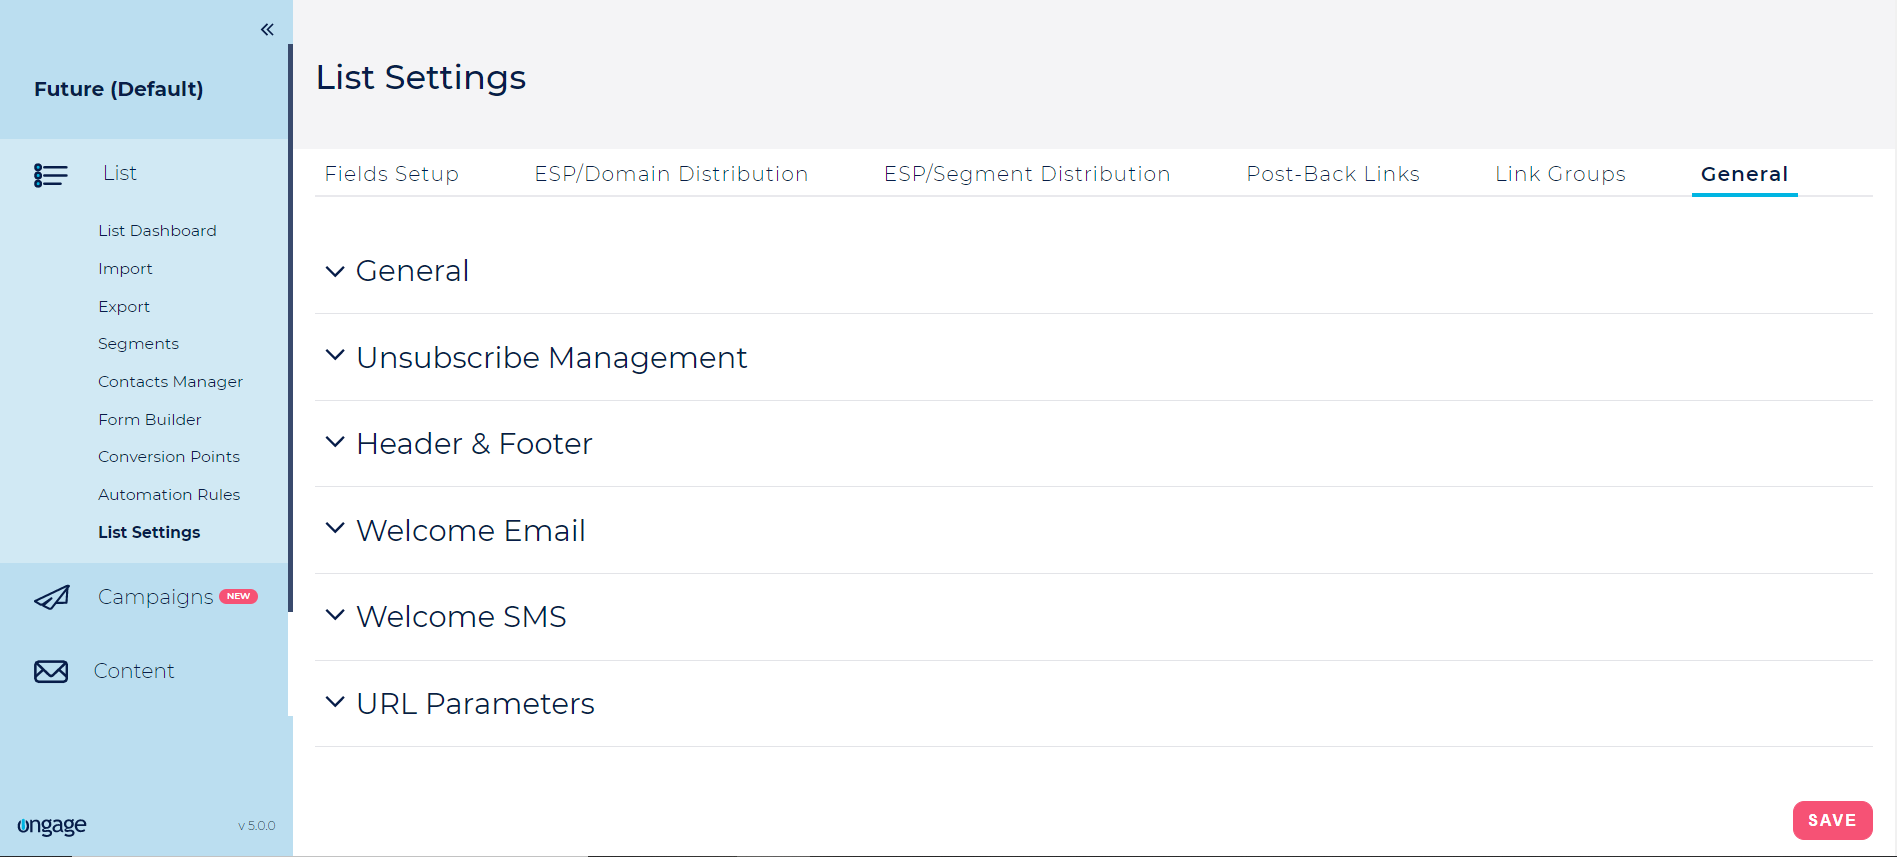
- Go to List → List Settings → General Tab (see screenshot above).
- Open the 'Welcome Email' panel:
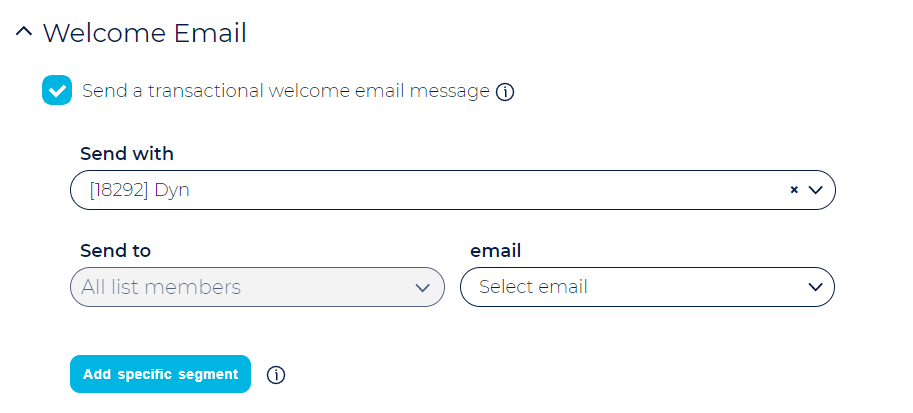
- Check "Send transactional welcome email message" checkbox to activate this feature.
- Select which SMTP vendor connection to use for sending this transactional welcome email.
- Select the email message you would like to send, from your Content → Email Message library, to all new contacts that join (get added) to this list.
| Warning |
|---|
Note:
|
| Info |
|---|
If you'd like to send several follow-up email messages, after this transactional welcome email, see Campaigns → Events & Triggers to set up sending a sequence of follow-up on-boarding messages on: 1 day, 2 days, etc. after new contacts joined this list, by using the Ongage system create date, as the base for that Event. |
How to Setup Different Welcome Email Messages for Different Segments
The segmented welcome email feature enables marketers to send different welcome messages to different on-boarding contacts, based on data-point values in their list fields.
For example:
- Send different welcome messages to contacts from different States or regions.
- Send different welcome messages based on different interests, e.g., 'Sports' vs. 'Travel'.
To setup this up:
- Go to List → List Settings → General Tab (see screenshot at the beginning of this section).
- Open the Welcome Email panel:
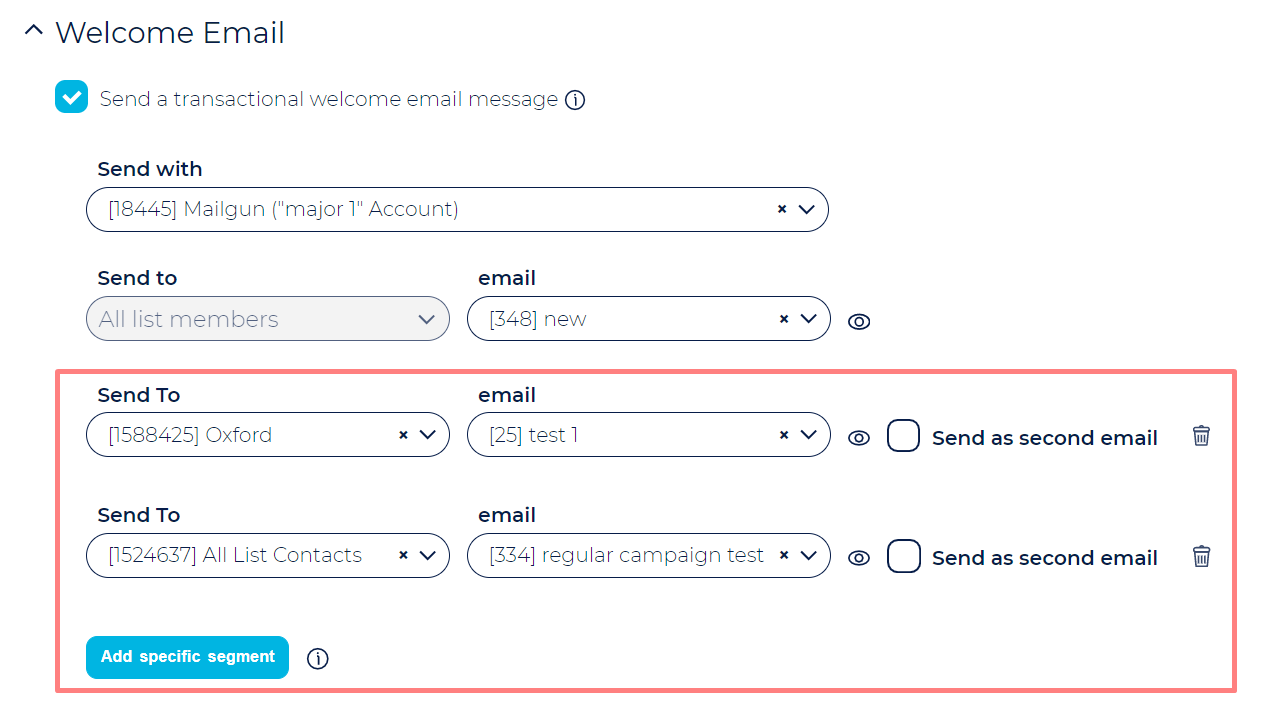
- Click on the Add specific segment button.
- Choose a different email message to send to the selected segment.
- Additionally you have the following options:
- Check Send as second email to send this segment an additional message on top of the default welcome email.
- When unchecked (which is the default setting), the selected segment will receive only the segment designated message instead of the default welcome email.
Fields Setup
| Info |
|---|
See the Fields Setup Section in our Getting Started Guide. |
Field Setup FAQs
What type of field should I use for storing ZIP codes aka Postal codes
We recommend using a String type field for storing ZIP codes.
- In places like Canada and the UK, ZIP codes contains letters, so there the choice is clear.
- But even in the US, ZIP codes can start with a leading 0, and if the field is numeric, it will naturally truncate leading 0's.
- For all of the above reasons we recommend using a String field for storing ZIP codes.
- (Note: there are exceptions like France, where postal codes are only numeric and don't have leading zeros, in that case you can use a numeric field and benefit from the numeric range operator in the segment manager, which is not applicable for String fields).
What type of field should I use for storing Phone Numbers
A String type field should be used for storing phone and mobile numbers. There are a few reasons for this:
- Often phone numbers are indicated with non-numerical characters like '+', '-', '(', ')'.
- Moreover in some countries phone numbers can start with leading zeros, and numeric fields truncate leading zeros. For example London area code is 020. So this is another reason why phone numbers should be stored in a field that is a string rather than numeric.
Update on Click
| Info |
|---|
You might also want to check out the similar Post-Back Links feature in the following section. |
Intro
- Update a list field, when a recipient clicks on a newsletter link.
- This feature enables marketers to capture data from link(s) that a recipients clicked on in newsletter and update a designated list field with a value associated with that link.
Double Opt-in Example: Overwrite Field with Value in Link
- Let's say you'd like your recipients to confirm that they want to get your newsletters.
- And let's say the List field name you want to capture the confirmation is named: 'confirm'.
Your confirmation email will contain a link as illustrated below. where the 'ocxf_ prefix indicates that the field 'confirm' will get populated with the value 'Yes' when clicked on
Code Block <a href="https://www.mywebsite.com?ocxf_confirm=Yes">Click here to confirm</a>
- Then you can either: Segment all those where confirm equals 'Yes' or automatically exclude everyone where confirm is not equal to Yes.
- Note: you can send an additional confirmation email after a contact double-opts in, by using our Automation Rules feature, see there 'Update Field Examples' in the Automation Rules Examples online help page.
Travel Example: Append Values
- In this example you can capture clicks on multiple links.
- Let's say you're running a travel newsletter with several destinations, NY, FL, CA, WA.
- And let's say the destination list field name is: 'dest' and is of type string.
- Use 'ocxfa_<fieldname>' prefix to indicate that you want to append the value rather than replace the value as is the case when the prefix 'oxcf_<fieldname>' is used.
So if a subscriber clicks on both the 'New York' and 'California' links, then his list field 'dest' will contain the value: "NY;CA;".
Code Block <a href="https://www.my-travel.com?ocxfa_dest=NY;">Visit New York</a> <a href="https://www.my-travel.com?ocxfa_dest=FL;">Visit Florida</a> <a href="https://www.my-travel.com?ocxfa_dest=CA;">Visit California</a> <a href="https://www.my-travel.com?ocxfa_dest=WA;">Visit Washington</a>
All Field Prefix Options Detailed
- ocxf_<fieldname>: overwrite fieldname value with value in link.
- ocxfa_<fieldname>: in case of field type string: append value from link to existing value in fieldname.
- ocxfa_<fieldname>: in case of field type numeric: add value from link to value in fieldname.
- ocxfs_<fieldname>: in case of field type numeric: subtract value from link from value in fieldname. This prefix can only be used with numeric type fields.
Post-Back Links
| Info |
|---|
You might also want to check out a similar feature 'Update List Field Based on Click' in the previous section |
What is a Post-Back Link and How to Implement Double Opt-in
- Post back links enable you to update the value of a list field, by your subscribers clicking on a designated link in your email message.
- The update takes place, after your email arrives, and when a recipient of yours, clicks on the post back link in your email message.
- Typically Post Back links are used for implementing double opt-in, though there are other use cases.
- Double opt-in is used when you want your list contact/subscriber to acknowledge receiving future emails, and to save their answer in an appropriate field in the list.
- For example you might have a field named DOI (short for double opt-in) which its default value is either 0 or 'N', and the post back link when clicked will change it to 1 or 'Y'. Alternatively you can use a date field, to store the date they double opted in.
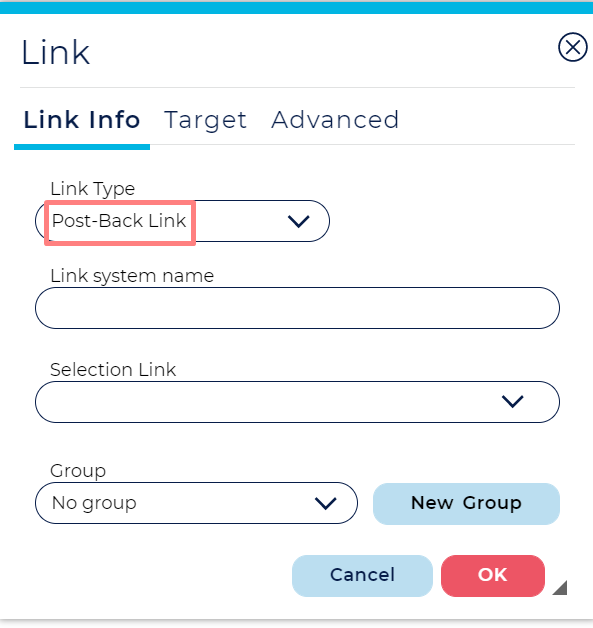
- Once you create the post back, described in the following section, you can use it in your email newsletter. You use it by simply clicking on on the Link button in the email editor, and choosing the Link Type: Post-Back Link.
| Warning |
|---|
|
How to create Post-Back Link
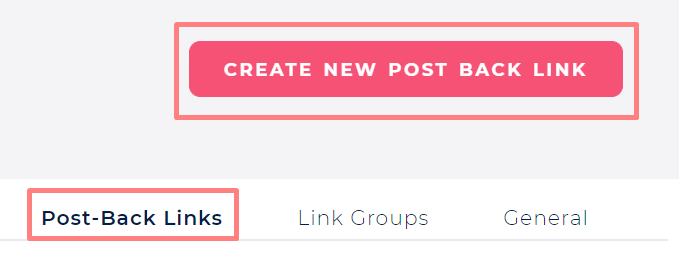
- Go to List Settings → Post Back Links
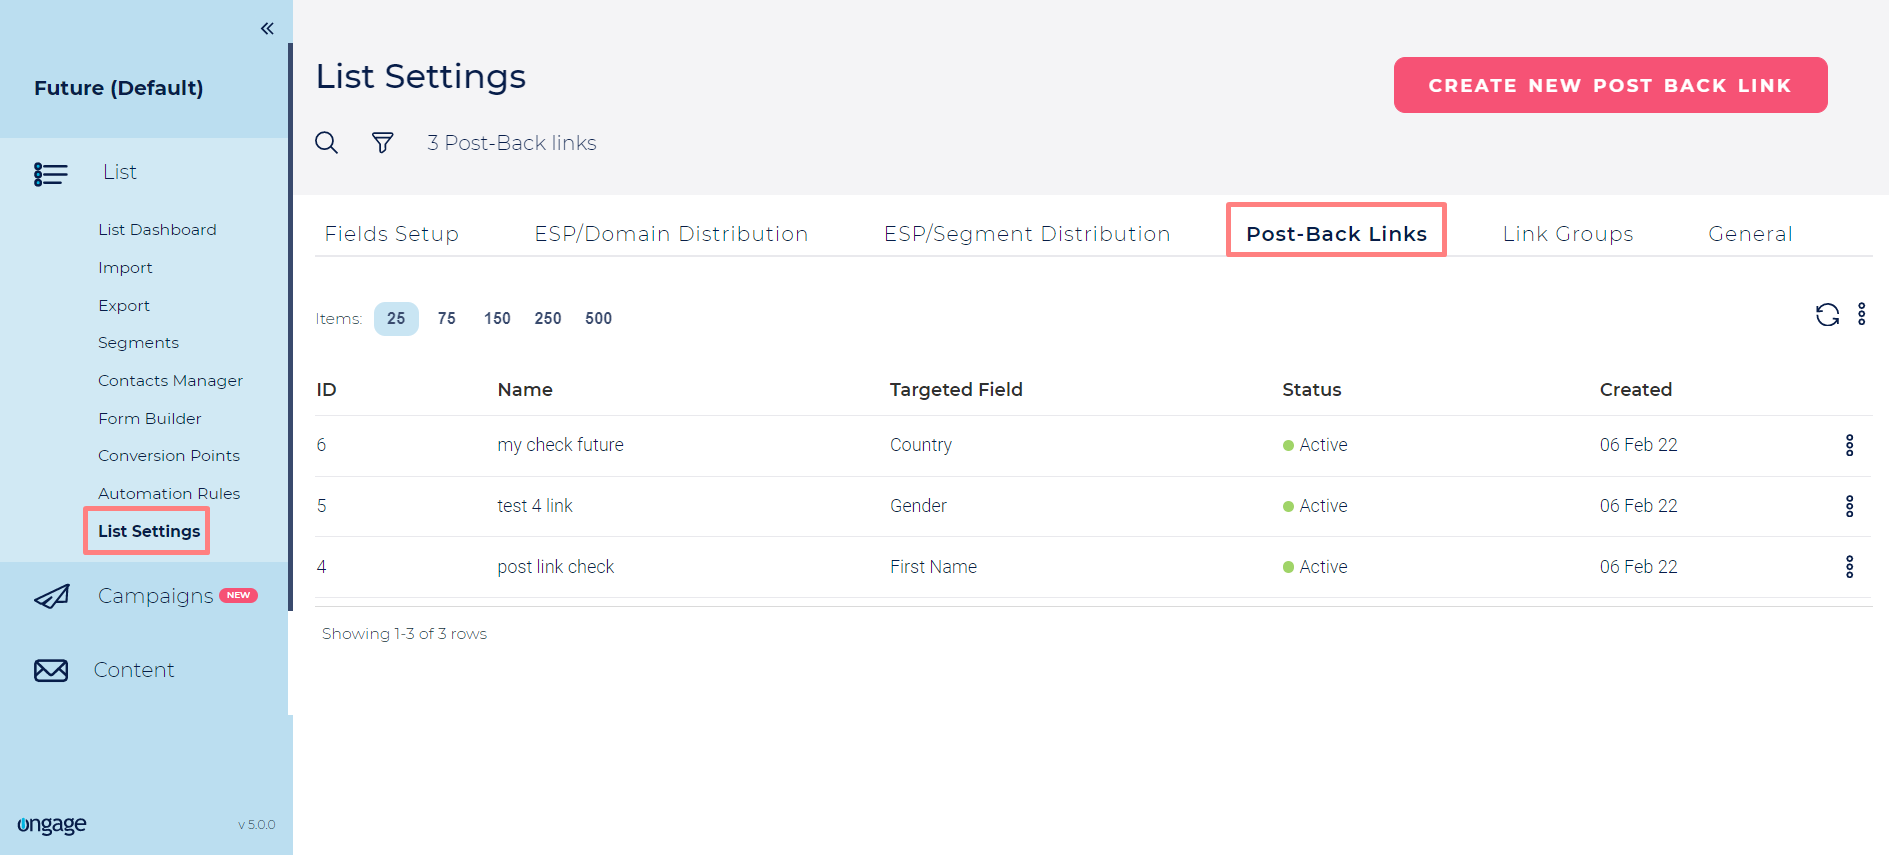
- Click on the “Create new post back link” button
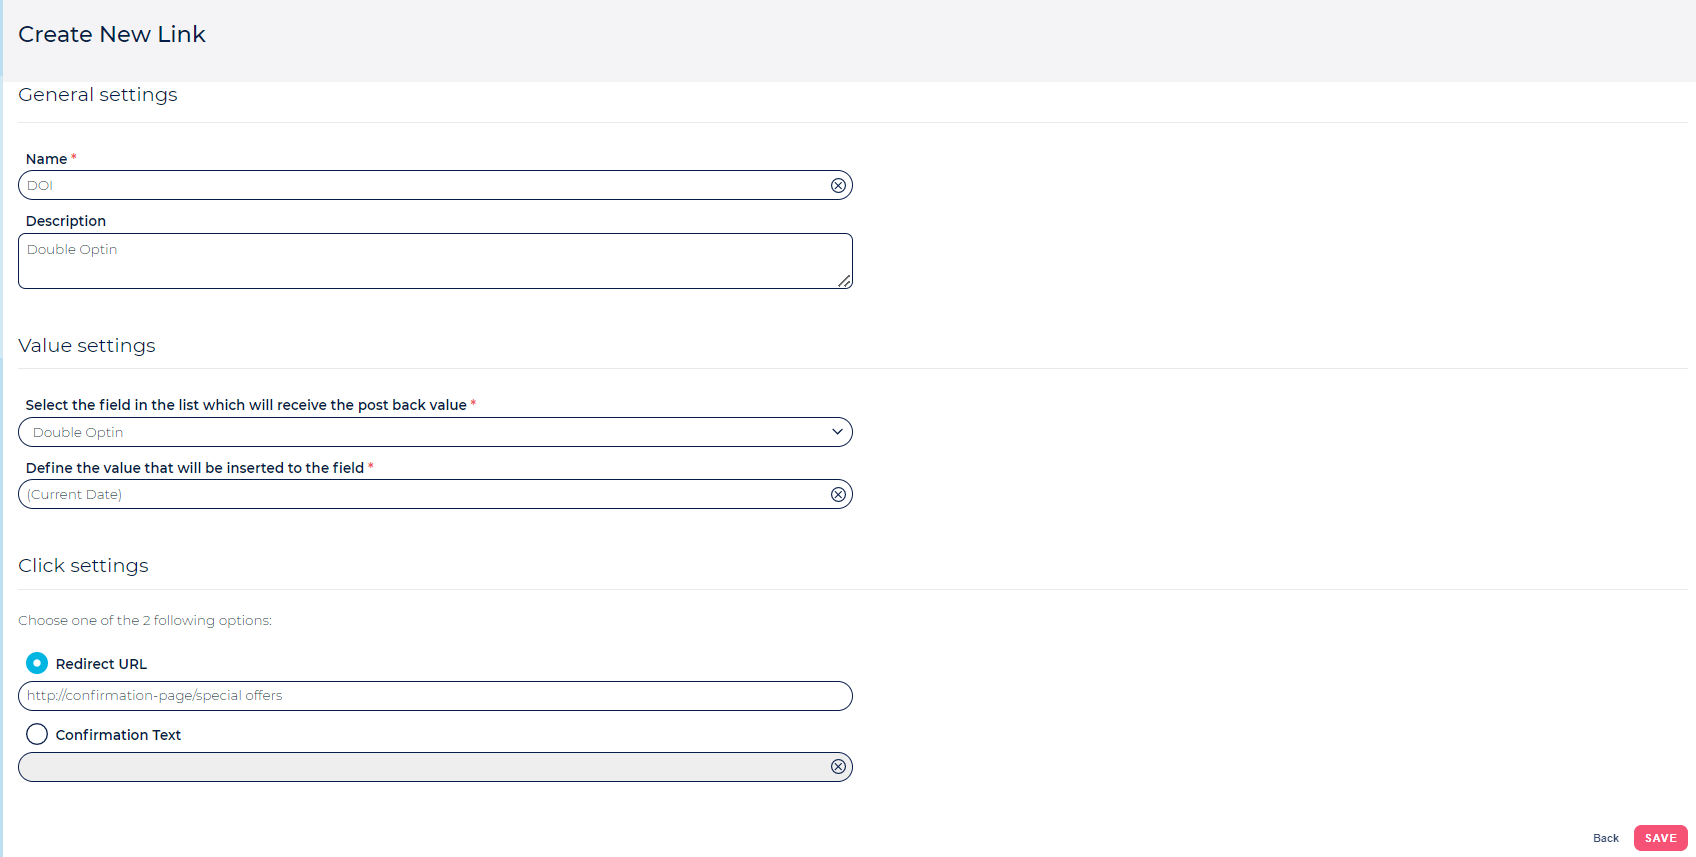
- Define the name and description of the link
- Select the field in the list which will receive the post back value
- In the case of a date field it will automatically be "Current Date"
- You can also choose the message the user will see when he presses the link, or set a URL to redirect them to, when they press on that link.
How to use Post-Back Link
When your Post Back Link is ready you can insert it into your email newsletter in the following manner
Create your email content in the WYSIWYG editor:
- Choose the text for your Post Back Link, for instance : 'Click here if you'd like to receive emails from us'
- Select the text and click the 'Link' icon:
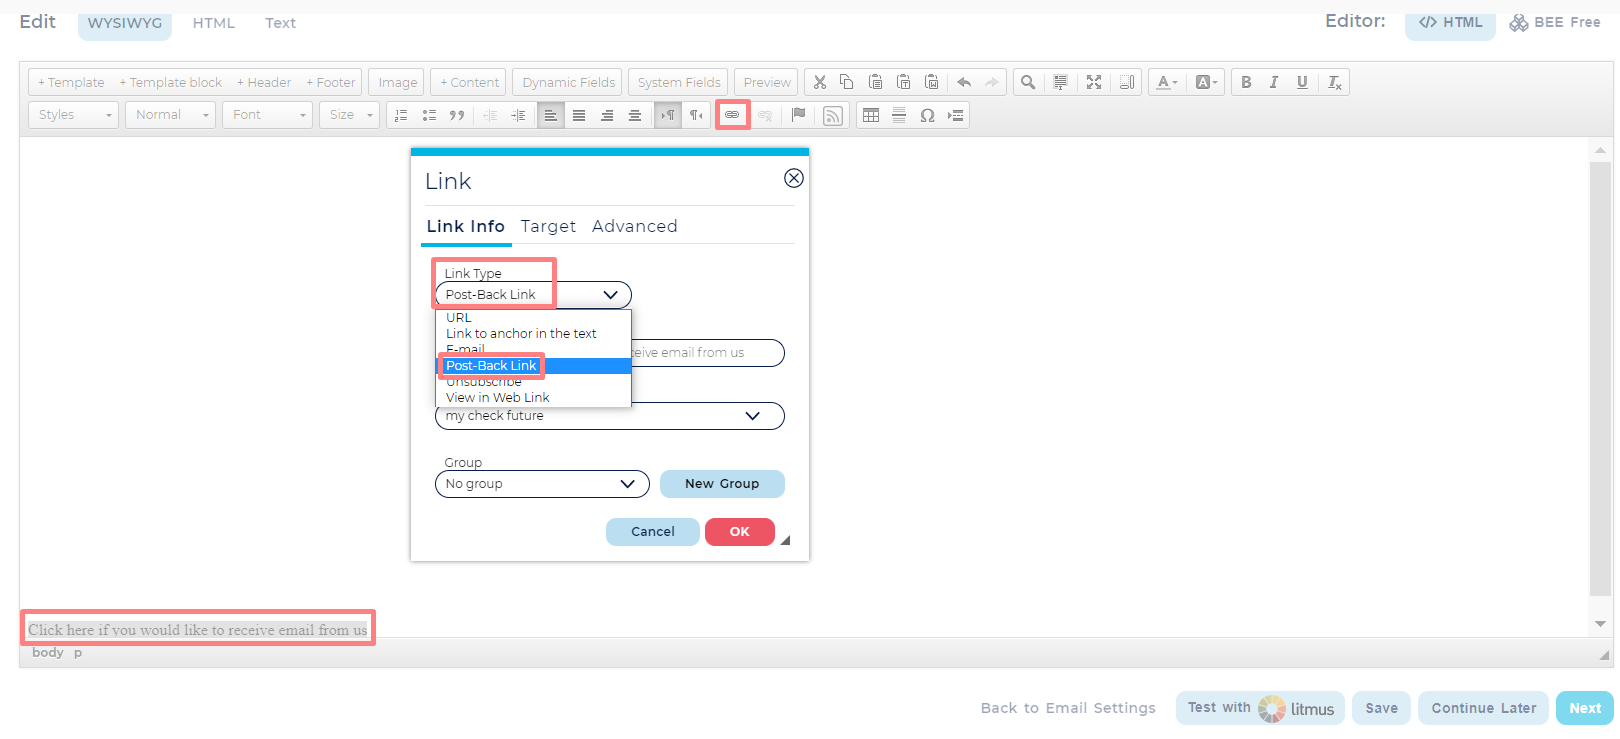
- Choose the Link Type - 'Post-Back Link'
- Select the name of the Post Back Link you created earlier
- Send a test Campaign and check the value got updated in the relevant field.
Note: It might take a little while for the value to be updated.
ESP/Domain Distribution
| Info |
|---|
See the ESP Domain Routing Section and how to configure ESP routing per list or per campaign. |
ESP/Segment Distribution
This setting will be applicable for all the campaigns that you do for this list.
Note: Please note, the campaign level setting will override this list setting and will apply for that specific campaign only.
Link Groups
Overview: What are Link Groups
Link Groups are a way of getting aggregated statistics across a group of links, instead of just individuals ones. Let's illustrate this by example, let's say your email newsletter is schematically built as following:
| Code Block |
|---|
Header & Intro

Entertainment News
    Entertainment Link 1
    Entertainment Link 2
    Entertainment Link 3

Sports News
    Sports Link 1
    Sports Link 2
    Sports Link 3

Weather News
    Weather Link 1
    Weather Link 2
    Weather Link 3

Footer |
You can create Link Groups for "Entertainment", "Sports" and "Weather", and then get aggregated stats on those groups, in order to determine for example, which group of topics gets the most clicks.
Link group stats can be used and measured across multiple campaigns. Meaning by using the same groups in many campaigns, you can get the overall click performance of those groups, over the course of many campaigns, month, months, year.
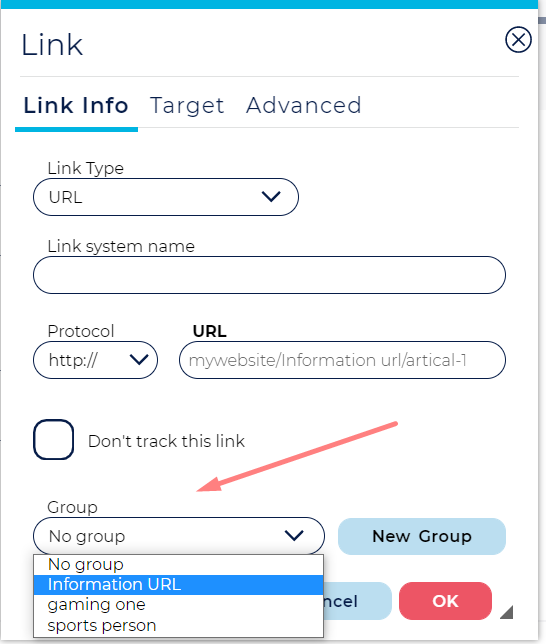
How to setup and use Link Groups
- Go to List Settings > Link Groups
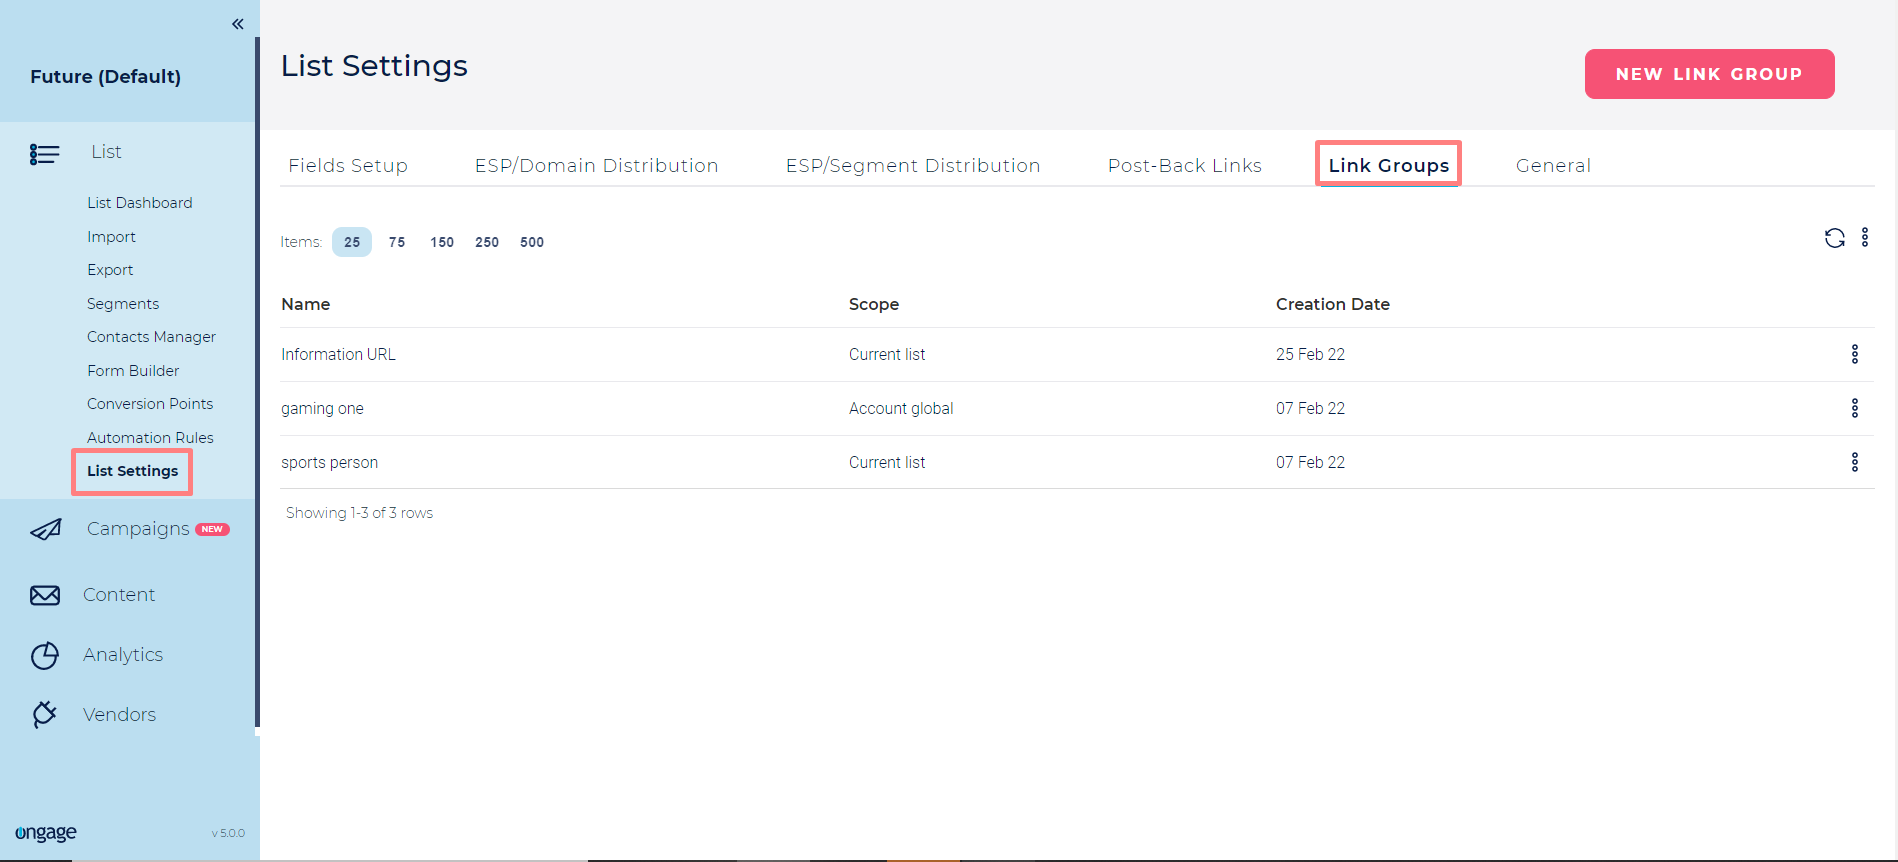
- Click "New Link Group" and give a name for each category of links you'd like to get grouped stats on.
- Then in the Email Message Editor when editing a link, select the link group you'd like to associated each link with: