Table of Contents:
Table of Contents minLevel 2
Intro
![]() Among the first things you'll want to do when getting started with Ongage is import (aka migrate) your active contacts into Ongage. Here you'll find the basics of how to do that.
Among the first things you'll want to do when getting started with Ongage is import (aka migrate) your active contacts into Ongage. Here you'll find the basics of how to do that.
- With Ongage you can create and manage multiple lists (aka data bases of contacts / subscribers).
- Typically different list are used for managing subscribers of different brands, web properties or different business operations.
- For example, one list might be for job seekers, another list for subscribers interested in the latest top news, and another list for subscribers of a daily deal site.
How to Import Contacts (List Members/Email Addresses) into Your List
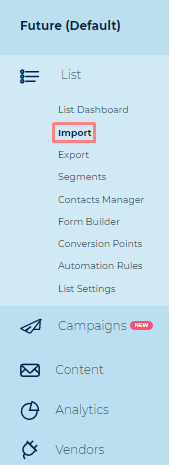
- From the main menu click on List → Import
- From the the List → Import screen you can then upload a CSV file, containing the email addresses you want to import, along with their accompanying list field data fields (e.g., First Name, Last Name, Tel, Address, etc.).
Click on the "Add File...file" button to select the CSV file, from your computer, that you want to import.
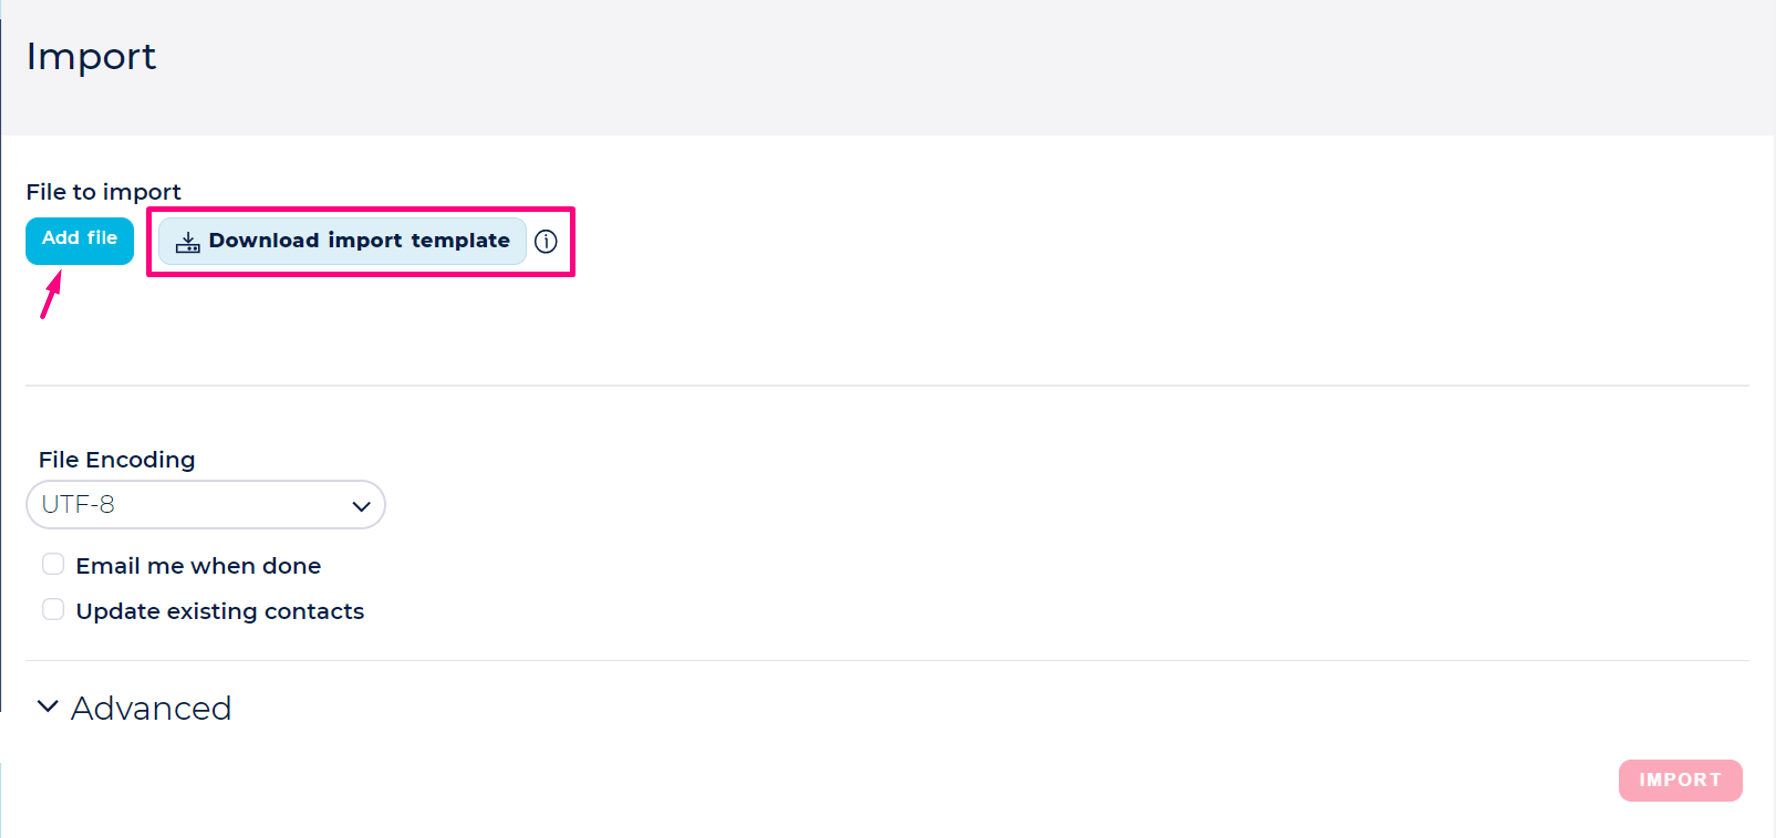
- Click on the Import button – to initiate the import.
| Warning |
|---|
|
Sample CSV File
Here's an example of a sample CSV, you'd use for importing your contacts into Ongage, where the first row contains the names of your List fields:
...
| first_name | last_name | gender | |
|---|---|---|---|
| myemail@myemail.com | Jane | Doe | f |
| youremail@youremail.com | Jon | Doe | m |
How to Add a New List to an Account
![]() Before creating a new list, see the intro note at the top of this section. Also see our Segment Your Contacts page in this Getting Started guide, to determine if you need to create a new list, or will our robust segmenting features suffice. Still not sure – contact your account manager or ask Ongage support.
Before creating a new list, see the intro note at the top of this section. Also see our Segment Your Contacts page in this Getting Started guide, to determine if you need to create a new list, or will our robust segmenting features suffice. Still not sure – contact your account manager or ask Ongage support.
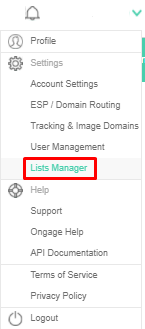
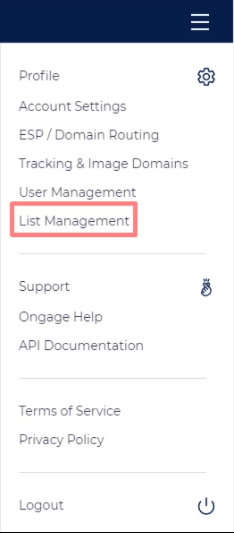
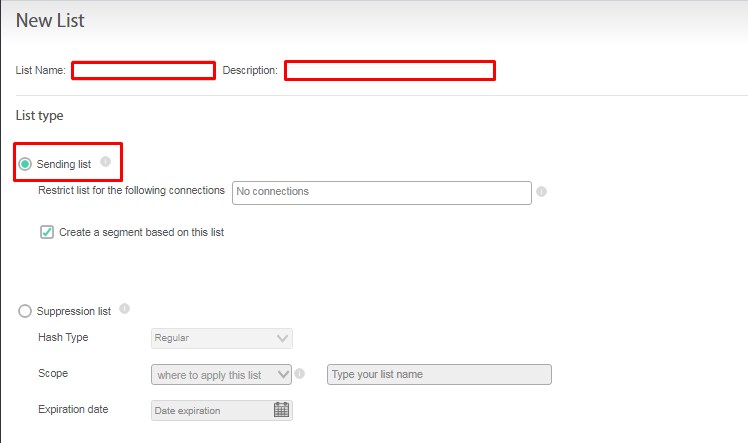
- Click the account settings icon (see top-right arrow-menu) and select the 'Lists ManagerManagement' option.
- And click on the New List button to start creating a new list.


- Enter List Name and Description, make sure 'Sending List' option is selected and click 'Save'
How do I migrate unsubscribed and inactive contacts from my old platform into Ongage
There are 2 ways of going about this
...
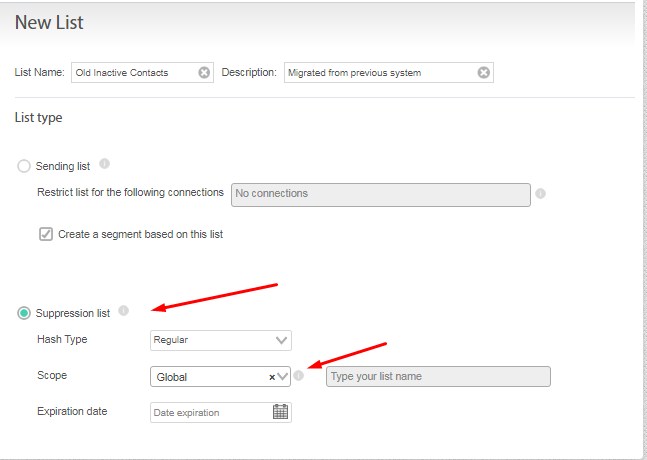
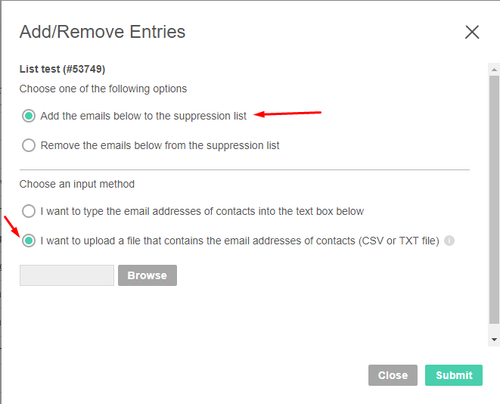
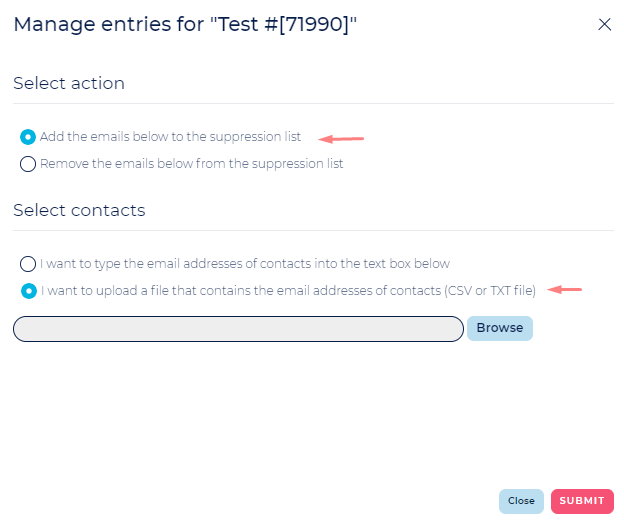
![]() The quickest and easiest way is to create one Global Suppression List
The quickest and easiest way is to create one Global Suppression List
- From the 'Lists ManagerManagement' page (see above), click the 'New List' button, provide a relevant name like demonstrated below, select the 'Suppression list' radio button, select the 'Global' scope and click 'Save'.
- Then from the 'Lists ManagerManagement' page click on the Add/Remove
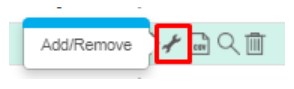 Manage suppression entries.
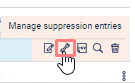
- Import your inactive contacts into this suppression list.
![]() If you're managing multiple sending lists for multiple brands, you could consider creating more than one suppression list, one for each sending list, though it is not required. Speak to your Ongage sales or account manager if you'd like to further discuss this matter.
If you're managing multiple sending lists for multiple brands, you could consider creating more than one suppression list, one for each sending list, though it is not required. Speak to your Ongage sales or account manager if you'd like to further discuss this matter.
...
- Download a CSV of all your unsubscribed members from your current platform.
- First, import them as described above (all contacts must first be in your list, before you can change their status to unsubscribed).
- Then go to: List > Contacts Manager > Change/Delete
- Upload the CSV again and choose: "Mark them as unsubscribed in my list".
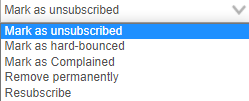

- Repeat and do the same for Hard bounces and Complained.
...