Table of Contents:

Template Library
How Templates are different than Emails
- Templates are used for styling and formatting the body of your email message and can be re-used applied over and again in different emails. Template don't have subjects and other header fields (like from name, from address, etc.) as in email messages. It should be noted, some users prefer to simply make a copy of a desired email message each time, instead of using templates.
- Templates by default are global to the entire account and accessible from all lists, unless you restrict the template folder they reside in.
- The Template Editor allows you to easily create and edit email templates or blocks of content using our WYSIWYG editor.
- You can create a different templates, and those templates can be saved directly into the template library, and can then be inserted into your email message directly from the WYSIWYG editor.

 Note: In the case of the BEEFree Editor, you can create templates from within the BEEFree email message editor, and then from there save to the template library.

Image Library
What is it for
- The Image Library allows you to upload and manage your images in a simple library management interface.
- Once you define your image domain, you can starting using the image library when creating/editing your HTML templates and emails.
- The images are hosted on the Ongage platform but the URL referring to the images will contain your own domain as you set them up on the Tracking & Image Domains page.
Image data-folder attribute
In order to streamline the construction of an HTML email, composed outside of Ongage with all its accompanying images, Ongage users can do the following:
- Upload all the images associated with a given HTML email file, to some Ongage image library folder e.g., “My Folder”
- Then in the HTML File, to each HTML image tag, simply add a data-folder attribute, with the name of the image library folder e.g.,
<img src="image2.jpg" data-folder="My folder"> |
That way the HTML email, composed outside of Ongage, can be assembled in Ongage in 2 easy steps!
What is the Max Image File Size
1 MB. When uploading images, Ongage will accept any image file under or equal to 1 MB in size, but we recommend you aim for sizes between 100 KB - 400 KB.
How to create Image and Template Folders
You can allocate Image folders to specific lists or users
 For organizational purposes you might want to create a separate dedicated image or templates folder for each list (or for different users). All additional folders reside under the default Root folder.
Here are the steps to create folders, and allocate to a list or user if desired:
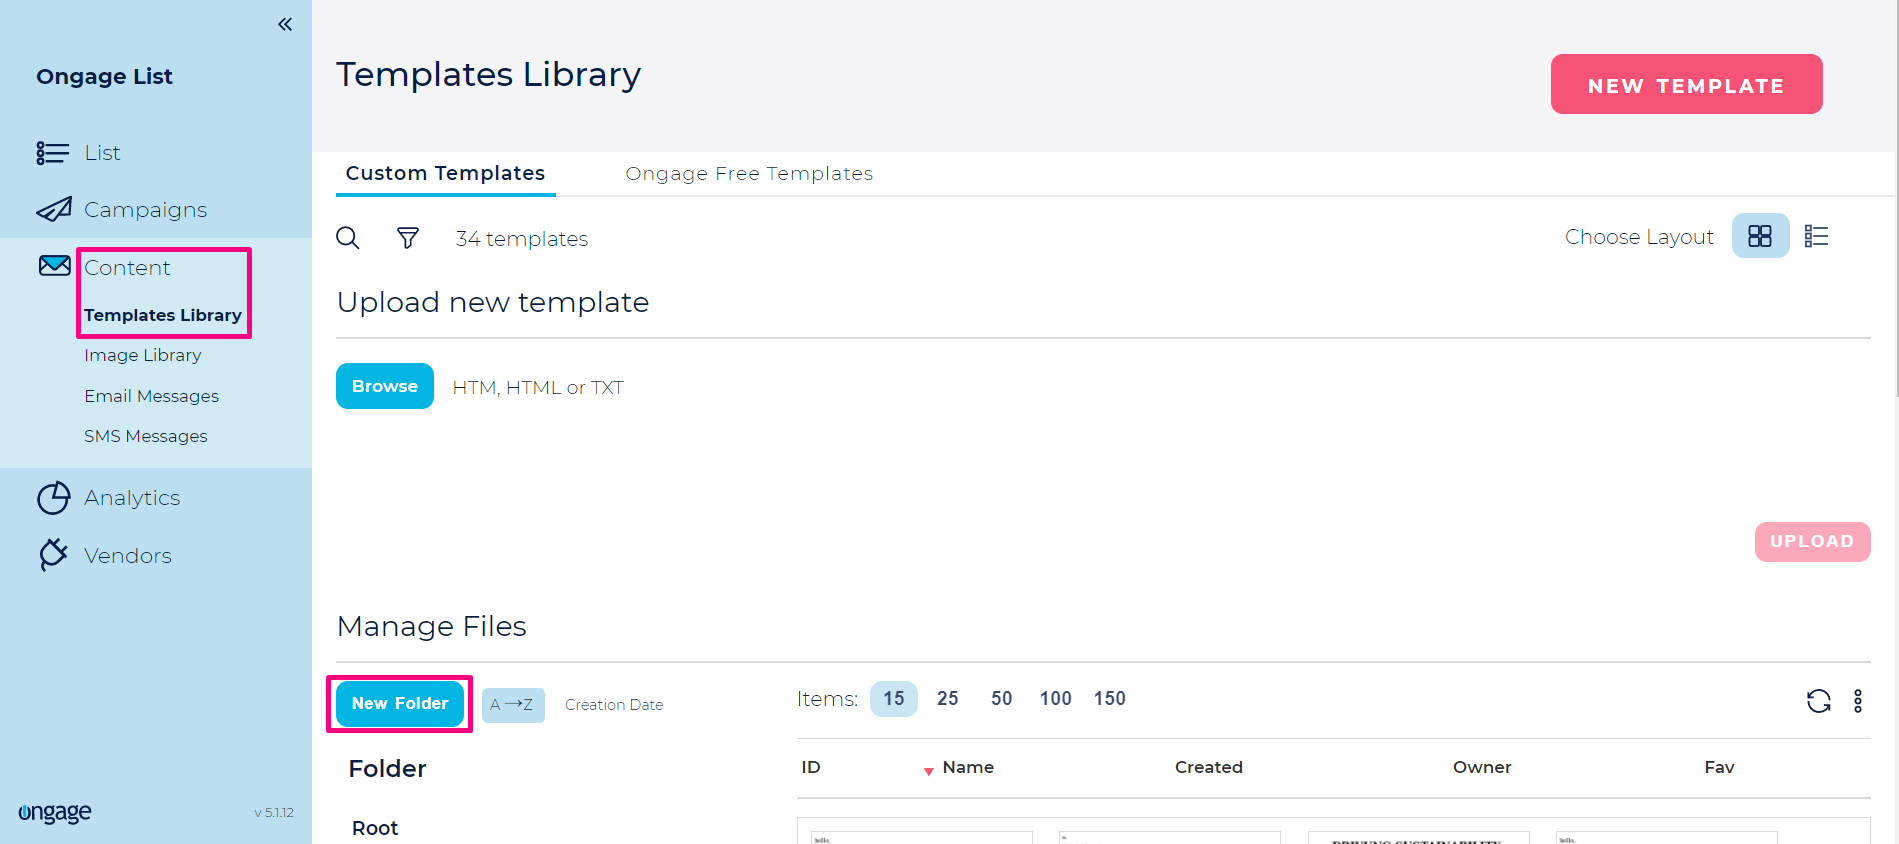
- Go to Content >> Template Library, and you can see the option for creating a new folder.

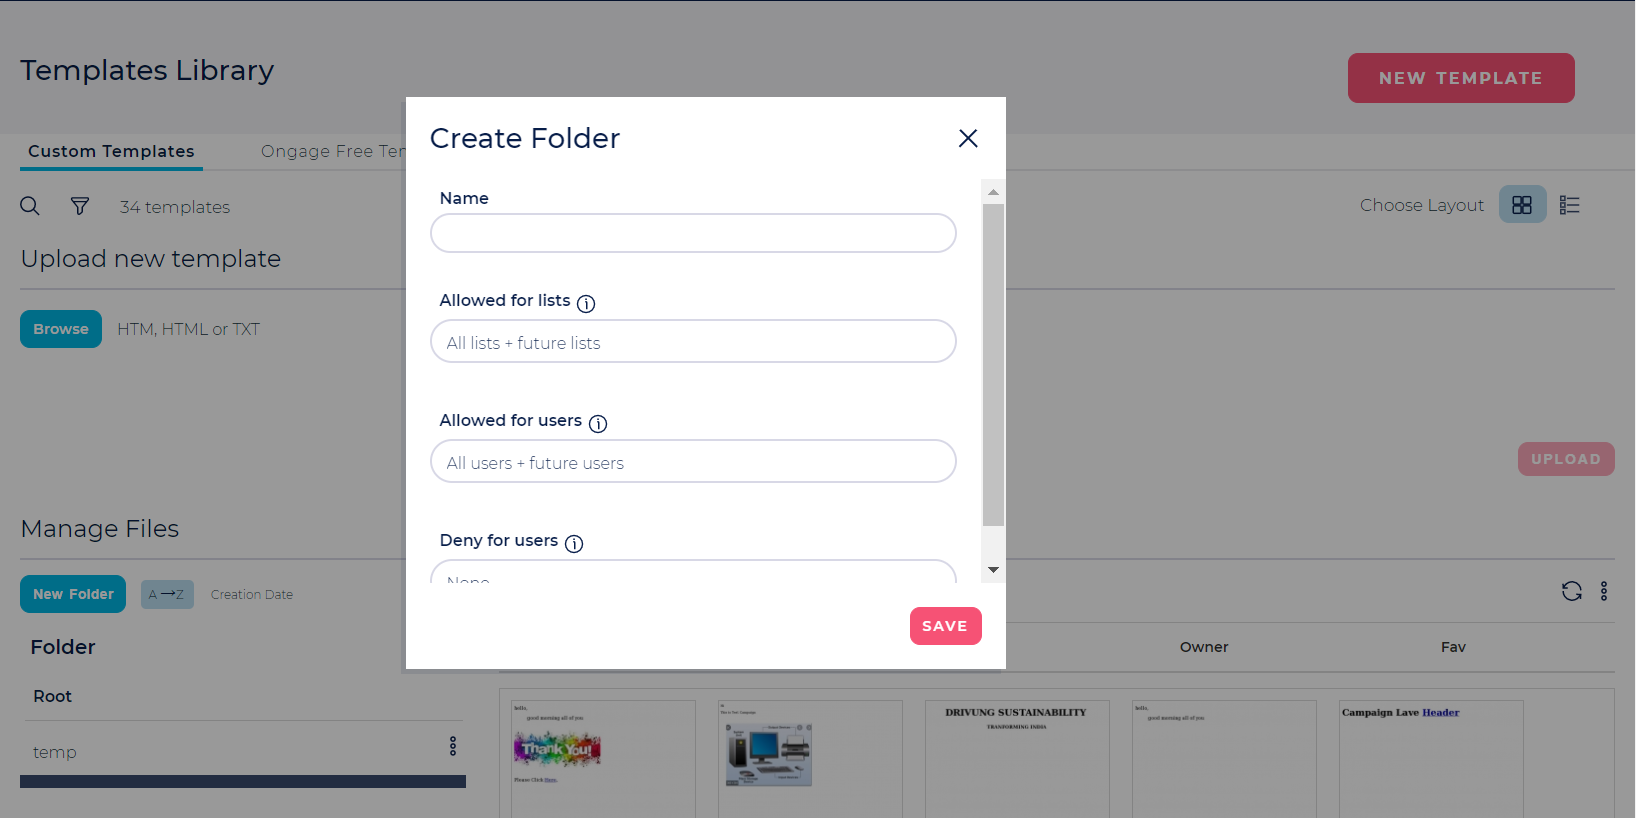
- Click on the New Folder, and a popup dialog box shows up where you can to enter the name of the folder and allocate List or User Level access as per your need.

- Similarly, you can also upload a new template, just by clicking on the browse option, select your template and upload.
 In a similar manner, you can create folders for images and manage User or List level access permissions for those folders. Start by going to Content >> Image Library, and follow the steps as listed above.
 Note: The Root folder remains global to all lists.


![]() For organizational purposes you might want to create a separate dedicated image or templates folder for each list (or for different users). All additional folders reside under the default Root folder.
For organizational purposes you might want to create a separate dedicated image or templates folder for each list (or for different users). All additional folders reside under the default Root folder. 

![]() In a similar manner, you can create folders for images and manage User or List level access permissions for those folders. Start by going to Content >> Image Library, and follow the steps as listed above.
In a similar manner, you can create folders for images and manage User or List level access permissions for those folders. Start by going to Content >> Image Library, and follow the steps as listed above.![]() Note: The Root folder remains global to all lists.
Note: The Root folder remains global to all lists.