Table of Contents:
Table of Contents minLevel 2
How to Setup your Pepipost Connection in Ongage
To set up a Pepipost Connection in Ongage, please follow these steps below.
- Login to your Pepipost Account
- From the Gear-Wheel icon in your Pepipost account, choose the Integrations menu item, to retrieve the API Key and API URL.
The default API URL is http://api.pepipost.com/v2/. Place the values of API URL and API Keyinput field in Pepipost's connection in Ongage.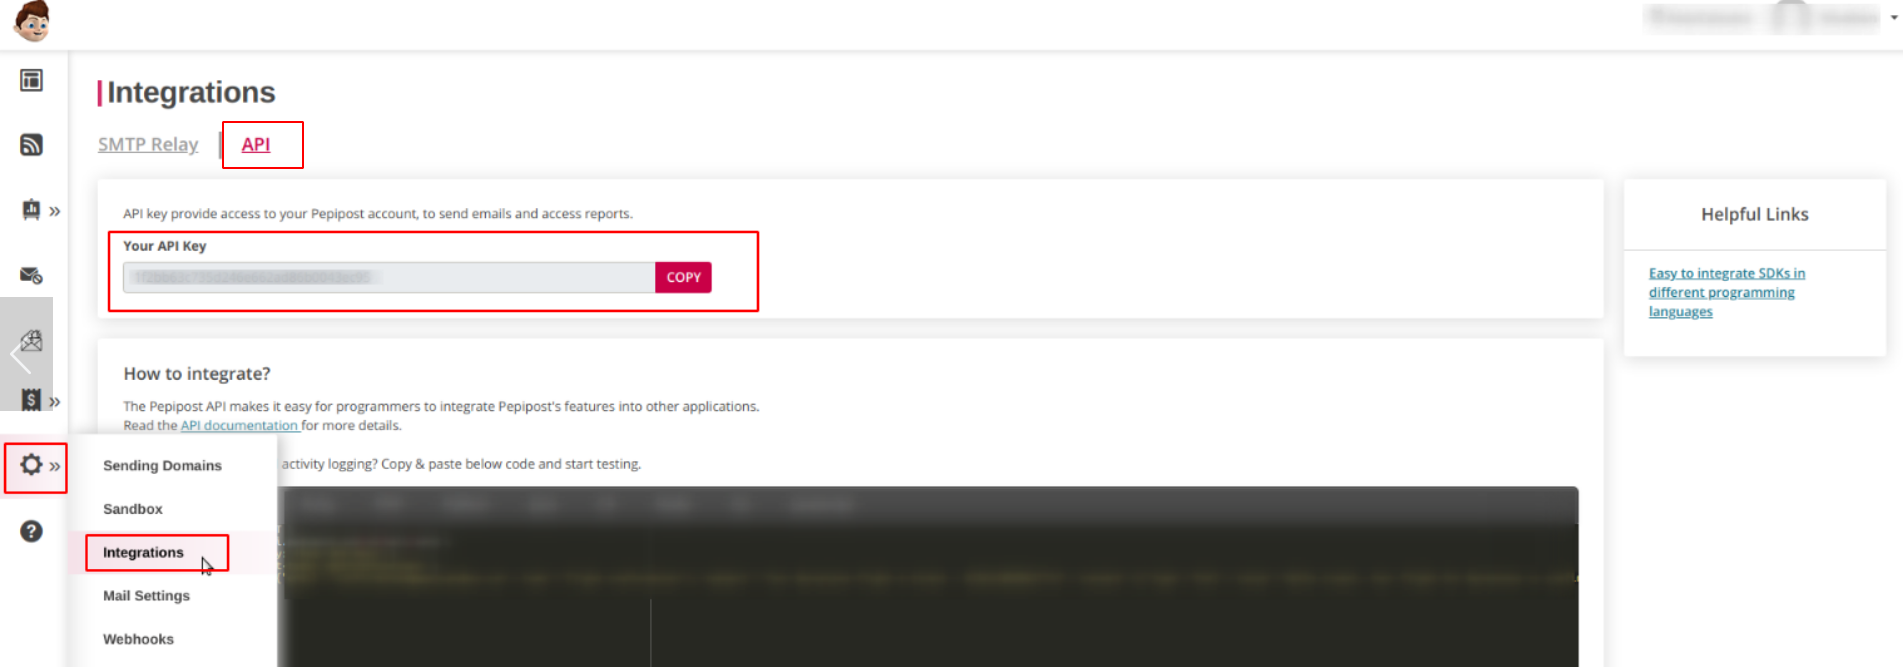

- For SMTP Host field in Ongage, enter: smtp.pepipost.com.
For SMTP Port enter either 2525 or 587.
From that same Integration screen in Step 2, choose the SMTP Relay tab, in order to retrieve the SMTP Username and SMTP Password.
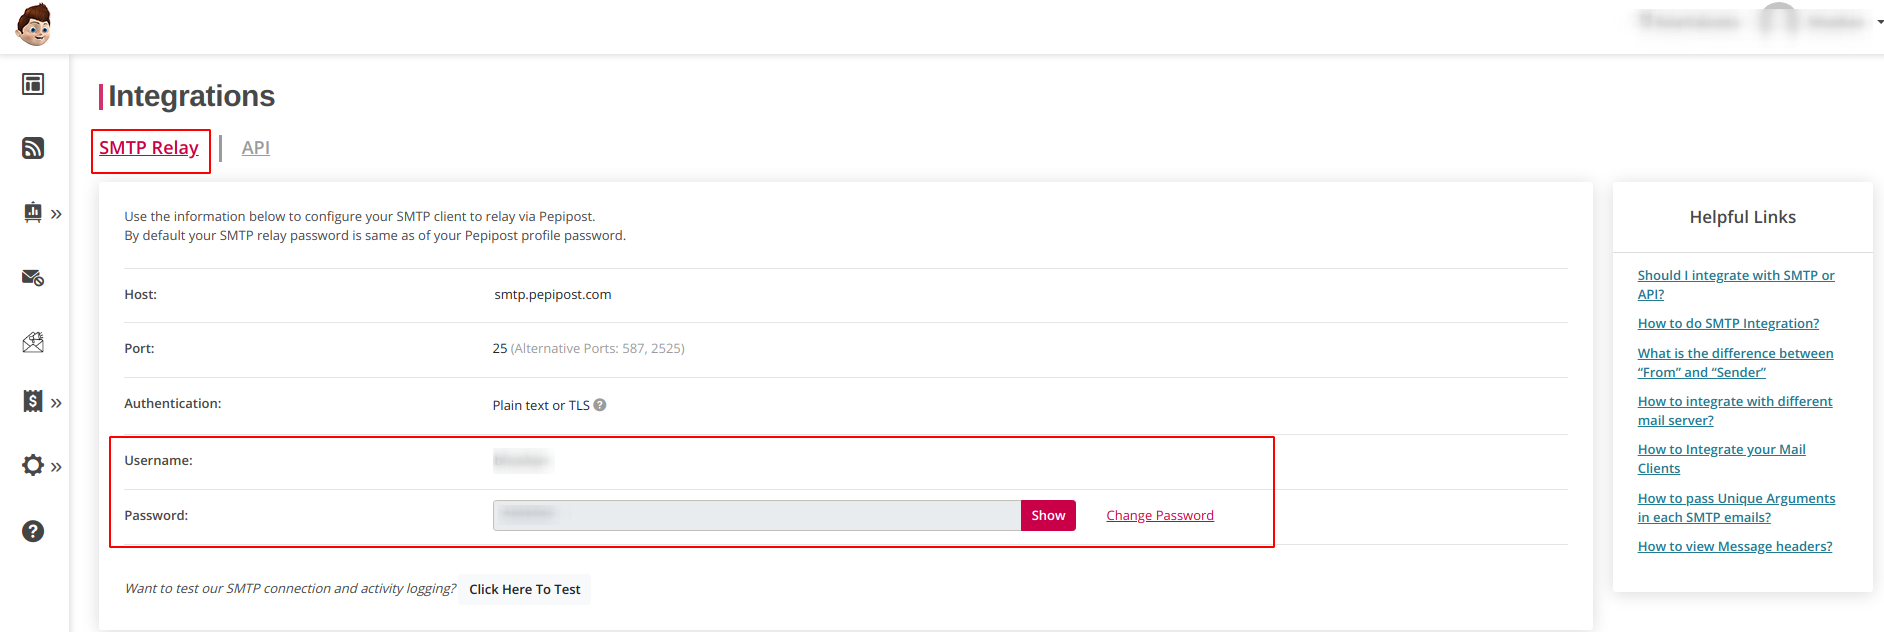
 Please note: you will have to provide your Login Password to get then SMTP Password. And in Ongage, please use the SMTP Password and not the Login password.
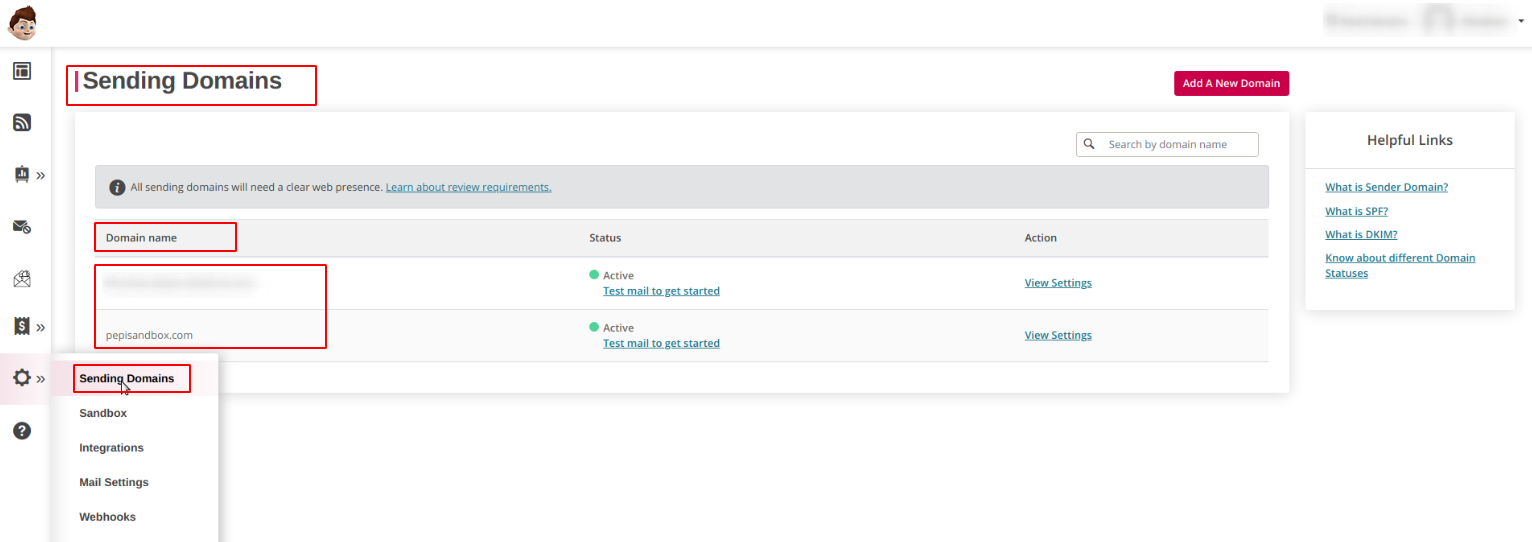
 For Domain Name, choose Sending Domain option from the Gear-Wheel icon in your Pepipost account and enter the verified sending domain into the Pepipost setup screen in Ongage.
- Once the above details are filled in the Ongage connection, click Verify Credentials to make sure the details are correct.
- Once credentials are verified, please Save the connection to activate the Pepipost connection in Ongage.
Pepipost Sender Domain Verification
| Warning |
|---|
You will need to complete this setting from the user interface of your Pepipost account prior to Step 6 above and before you start sending emails via your Pepipost connection in Onagage. |
...
- Add the designated Sending domain defined in section 3 to Pepipost's "Sending Domains". See here for instructions: https://docs.pepipost.com/docs/what-is-a-sending-domain-how-to-set-up-sending-domains
- Sending domain verification - verify the ownership of your domains with SPF setting and DKIM validation: https://docs.pepipost.com/docs/use-dns-to-validate-domain-ownership
- For more information about the domain approval process in Pepipost, see here: https://docs.pepipost.com/docs/what-is-domain-approval-process
...
Appendix
Old Pepipost Setup using the Ongage Private SMTP connector (DEPRECATED)
- Use the Ongage Private SMTP connector:
- Go to ESP Setup of that connection and enter the following values below along with the SMTP password and username you got from Pepipost (Same Username and Password for the Pepipost UI):
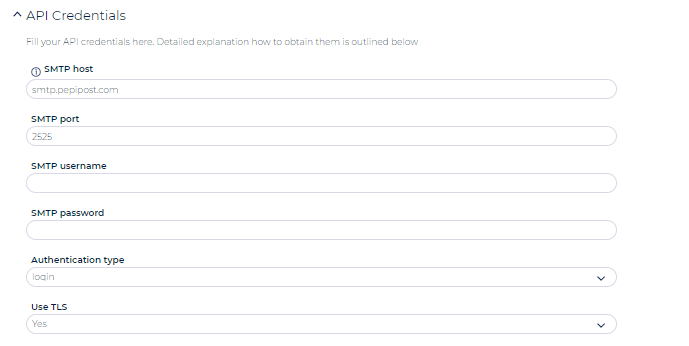
SMTP Credentials- SMTP host: Enter your Pepipost SMTP hostname. e.g. smtp.pepipost.com
- SMTP Port: You can connect via unencrypted or TLS on ports 2525 or 587.
- SMTP Username: Enter your Pepipost Username
- SMTP password: Enter your Pepipost Password
- Authentication type: Select "Login"
- Use TLS: Select "Yes". If you are selecting this as Yes, then it is recommended to select port 587 above.
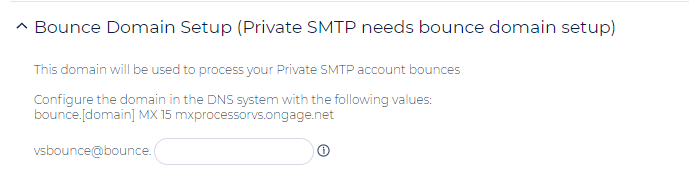
- Bypass the bounce domain setup by entering the following value into the input field below: bypass_bounce_domain
- Add a Custom X-Header with the following Name and Value:
Name: X-APIHEADER
Value: {{account_id}}X{{ocx_list_id}}X{{ocx_mailing_id}}X{{ocx_child_id}}X{{ocx_connection_id}}
- Click on 'Verify Credentials' to verify the configuration.
- And click on 'Save'.
...