Table of Contents:
Table of Contents minLevel 2
DNS Services
Following are links to a variety of leading DNS services
- Bluehost: General DNS Setup
- CloudFlare: General DNS help
- DynDNS: General DNS setup
- HostGator: General DNS setup
- Hover: General DNS setup
- Network Solutions: General DNS setup
- Rackspace: General DNS setup
- Rackspace Cloud DNS: General DNS setup
- Register.com: General DNS setup
- ZoneEdit: General DNS setup
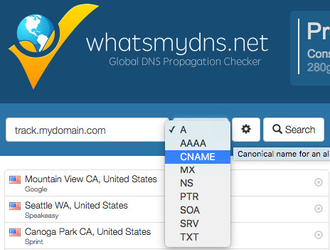
Check DNS Verification & Propagation of your Image & Tracking Domains
![]() Note: any time that DNS changes are made, you need to wait for DNS propagation to complete. DNS propagation usually takes a few hours, but in rare cases can take longer if it's a brand new domain, anywhere from 24 hrs - 72 hrs (i.e., 1 - 3 days).
Note: any time that DNS changes are made, you need to wait for DNS propagation to complete. DNS propagation usually takes a few hours, but in rare cases can take longer if it's a brand new domain, anywhere from 24 hrs - 72 hrs (i.e., 1 - 3 days).
Bounce Domain Setup
...
![]() Note: The DNS Hosting company "ENOM" does not support custom MX records like those needed in Ongage for bounce domains, like in the the case of MySMTP.eu.
Note: The DNS Hosting company "ENOM" does not support custom MX records like those needed in Ongage for bounce domains, like in the the case of MySMTP.eu.
How to Add DNS Records
About SPF, DKIM and Ongage
![]() As Ongage is a front-end platform connecting to back-end email delivery vendors, who do the actual sending of the emails. DKIM and SPF are not setup in Ongage. Rather you need to go to your Email delivery vendor (e.g., Dyn, SparkPost, Mailgun, Amazon SES, etc.) and get the keys from them to put in your DNS. Typically those vendors have either clear instructions how to do that, or can help you set those up. Once set up, they will add a DKIM and SPF header to all your email messages, when sent from Ongage via one of those email delivery vendors. Please speak to your back-end email delivery vendor (aka ESP/SMTP vendor) on how to get those setup.
As Ongage is a front-end platform connecting to back-end email delivery vendors, who do the actual sending of the emails. DKIM and SPF are not setup in Ongage. Rather you need to go to your Email delivery vendor (e.g., Dyn, SparkPost, Mailgun, Amazon SES, etc.) and get the keys from them to put in your DNS. Typically those vendors have either clear instructions how to do that, or can help you set those up. Once set up, they will add a DKIM and SPF header to all your email messages, when sent from Ongage via one of those email delivery vendors. Please speak to your back-end email delivery vendor (aka ESP/SMTP vendor) on how to get those setup.
Resources for setting up SPF and DKIM
- Amazon SES: DKIM, SPF
- GoDaddy: SPF and DKIM
- Dreamhost: SPF, DKIM
- Namecheap: SPF, DKIM
- United Domains: DKIM and SPF (in German)
Articles about Email Authentication: SPF, DKIM, DMARC and BIMI
- 3 DNS Records Every Email Marketer Must Know (March 2017)
- Email Authentication Guide (by MailChimp)
- Gmail DMARC policy update (June 2016)
What marketers need to know about DMARC (July 2016)
Why DMARC Matters for Email Marketing (April 2017)
- Email Authentication Protocols: What Are They and Why Are They Important? (Ongage blog: September 2020)
About DMARC
Article explaining DMARC Overview
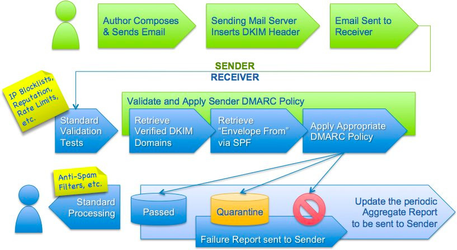
Image from dmarc.org
About SPF
The SPF is a TXT type record you get from your ESP and put in your DNS that specifies what servers may send emails on behalf of your domain.
Ongage Best Practice Regarding SPF Records and Multiple ESPs
Ongage recommends using different sending domains for different ESPs, for a variety of reasons, one of them being that the reputation of 1 ESP account will affect the reputation of the other ESP account.
Having said that it is possible to merge 2 SPF records into one. So if you take the SPF record rule from one ESP and another SPF rule from another ESP, the two rules can be merged into 1 SPF record, so that you can use the same sending domain for both ESPs from Ongage, but as noted above this is not recommended.
Appendix
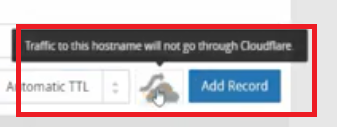
CNAME in Cloudflare not getting Verified after Configuration
In order to avoid this from happening, follow the steps below:
- Go to the Cloudflare DNS setup screen.
- Select the CNAME
- And before adding the Record click on the orange cloud icon to make it grey.
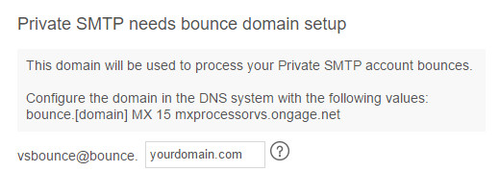
In Case your DNS UI Does not Support Pointing a Bounce Sub-domain Domain to our mxprocessor.ongage.net
- Create an A record: bounce.yourdomain.com
- Create an MX Record as: bounce.yourdomain.com MX 15 mxprocessorvs.ongage.net
- Enter the value “yourdomain.com” into the bounce domain setup dialog box:
Special Notes for setting up bounce domain in HostGator
In order to setup a bounce domain in HostGator, you'll need to do the following two steps:
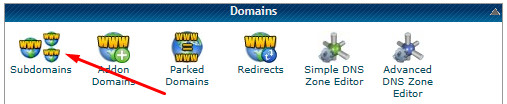
Step 1: Create a Subdomain
- Click on "Subdomains" icon
- Insert the below:

In subdomain: bounce."your domain"
in the document root insert a unique long name
e.g,
Subdomain:"bounce.yourdomain.com"
Document root: /"customer path"/bounce.yourdomain12345
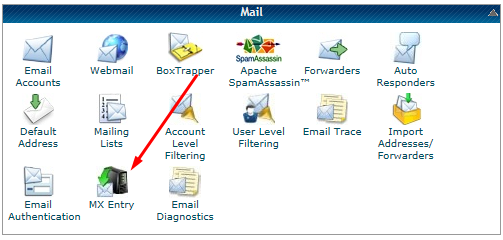
Step 2: Add an MX Entry
- click on MX entry
- The domain should be the same one from step 1
- Select option "Remote mail Exchange"
- Priority: 15
- Destenation: mxprocessor.ongage.net
Note: If the tracking is VS write mxprocessorvs.ongage.net
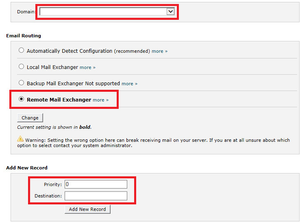
- Click "Add new Record"