Table of Contents:
Table of Contents minLevel 2
Subsection Pages
Child pages (Children Display)
ESP/SMTP/SMS Vendor Setup and Configuration
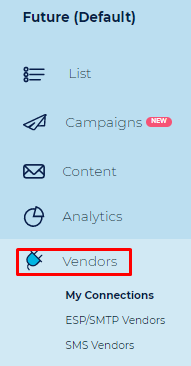
This module is managed from the following menu item:
My Connections
![]() Here you can view all ESP/SMTP/SMS vendor connections you have setup in your Ongage account.
Here you can view all ESP/SMTP/SMS vendor connections you have setup in your Ongage account.
...
- In Progress - means you started setup, but did not complete it, and there are some elements that still need to be configured.
- Check - means you've completed the setup of this ESP/SMTP connection, and it is now ready to be used for sending emails messages.
How to Add a New ESP/SMTP/SMS Vendor
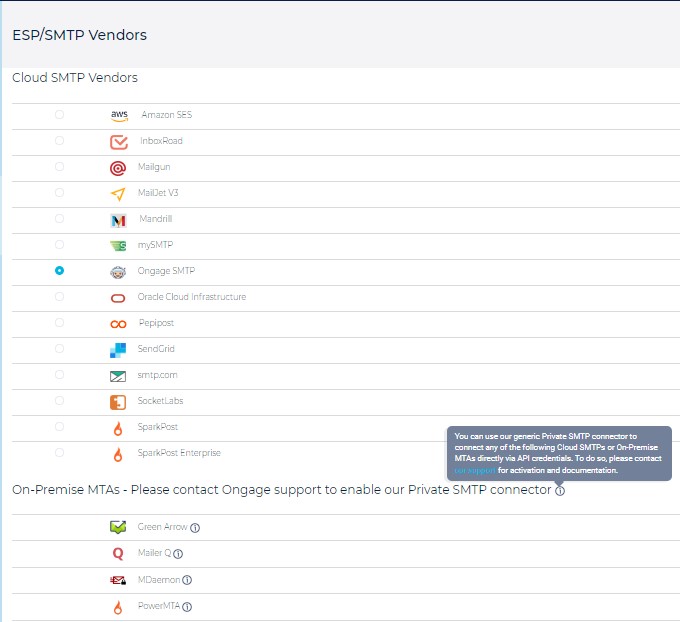
- Go to: ESP/SMTP Vendors sub-menu.
- In the case that you'd like to add an SMS vendor go to SMS Vendors sub-menu.
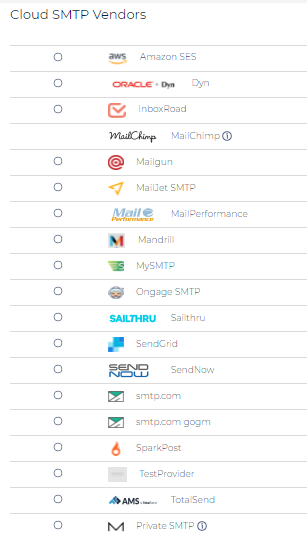
- Click the checkbox next to the SMTP/ESP you'd like to add (under the 'Choose' column).
- Click on the "Save & Next Step >" to proceed to the setup page for that ESP/SMTP/SMS vendor.
...
- Click on the 'Edit' icon under the 'Actions' column for the relevant ESP connection:
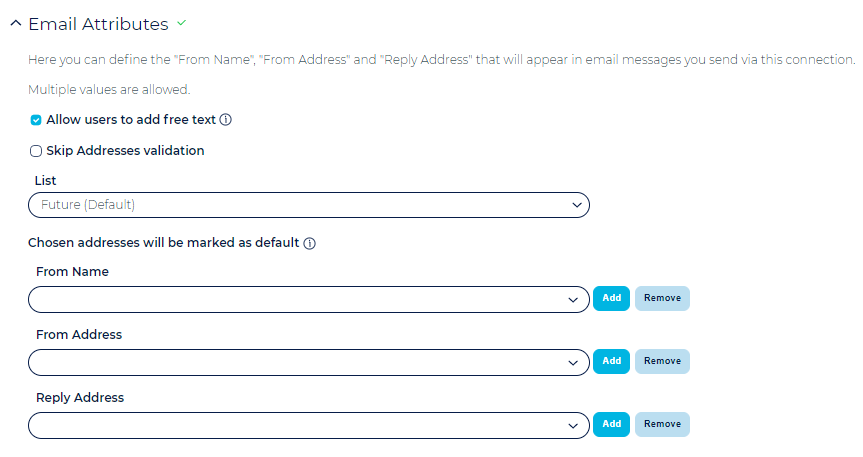
- Setup From Name, From Email Address and Reply Email Address – see following section for detailed instructions.
- Enter the API Credentials for this ESP/SMTP/SMS vendor.
- Follow the special in-page instructions provided for that specific vendor.
- Click on the 'Verify Credentials' button, to check if the values you entered are correct, so that Ongage is able to connect to your account on that vendor for sending messages and retrieving stats.
- Click on 'Save' to complete.
ESP / SMTP Detailed Setup Tutorials
Go to the following guide for detailed ESP setup tutorials where you can find detailed instructions on how to retrieve API credentials needed to connect your vendor to Ongage:
How to Setup From Name, From Email Address and Reply Email Address
- Here you can setup the default from email address (aka sending address also sometimes called sending domain) and reply email address to be used for this ESP connection.
- With most ESPs and SMTPs you will need to verify the sending email address and reply email address on the ESP vendor's platform, before you can use that ESP connection in Ongage.
- Simply click on the Add button and type in the desired values.
- You can setup multiple From Names, From Addresses and Reply Addresses as need, per ESP connection as well as per list (see following section below). You can choose a default value for each, and still choose another set, when sending the email message, from the email message settings step (when setting up an campaign):
...
- If you add/change a from email address, you'll often need to verify it in the ESP/SMTP.
- If you change the default from email address, only new emails will pick up the new default values. If you copy/reuse an existing email, it will preserve the previous from/reply values.
- The "From Name" (e.g., Jon Doe, Jane Smith), can be easily changed as desired in "Step 1: Email Settings" to whatever name you'd like.
- In the case of SMTP vendors the 'From Name' can be a dynamic list field. You'll need to set that up in the email message. For more about that see our online 'Content' section, and look there for 'From Name'.
How do I remove the “Sent on behalf of” aka "via" header from the email messages I send from Ongage
If you receive an email message that you sent from Ongage, and instead of the from email address you setup in the ESP setup page, appearing at the top of the email message, you see a "via" or "Sent on behalf" header like this:
...
Also see our online ESP Setup Tutorials for more information about how to verify (aka authenticate) your sending domain on various SMTP vendors.
How to Setup Different Default From Name, From and Reply Addresses for Different Ongage Lists
- If you have multiple lists, often used for managing different brands/properties/customer lists, you can set a different from name, from email address, and reply email address for each list.
- So if one list for example is "Real-Estate Updates" for brand real-estate-updates.net, you can set there the from address to: sue@real-estate-updates.net for example, and the for your other list lets say: "Healthy Recipes" you might set the from address to jon@healthy-recipies.us
- You can set the default from name, from address and reply address for each List by using the List drop-down located right on top of these email attributes. See image above: "List" drop-down.
How to Add an Additional Connection for the Same Vendor
If you have more than one account/sub-account (IPs) with the same ESP/SMTP vendor, for example you have several Mailgun accounts/Subaccounts, you can set up additional connections in Ongage for those, in the following manner:
Go back to the: Vendor Settings → ESP/SMTP Vendors
- In the case that you'd like to add an additional SMS connection go to the SMS Vendors sub-menu.
- Select the radio button next to the same vendor that you'd like to add an additional connection for:
- Click on the 'Save & Next Step >' to proceed to the setup page for that new connection.
- When setting up multiple connections with the same vendor, it is particularly recommended to use the 'Account Name' field in the ESP setup page, in order to give a unique label to each connection.
How to Remove an ESP/SMTP/SMS Connection
- Go to: Vendor Settings → My Connections
- Under the 'Actions' column choose the 'Deactivate' icon
The 'Status' column will show the ESP connection is inactive. - Under the same 'Actions' column click on the delete icon:
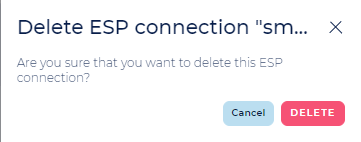
The following popup dialog box will then display: - Click on 'Delete' to proceed.
Appendix
How to use a dynamic field in the 'From Name', 'From Address' and/or 'Reply Address'
This feature only works with SMTP relays (for a full list of those see our ESP knowledge base).
...
![]() Note: The From Name can also be used dynamically in the email message. See our Content Help section for how to set a From Name dynamically in the email message.
Note: The From Name can also be used dynamically in the email message. See our Content Help section for how to set a From Name dynamically in the email message.
How to set up Bounce Domain
Note: The DNS Hosting company "ENOM" does not support custom MX records like those needed in Ongage for bounce domains, like in the the case of mySMTP.
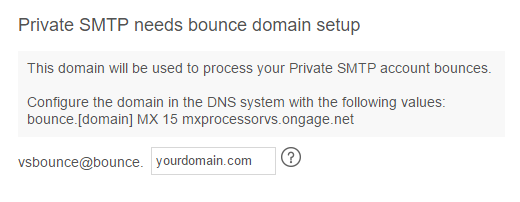
Note: This is needed only for the following vendors mySMTP, Private SMTP, InboxRoad.
In Case your DNS UI Does not Support Pointing a Bounce Sub-domain Domain to our mxprocessor.ongage.net
- Create an A record: bounce.yourdomain.com
- Create an MX Record as: bounce.yourdomain.com MX 15 mxprocessorvs.ongage.net
- Enter the value “yourdomain.com” into the bounce domain setup dialog box:
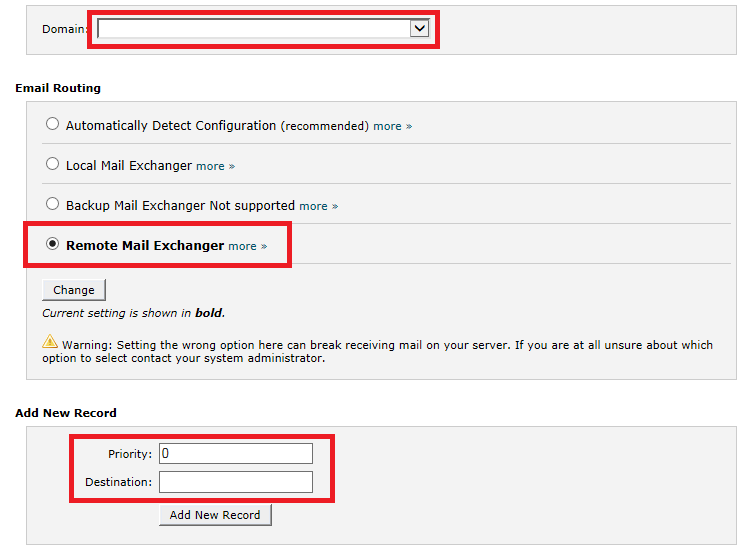
Special Notes for setting up bounce domain in HostGator
In order to set up a bounce domain in HostGator, you'll need to do the following two steps:
...
Note: If the tracking is VS write mxprocessorvs.ongage.ne
- Click "Add new Record"
Additional SMS Setup Info
Besides the SMS vendor setup described above, there are a few other small steps required for getting up and running with SMS campaigns, see our Campaigns guide and look for 'How to Create SMS Message and Setup an SMS Campaign' on that page.
