Table of Contents:
Table of Contents minLevel 2
Events and Triggers: Getting Started
Intro
- Start by going to: Campaigns → Events & Triggers
- Events enable marketers to create a sequence of one or more pre-programmed email messages that will be sent automatically based on a given trigger / event / condition.
- These events are sometimes referred to as waterfalls, as the triggers form a waterfall like funnel.
- Marketers can build basic customer journeys using this feature.
- In 2020 Ongage launched Automation Rules which offers an array of transactional actions and messages, and is an enhancement to Events and Triggers and enriches marketers ability for creating customer journeys.
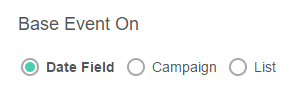
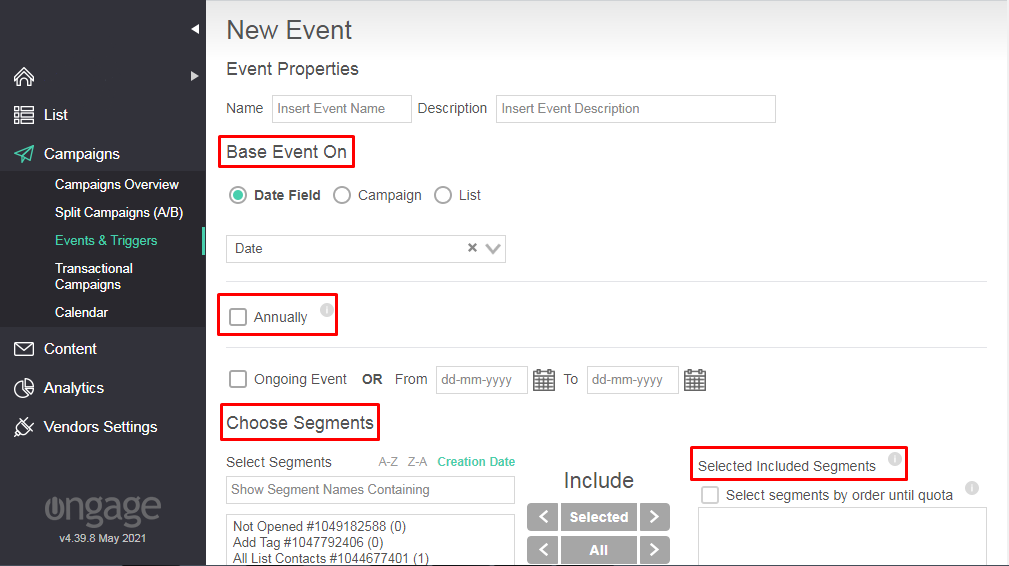
- To setup an Event you first have to define what you'd like to base the event off of: date field, a previous campaign or setup a recurring campaign:
Event Types and Usage
Ongage currently offers the following Event Types:
...
![]() Note: When you stop an event, in the case where a trigger is based on a previous trigger, it stops the entire event waterfall (aka funnel), meaning all contacts in progress will get cleared out, so that when you restart it again, the Event will start over from the 1st trigger. On the other hand if all triggers are based on the original Event setting (i.e., one of the above), you can stop and start, and contacts in the funnel will pick-up from the next matching trigger.
Note: When you stop an event, in the case where a trigger is based on a previous trigger, it stops the entire event waterfall (aka funnel), meaning all contacts in progress will get cleared out, so that when you restart it again, the Event will start over from the 1st trigger. On the other hand if all triggers are based on the original Event setting (i.e., one of the above), you can stop and start, and contacts in the funnel will pick-up from the next matching trigger.
Some Trigger Examples
- Based on Join Date/Create Date: send a sequence of emails after someone joins your list, based on either Ongage's system create date field, or your own Join Date field. For example, some companies might send 3 or 4 on-boarding email messages explaining to a new user tips on how to use your service. Typically you might send those on day 2, 3, 4 after they signed-up. Of course every company will have their own on-boarding schedule.
 The initial Transactional welcome email should be implemented using our Welcome Email feature – see the chapter "How to Setup a List Welcome Email" in our List -> List Settings General Online How-To.
- Events are not designed for sending a transactional welcome email.
- Based on Birth Date: send a sequence of emails prior to, on and after a contact's (aka list member's) birthday.
- Based on Event Date: send a sequence of emails prior and leading up to an event, e.g., convention or webinar.
- Send a follow-up email (or emails) to all those who opened or clicked in a given email campaign.
Events and SMS
- You can set up events to send SMS text messages using an SMS vendor.
- Currently you cannot setup an event to send both SMS text messages and email messages from the same event.
How to Setup a Welcome Onboarding Series
If you want to send a sequence of welcome/introduction emails to a new list member after they were sent The Transactional Welcome Email, immediately after being added to the list, then you have 2 methods to do it which are explained below.
...
![]() We generally recommend setting up all triggers based on the original date (rather than trigger based on trigger) in this kind of setup.
We generally recommend setting up all triggers based on the original date (rather than trigger based on trigger) in this kind of setup.
Send email messages X days after the create date at a specific time of the day
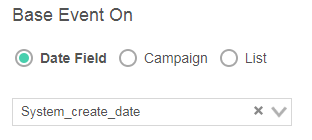
- You need to create a new event based on "System_create_date".
- You can select Ongoing Event or select the start date and the end date for the same.
- Select the segments that are to be included and the ones that are to be excluded.
- Click on the “Add Trigger” button and follow the steps listed below.
- Click on the “Choose Email” and select the email that is to be sent.
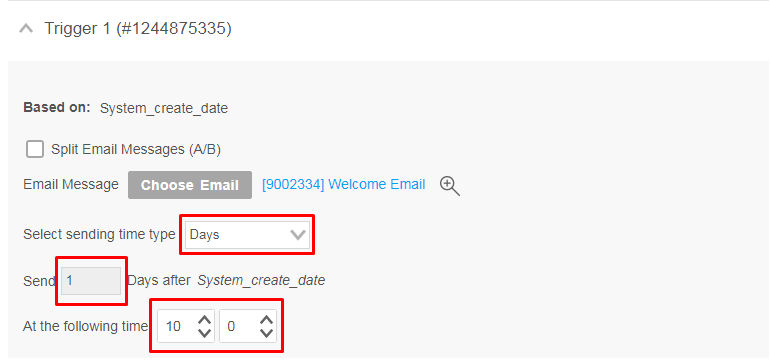
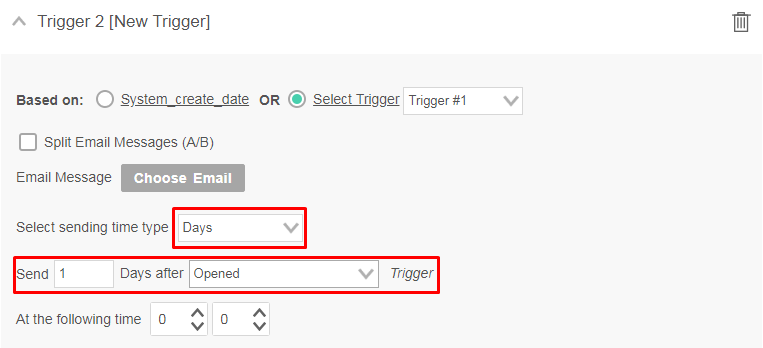
- In the sending time type, select “Days” as it will send an email after 1 day after the “System_create_date”.
- You can select the time, i.e. at what time of the day the email should be sent.
- With the above setup, the first trigger will send an email to users the next day after they are added in the list. The email will be sent at the time of the day you have configured in the Trigger.
- Then you can create the Second Trigger to send the next email 2 Days after the “System_create_date”.
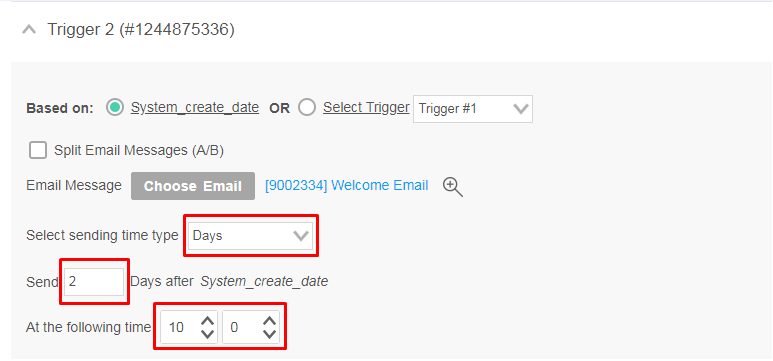
- Similarly, you can add a third trigger that is to be sent on the third day after the System_created_date and so on.
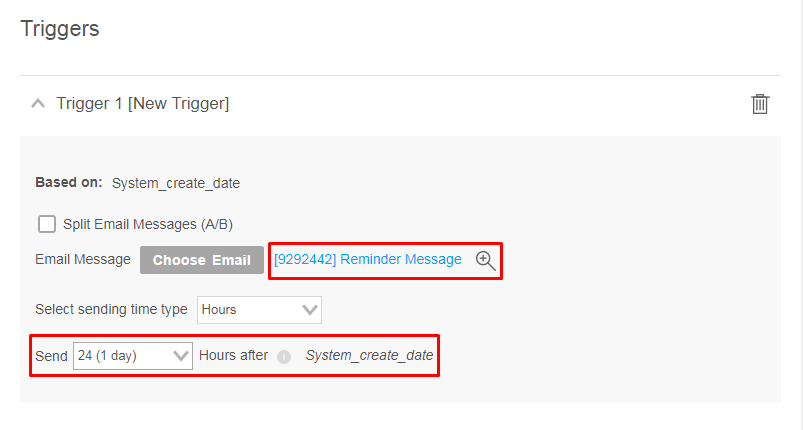
Send email messages 24 hours, 48 hours, etc. after the create date
- Follow the same steps as listed above until the “Add Trigger” button.
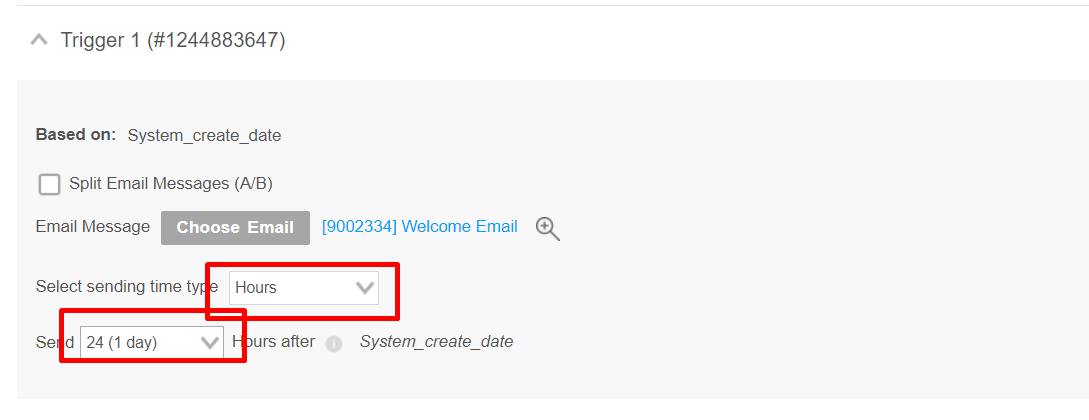
- In the sending time type, select “Hours” as it will send an email after X hours after the “System_create_date”.
- With the above setup, the first trigger will send an email to users after 1 hour of the created date. The email will be sent at the time of the day you have configured in the Trigger.
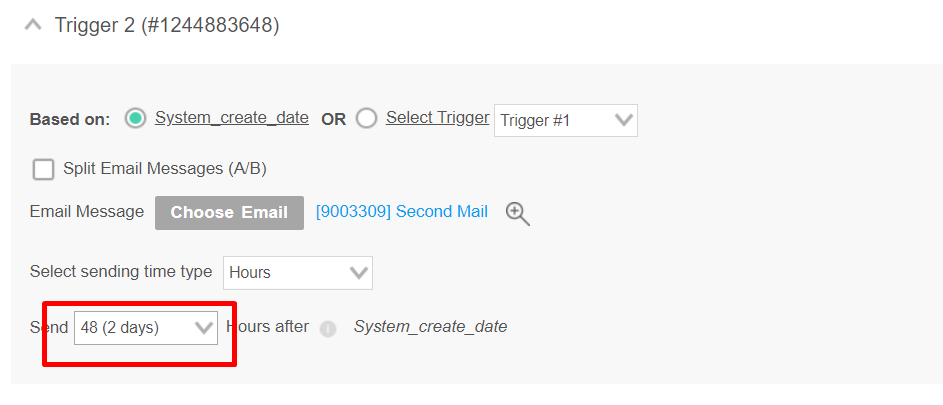
- Then you can create the Second Trigger to send the next email after 48 hours after the “System_create_date”.
- Similarly you can create the Third Trigger which will send the next mail after 48 hours of the System_create_date and so on.
How to Setup a Birthday Event
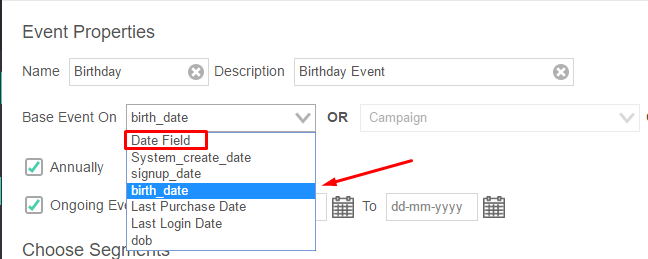
- Create a New Event
- Base the Event On 'Date Field' and select the name of the List field you use for storing the birth-dates of your contacts (aka subscribers):
- Make sure to check the 'Annually' checkbox. Checking this option will cause this trigger to be activated every year. See tool-tip in product for more details regarding this.
- In the 'Choose Segments' section, one will typically choose the segment 'All list members', but you can choose any include and exclude segments you like.
- Add Trigger, select birthday email message, and set when you'd to send them their birthday message, e.g.,
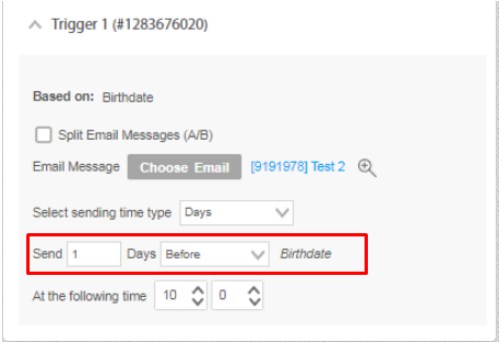
![]() Of course you can choose to send the message on their birthday early in the morning, instead of the day before, as demonstrated above. Or you may choose to send a series of emails leading up to their birthday. You might even want to send a post birthday cross-sale message. Its all up to you.
Of course you can choose to send the message on their birthday early in the morning, instead of the day before, as demonstrated above. Or you may choose to send a series of emails leading up to their birthday. You might even want to send a post birthday cross-sale message. Its all up to you.
How to Setup Reminder Messages for a Webinar/Convention
Create a Custom Date Field something like "webinar_date" and populate it with webinar date for all contacts who registered to it. Then follow these steps:
- Go to Events & Triggers (see screenshot at top of this section) and click on 'New Event'.
Provide an Event Name and a Description (Optional).
Choose to base the Event on a "Date Field" and choose the Custom Date field which you created for setting up the event.
Choose range of dates for this Event.
Choose the segment(s) you'd like to include, exclude.
In the ESP routing section choose the type of ESP distribution you'd like to use (Single ESP, multiple ESPs, etc.).
- Click on Add Trigger, and it will automatically be based on the Date Field you chose in step (3).
- Within the trigger, Set X days before to send a reminder email, X days prior to Webinar date.
Choose the message you'd like to send in this trigger.
Similarly, click on Add Trigger and set 2nd message Y days before (etc., add as many message reminders as you'd like).
If you want to send a reminder on the day of the convention or meeting: let's say the convention starts at 10am then you can set up another trigger to send 0 days AFTER, at 8am.
How to Setup an Event based on a Previously Sent Campaign
You would use such an event, in the case where you might want to send a follow-up email, or series of follow-up emails, to all those who opened and or clicked in a certain campaign:
Go to Events & Triggers (see screenshot at top of this section) and click on 'New Event'.
Provide an Event Name and a Description (Optional).
Choose to base the Event on a Campaign (Choose the campaign name from the drop-down list).
Choose range of dates.
Choose the segment(s) you'd like to include, exclude.
In the ESP routing section choose the type of ESP distribution you'd like to use (Single ESP, multiple ESPs, etc.).
- Click on Add Trigger, and it will automatically be based on the campaign you chose in step (3).
Choose the email message you'd like to send in this trigger.
Check the "Send X days after" Opened, Clicked or any other conversion there in the drop-down.
Add an additional trigger if needed and repeat steps 8 and 9.
How to Setup a Recurring Campaign
Go to Events & Triggers (see menu screenshot above).
Create a new Event.
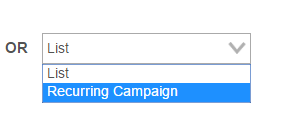
Select Event based on List → Recurring Campaign.
- Select segment (s) (exclude segments).
- Add trigger
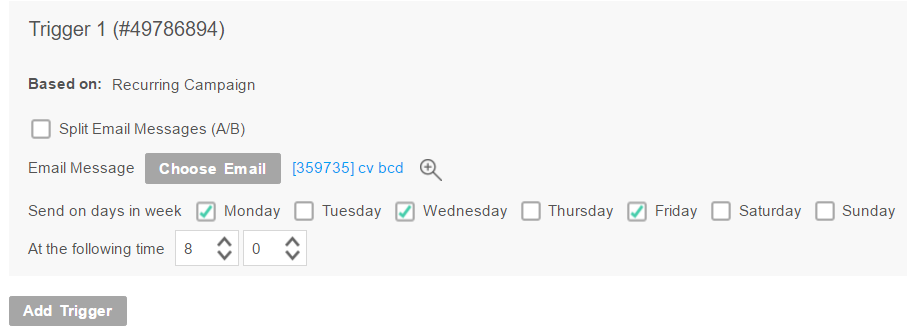
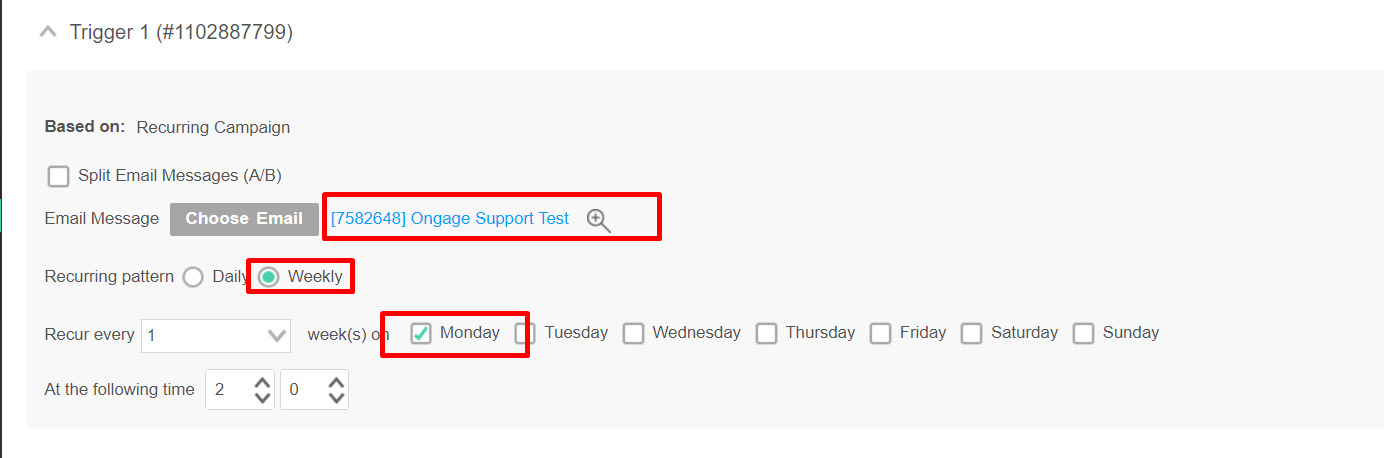
Select the email you want to use in this recurring campaign.
Select the recurring days of the week you'd like it to be sent on.
Select time of day, that this recurring email message will be sent at.
...
- Using a Static HTML feed to send out a daily weather forecast email or a line up of today's TV programs.
- Using the static HTML feed, the URL will pull from your content/web server, the content of the day, inject it into an email message, and send it out to all targeted (registered) contacts for that newsletter. So that each day there's a new message, with new content, based on the refreshed content from your content/web server.
How to Setup a Recurring Campaign Without Using a Dynamic Feed
If you don't have a content feed setup, you can still pre-program a week ahead 7 different messages for each day of the week.
Go to Events & Triggers (see menu screenshot above).
Create a new Event.
Select Event based on List → Recurring Campaign.
- Select segment (s) (exclude segments).
- Add trigger
Select the email you want to use in this recurring campaign to send on Monday for example.
Select the recurring days of the week you'd like it to be sent on.
Select time of day, that this recurring email message will be sent at.
Similarly, add another trigger and choose Tuesday and select relevant email message you want to send.
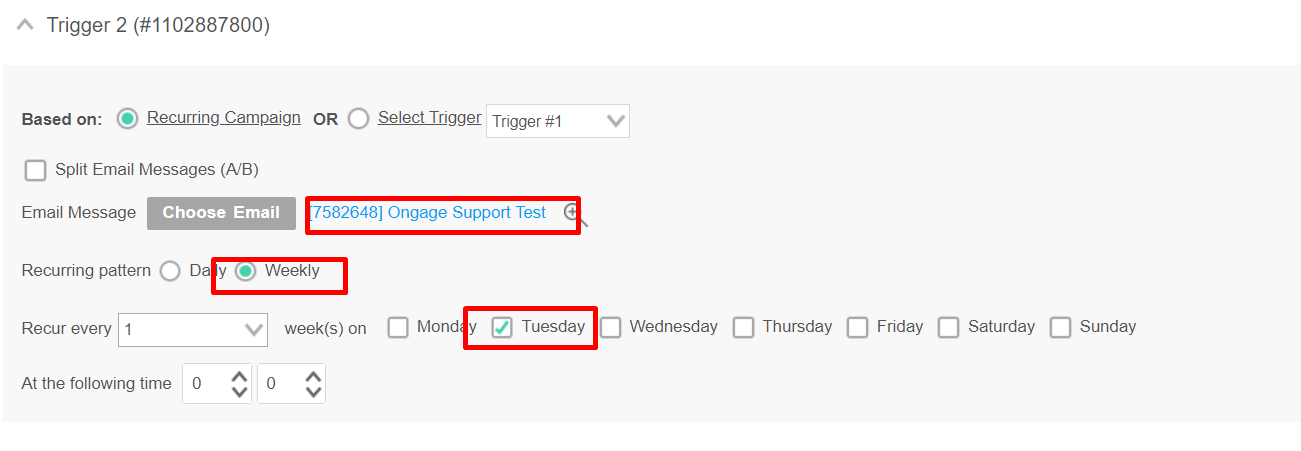
Likewise, you can add multiple triggers for each day of week with a separate email messages selected for each day.
How to send a re-engagement trigger to those who have not opened in 2 or 3 weeks
If you want to set up a re-engagement trigger to send email to those who have Not Opened your previous trigger in the last 2 / 3 weeks, then you can do it by following the steps below.
- Create a new trigger that is based on the previous trigger.
- Click on the “Choose Email” and select the email that is to be sent.
- In the sending time type, select “Days” and configure to Send the trigger after 15 days if the email from Previous trigger was Not Opened for 15 days.
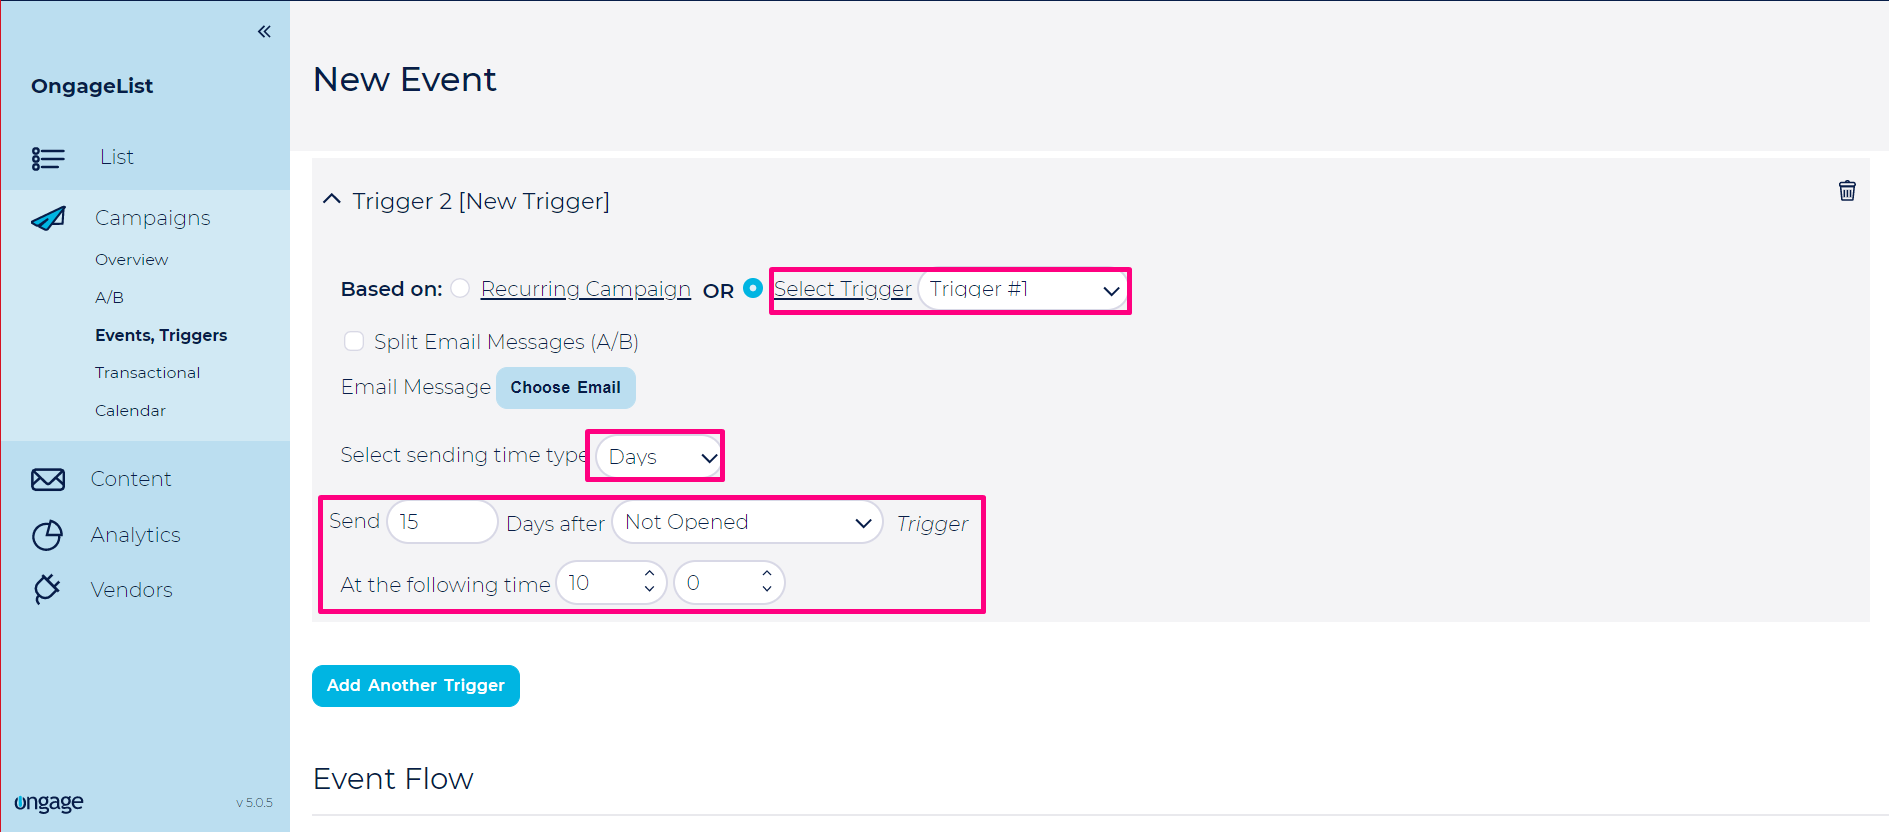
- You can select the time, i.e. at what time of the day the email should be sent.
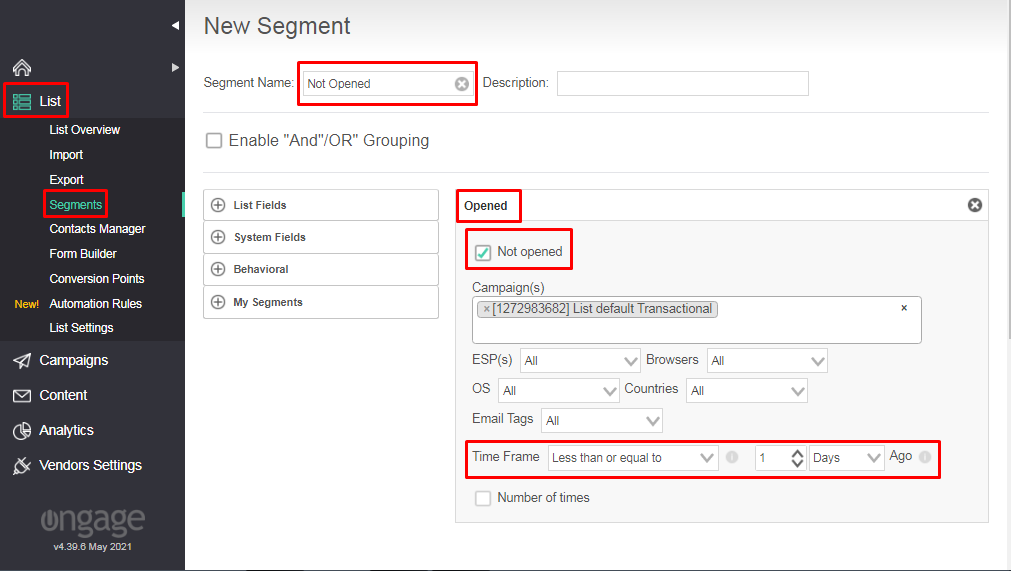
Send SMS trigger if Welcome Transactional Email is Not Opened in 24 hours
If you want to send an SMS to the customer if they do not open Welcome Transactional Emails for 24 hours, that can be achieved by setting an Event based on the Created Date with a segment of Non Openers in Welcome Transactional Campaign.
- Start by going to List >> Segments >> New Segment.
- Create a new Segment with the criteria of Not Opened, select Transactional Campaign (in most cases Default Transactional campaign) and select the time frame as less than or equal to 1 day ago.
- Go to Campaigns >> Events and Triggers >> Create an Event based on system_create_date.
- Add the Segment which was created in Step 2 above for non openers of Transactional Email Campaign.
- Configure Trigger to send 24 hours after System Create Date and Choose an SMS Message that will be sent.
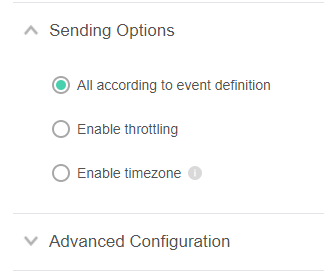
Sending Options and Advanced Configurations
Just like in regular scheduled/bulk campaigns you can set throttling, send according to time-zone, and apply a quota. Similarly regarding ESP routing. For more about these settings see the main Campaigns help page.
| Warning | ||
|---|---|---|
| ||
In the case of Events, all these settings apply to all the triggers in the event! |
About Trigger based on Triggers
As a marketer you can configure the trigger to be sent based on the behaviour of users in one of the Previous Triggers configured in an Event. You can define Trigger based on Triggers on a variety of different behaviours like sent (schedule date), opened, not opened, clicked, not clicked, soft bounce, not soft bounce, open and not clicked.
...
While setting up the trigger based on previous trigger, you can schedule the trigger to send based on Days or Hours after the behaviour registered in previous trigger.
Limitations when using Trigger based on Trigger
- The following Event elements cannot be changed on a running event which has trigger configured based on previous triggers:
- The type of event (Date, Campaign, List)
- Include segments
- Annual checkbox
- The day the trigger is scheduled to send on
- X days/hours value
- Trigger conversion type (open, click, etc.)
The reason for that is, while sending a trigger which is based on the previous trigger, the original segments are no longer relevant because the behavioural data registered in the previous trigger becomes the universe to be considered for the next trigger instance. And any changes made in the elements shared above, impacts the calculation of targeted count for the ongoing trigger flow.
- Stopping the event will stop all current drip flows, so when reactivating the event, it will start from scratch, from the beginning! Any other element not mention here (e.g., Event name, email messages, split test, exclude segments, ESP routing, throttling or quota) can be changed on the fly without stopping the Event.