Table of Contents:
Table of Contents minLevel 2
Intro
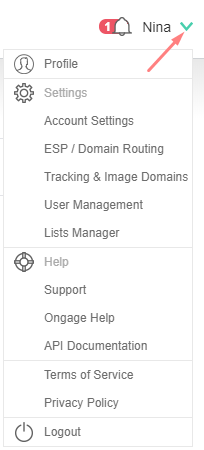
All settings in this section are accessed from the following menu in the upper right-hand corner of the Ongage web-platform:
Subsection Pages
Child pages (Children Display)
Account Profile
![]() Only Admin Managers have access to the Account Profile page
Only Admin Managers have access to the Account Profile page
Here you'll find:
- Your Ongage account name, account ID and account code (needed for API access, if you're doing API calls to your Onage account), along with your company contact info.
- Notification Email address for receiving notification emails from the Ongage platform. You can edit and change that email on this page.
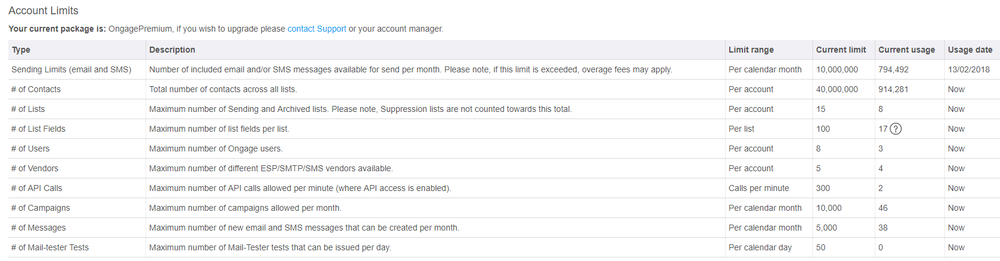
- Account limits: providing info regarding Ongage account limits based on the Ongage package you purchased and your current usage of those limits.
General Account Settings
Contains various miscellaneous account level settings.
- Default Unsubscribe Link: when this is checked, then the default unsubscribe setting will be checked for all new email messages in the account.
- Exclude Test Campaigns from Dashboards: we recommend leaving this setting unchecked. Otherwise you won't see your Test campaigns.
- Exclude Test Campaigns from Analytics.
- Enable Email Masking: By checking this option, all contact email addresses when searched or exported will be partly masked with asterisks.
- Auto beautify HTML: will automatically beautify the HTML code in the WYSIWYG editor.
- Analytics Exports Date Format: when exporting aggregated analytics you can determine the date field format.
- Account TimeZone: set here the desired time zone for your Ongage account (some and older accounts might have user-level time-zones instead).
- Set Password for Zip Import File: Files that you use for importing (either via the UI or API) can be password protected. Here you can set what is the required password, for the Ongage platform to use, in order to open it and import the file.
- Set Password for Segment External Criteria Zip File.
- Webhook endpoint URL: Indicate a URL and Ongage will push (HTTP Post): bounces, unsubscribes, and complaints directly to your platform via this endpoint URL.
- Enable 2-factor authentication on all users on this account
- Advanced Campaign Throttling: here you can set default throttling for all campaigns in this account
- IP Access Management: this setting enables admin users the ability to manage which IP(s) may login and access your Ongage account (either via the UI and/or API).
- URL Parameters: setup default URL parameters to be added to all links in all campaigns in this account. Typically used for Google Analytics or other Website analytics, but there are other applications for adding URL parameters to all links. This setting is also available in the List Settings as well as Email Message Settings.
ESP Domain Routing
How to configure ESP routing globally- account level
- To configure your ESP routing:
"Settings" > ESP Routing or click the link ESP Routing
First Option -Route ESP per domains
The domain routing provide you the option to select which domain will go with which ESP or to define percentage of domain to each ESP.
...
Second Option – route percentage per ESP connection
The ESP routing provide you the option to select which ESP's will be the default ESP's and what will be the percentage sent from each ESP.
- Select the ESP you want to use

Click selected - You then can define the percentage you want to use for each domain connection

The above two options should be combine to a mix per your needs
How to configure ESP routing per list or per campaign
The global ESP routing configuration can be overwritten in 2 places:
- List Level: List > ESP Routing which will override the account level ESP distribution if set.
- Campaign Level: in step 3 (Campaign Configuration) of the Campaign Setup, which can be used to override any other ESP routing setting, and will apply for that specific campaign ONLY.
How to view multi ESP analytics
- Go to the Ongage Matrix Report where you can view the deliverability and performance of each ESP you are connected to.
List Manager
How to add a new list /delete a list
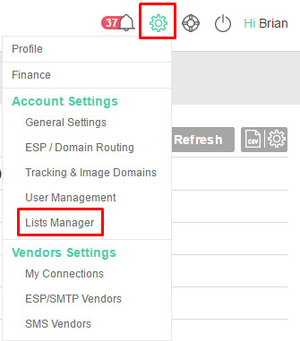
- Go to 'Settings -> Lists Manager':
- Click 'New List' button and You will be directed to a new dialog screen

- Enter the list name and its description
- Choose the list type:
- Sending List – A sending list is a regular delivery list that you can use to send email messages to its members
- You may choose to define the list as a default list - The default list is the list that will be used once you login the system. It is possible to change the list via the list picker located in the top bar
- Suppression List - A suppression list is a list that will exclude all emails in it from getting sent. You have the option to define such a list for 1 of 3 levels: (1) Global - i.e., for the entire account, for all lists, and all campaigns suppress those emails (2) List Level (3) Campaign Level
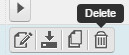
To remove a list, click the 'delete' trashcan icon from the actions column, next to the list you would like to delete. - Sending List – A sending list is a regular delivery list that you can use to send email messages to its members
How to bind/limit/restrict one or more ESP/SMTP connections to a specific List
![]() This feature enables marketers to restrict certain ESP/SMTP connection to a specific list. Often different Lists might be serving different brands, or operations, in which case you might want that List to be able to use just one or a certain set of ESP/SMTP connections.
This feature enables marketers to restrict certain ESP/SMTP connection to a specific list. Often different Lists might be serving different brands, or operations, in which case you might want that List to be able to use just one or a certain set of ESP/SMTP connections.
- From the setting gearwheel on the upper right hand side of the product (see screenshot at the top of this section), select the List Manager settings page.
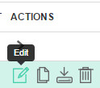
- Click the 'Edit' List icon, under the "Actions" column
- See "ESP vendor connections enabled for this list" setting
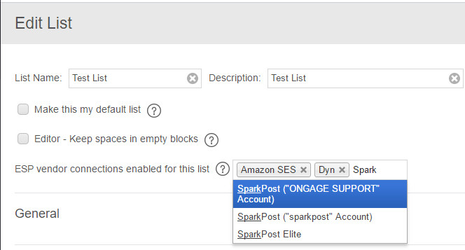
- Start typing, and an autocomplete of the ESP/SMTP connection names, available from your 'Vendor Settings → My Connections page', will appear. Select the one(s) you want this List to be able to use. If none are selected, then the List has access to all connections on your 'My Connections' page.
How to archive and un-archive a list
Why to archive a list
When a user has many lists and some of them are no longer relevant, but wants to keep them for historical data / archival purposes, they can archive them. Once archived they will no longer appear in the the top bar list drop-down, nor list manager. You can un-archive and restore a list at any time, see instructions below.
How do I archive a list
- Click “Settings” icon ( top right of the screen)
- Select “List Manager”
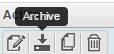
- In the relevant list go to action and click on the “Archive” icon
How do I un-archive a list
- Click “Settings” icon
- Click on Filter
- In the Archive lists select an option “Only Archived Lists”
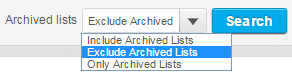
- Click “Search”
- In the relevant archived list go to action and click on the un-archive icon
Can contacts be added to an archived list
Yes, using the Ongage API add contact methods, you can add new contacts to an archived list.
How To Delete a List
...