Table of Contents minLevel 2
Introduction: What is a Conversion Point
Ongage conversion points are used to track post click conversions on a website for example, to where the recipients of your email message arrived to, after they clicked on a link in the email message you sent them:
![]()
When the thank-you page loads, the pixel fires, reporting back to the Ongage platform (via an HTTP call), about the conversion, for that specific contact.
Example of conversion points are:
...
Once implemented, you can then get email campaign stats that include conversion numbers, just like you have stats for opens and clicks, you can have stats of number of registrations for example. Similarly you'll be able to segment based on these behavioral conversions, just like one does with opens and clicks.
Conversion Points: Basic Technical Notes
- You can setup up to 5 conversion points per List.
- Ongage conversion pixels can be implemented either as client side or sever side – both are supported.
- It takes on average about 20 minutes for a conversion pixel to be processed from the time the Ongage platform receives it.
Conversion Point Pixel Overview
![]() Go to List → Conversion Points menu item in order to define and setup conversion point pixels
Go to List → Conversion Points menu item in order to define and setup conversion point pixels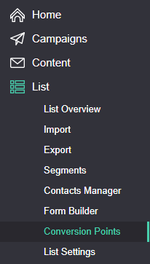
...
Your conversion pixel needs to be implement on the post-conversion page of your website (e.g. the thank-you page of a registration or purchase). For more details see below.
How to Implement an Ongage Conversion Point Pixel
- Go to List → Conversion Points and click on "New Conversion Point"

And fill in the following: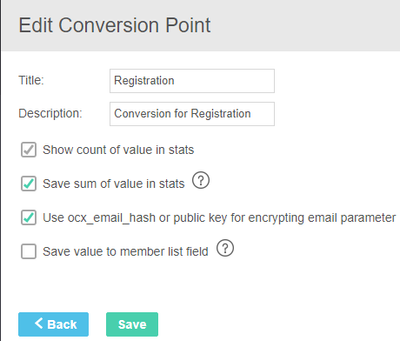
- If you'd like to also pass back a value and get sum of that value in the aggregate report – check the "Save sum of value in stats" option.
This is particularly useful to get a sum total of all purchases for a given campaign, figure out earnings per thousand emails, etc. - In addition you can save the values to a list field by clicking the "Save value to member list field" option.
- If you'd like to also pass back a value and get sum of that value in the aggregate report – check the "Save sum of value in stats" option.
- Copy the conversion pixel URL, from your Ongage account

- Place the conversion pixel on the post conversion page of your website
- For example: Let's say the conversion is "Registration", on the thank-you page following the registration form, place the pixel URL you got from the above dashboard
- See below details for how to implement the pixel on the post-conversion page
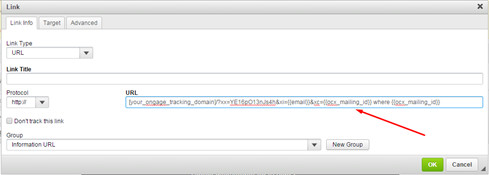
When setting up a email campaign, in the Email editor add the following dynamic fields to the relevant links in your email, that sends the recipients to the landing page where they'll be converting:
Dynamic field: {{email}}
System field: {{ocx_mailing_id}}
So the link will look something like this: http://my-landing-page/?email={{email}}&cid={{ocx_mailing_id}}
How to implement the conversion pixel on the post conversion point page
Your website programmer will be required to capture the values of the variables that arrived on the link to the landing page, and pass them back on the pixel that you'll fire on the post conversion page. For example:
| Code Block |
|---|
// Capture the variables on the landing page <?php $email = $_GET['email']; $cid = $_GET['cid']; ?> // Pass on the values to the post conversion page and populate the pixel with the values, that the recipient arrived with // This is an example of a client side pixel that you'd plant in the post-conversion page // When this page loads, the following pixel will load and send back the conversion data back to Ongage <img src="http://track.myowndomain123.com/?xx=YE16pO13nJs4&xi=<?php echo $_GET['email']?>&xc=<?php echo $_GET['cid']?>" width="1" height="1" > |
How to Implement Email Encryption
Sending a encrypted email address in both the email message and then back on the conversion pixel
This does not require any programming! Simply do the following:
- On the link in the email message send {{ocx_email_hash}} instead of {{email}}
e.g., http://my-landing-page/?email={{ocx_email_hash}}&cid={{ocx_mailing_id}}
- Capture the hashed email on your website, just like you would capture a regular email
I.e., $enc_email = $_GET['email']; - Send back the encoded email as is, on the pixel, just use &xih parameter instead of &xi
E.g., http://track.myowndomain123.com/?xx=YE16pO13nJs4&xih=
Appendix
If you only need to send an encrypted email address back on the conversion pixel
...