Campaigns
Table of Contents:
Subsection Pages
- Split Campaigns
- Events & Triggers
- SMS Campaigns
- Transactional Campaigns
- Manual IP & Domain Warm Up
- Automatic IP & Domain Warmup
- Campaign FAQ
Introduction
There are currently 3 major types of campaigns in Ongage
- Bulk campaigns (aka marketing or blast campaigns): are campaigns that you schedule to send to one or more segments. E.g., a daily, weekly or monthly newsletter to all your subscribers, is one such example, where one newsletter goes out to a bulk of recipients on your list.
- Of course you can target specific audiences using segments, and target them with tailored content relevant for that segment.
- Moreover you can use our dynamic content features, to send different content to different contacts in the very same campaign! For example, send in the same campaign, 1 set of content to all contacts from New York, and a different set of content to contacts from Los Angeles.
- Ongage does also offer Split (aka A/B Test) campaigns, which are a special case of these marketing campaigns.
- Event & Trigger (aka drip campaigns): are campaigns that based on an event (e.g., initial sign-up date) it sets-off a series of emails messages, that are sent spread out over time (days, weeks). For example a series of on-boarding messages to new users, or a set of messages designed to nurture leads to convert to paying clients, etc. (more about these see in this How-To section below).
- Transactional mailings (aka autoresponders): is an email message that is sent immediately to one individual recipient. For example a welcome email when someone subscribes to your list, or a receipt, when someone purchases a product, are two classic examples of transactional email messages. Every list in Ongage comes with one ready-made transactional campaign already setup, and it is typically used for your welcome email campaign. For more about transactional campaigns see our API Guide or our built-in welcome emails to be found in our List How To.
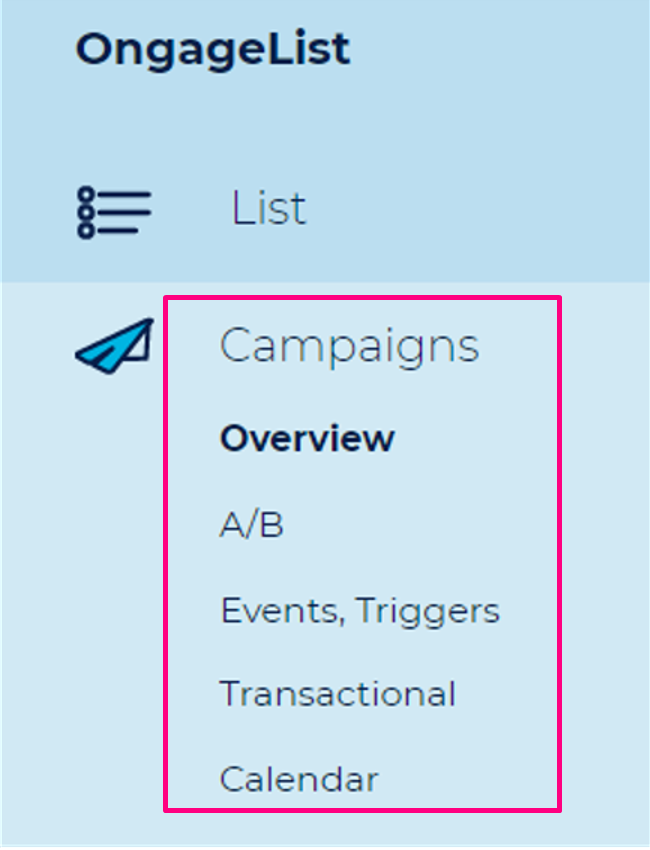
The Main Campaign Related Menu Items
| Campaign Overview & Setup | Campaign Analytics |
|---|---|
|
|
Campaigns General
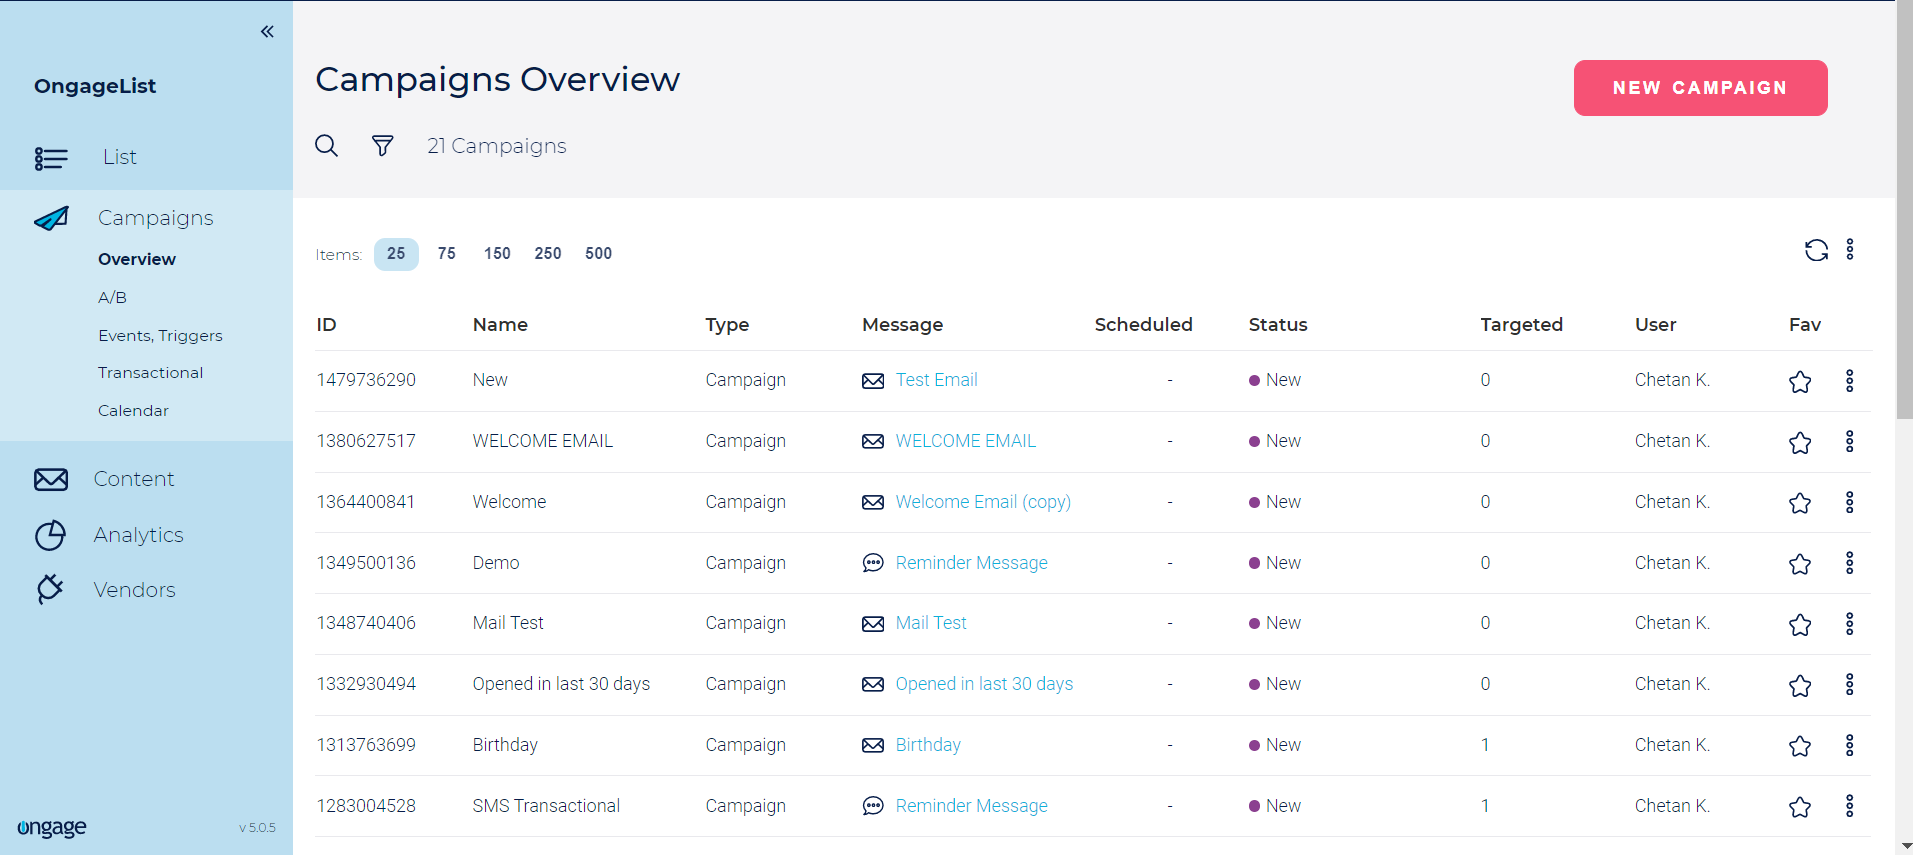
The Ongage Campaign Overview
- Go to: Campaigns → Campaigns Overview
- The Campaign Overview, provides marketers with a list of all campaigns in system, ranging from campaigns scheduled to go out in future, to campaigns in process and completed. The dashboard includes rich search options, so you can easily find the campaign information you might be looking for. Furthermore, marketers have quick and easy access to key info about each campaign, whether it be messages used, segments targeted, ESP / SMTP connections, campaign size, and access to the campaign snapshot report – which provides a detailed overview of completed campaigns.
Create and Schedule a Campaign Basics
See the How to Create and Schedule a Campaign Section in our Getting Started Guide!
How to Send a Test Campaign and Use Mail-Tester
![]() Before you send out a campaign, it is highly recommended to send a test campaign first.
Before you send out a campaign, it is highly recommended to send a test campaign first.
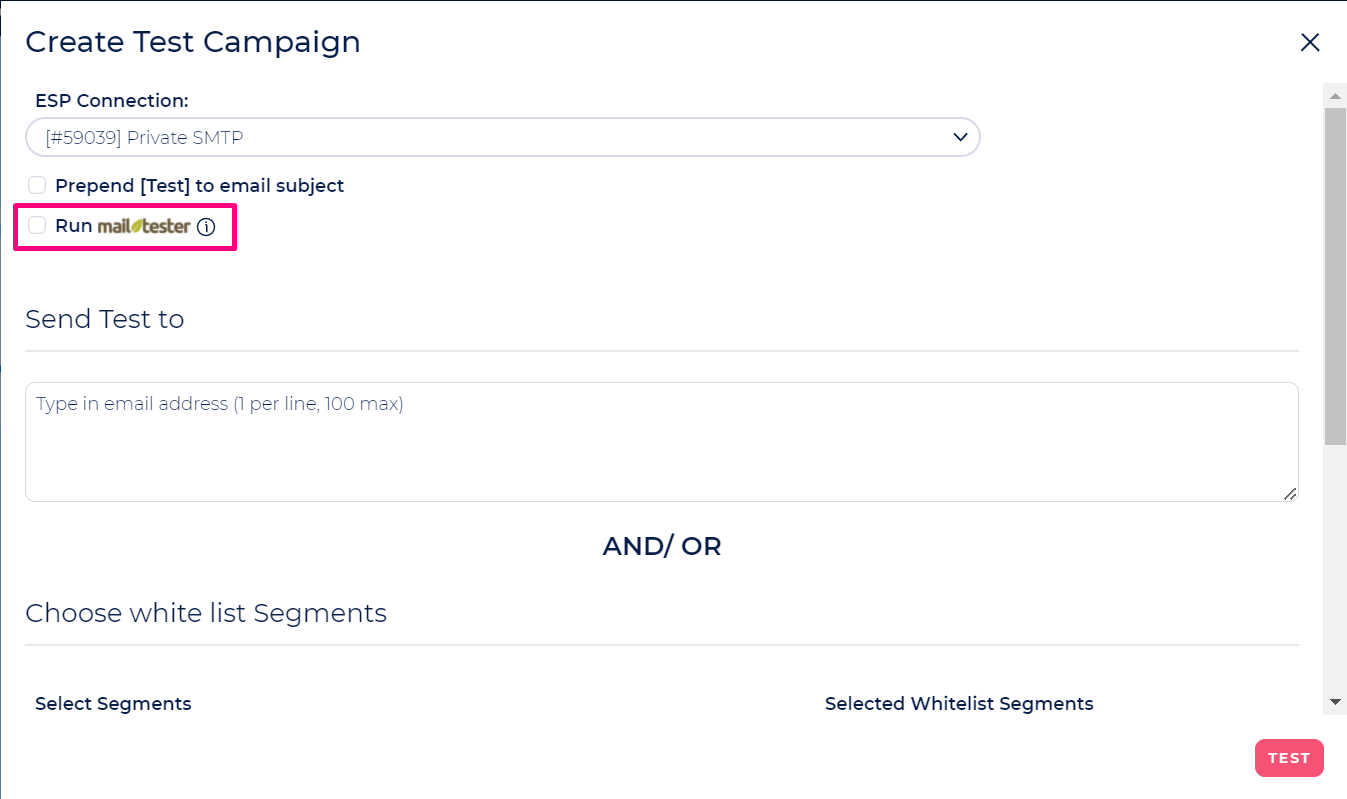
To send a Test Campaign with Mail Tester Report:
- Go to >> Campaign Configuration Page >> Test Campaign panel.
- Add email addresses AND/OR Whitelist Segment that will receive the Test Campaign.
- Check 'Run mail-tester' for a mail-tester report and click 'Test'. You can also just check and run a mail-tester without indicating any email addresses.
- You can also Send a Test Campaign from Email Message Dashboard using the Test Email Icon from Action Items.

Mail Tester Report
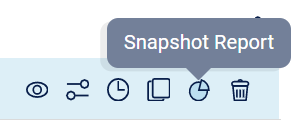
After running the mail tester, you can view the mail tester report by going into snapshot report of a campaign.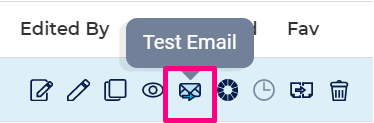
The Mail Tester report provides the score based on the following areas of Email Deliverability Analysis.
- Spamassasin: The Spamassasin report gives you results based on a robust scoring framework which includes a wide range of advanced heuristic and statistical analysis tests on email headers and body text. The report highlights whether the content is Blocked by any Spam filters such as Razor or gives a negative score if any part of your content is problematic and may cause delivery issues from ISP end.
- Authentications: Mail-Tester report checks SPF/DKIM/DMARC signature of your sending as well as bounce domains and highlights any missing authentication by giving negative score for the missing authentications.
- Blacklists: If your sending IP is blacklisted in any of the Major Blacklists, the report will show a negative score and highlight the blacklist in which IP is listed.
- Email Message Format: Mail-tester checks the HTML/CSS and the structure of the Email message and gives a negative score if any standard practise is missed in formatting an email such as using broken links, missing Alt Attribute of an image, HTML/Text or Image/Text ratio etc.
Include Segments Advanced Configurations
There are 2 optional advanced include segment configurations
Send according to segments order: When checking this box, the system will send messages to contacts according to the order of the segments below. Once sending is finished for one segment, it will begin for the next.
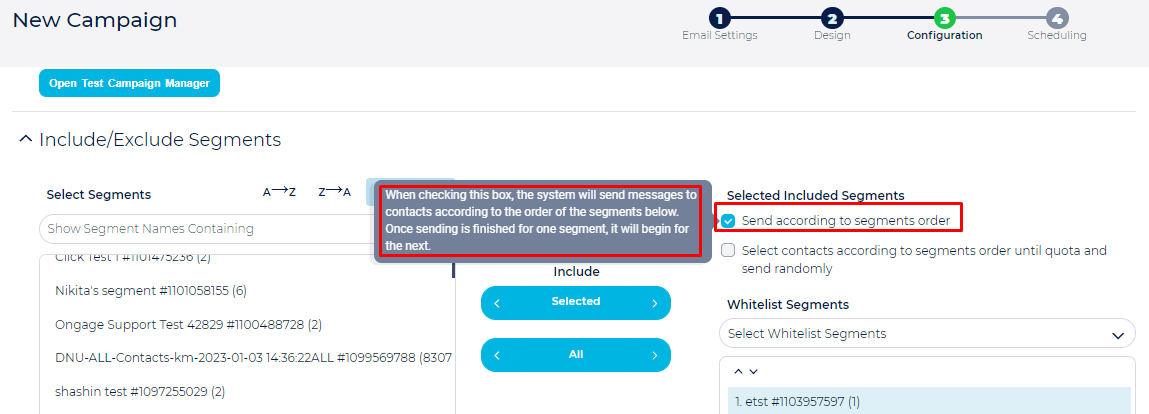
 Important Note: This option will override any other sending order!
 - Select Segment by Order Until Quota is another option available in which Contacts are retrieved according to the order of the Segments specified in the Campaign, till the quota is reached. The selected contacts are then sent in a random order.

Advanced Campaign Configurations
![]()
Campaign Quota
- The campaign Quota allows users to limit the total amount of Emails/SMSs to be sent out in a given campaign.
Users can define quota by going into Campaign Configuration >> Advanced Configuration options.
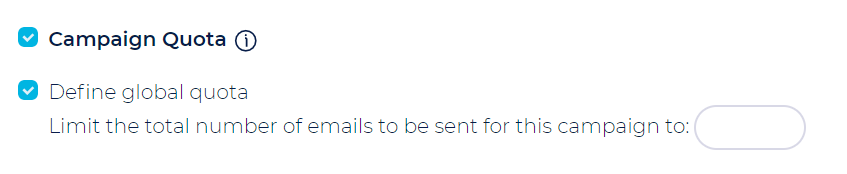
There are 2 ways in which you can set the quota for your campaigns.
- Define Global Quota: This will limit the maximum number of Emails/SMSs to be sent for your campaign.
- Define Quota Per ESP Connection: Here you can define the maximum number of Emails/SMSs to go out for each ESP connection you have used in ESP Routing distribution.
- Quota per ESP Connection can also be can also set be setup in the ESP Routing/Distribution configuration when using that feature as explained in that section below.
- Quota per ESP Connection can also be can also set be setup in the ESP Routing/Distribution configuration when using that feature as explained in that section below.
What is it useful for
There could be several reasons to use the campaign Quota function:
- Most often as part of the Manual IP & Domain Warm Up.
- In order to meet your ESP sending limit and not to exceed it.
- In conjunction with the feature: "Select segments by order until quota" – which enables mixing up small amounts of contacts from a less engaged segment with contacts from more engaged segments.
How Does Quota Work
It randomly selects a set of contacts from the selected segment till the quota number is reached. For example, let's say the targeted segment is 10,000 and the quota is set to 1,000, the system will randomly selected 1,000 contacts from that targeted segment.
If there are several segments targeted, it will randomly but proportionally select contacts from each segment, so more contacts will be selected from a large segment and less from a smaller one.
Campaign Level ESP Routing
- You can overwrite the ESP Routing that you have applied at Account Level or List Level from the ESP Routing Options available on Campaign Configuration page.
- You can set Distribution by Percentage or Numbers.

 Note: When you set distribution by Numbers, it is equivalent to defining Quota per ESP Connection!
Advanced Campaign Scheduling
These options you'll find on the 'Campaign Scheduling' Page under the 'Advanced Scheduling' title on that page.
Send Time Optimization
Intro
This option enables marketers to send a message to a contact at the time that they are most likely to engage with the message (i.e. open and/or click). Once switched on, email messages will be sent within a 24-hour time frame from the campaign launch, according to the time most likely to elicit an action by each contact targeted in the campaign.
The time as to when to send to each contacts, is based on past historical data, and takes into account a wide variety of factors, including the behavior of a Contact on a given List, as well as its behavior in the Account; it gives more weight to recent behavior, as well as more weight to clicks vs. opens, just some of the factors taken into account. Last but not least Ongage can also query a 3rd party platform as needed for additional data, so that even in the case of new contacts, Ongage can have data to optimize sending.
- Since the sending window is 24 hours, this feature may not be appropriate for time-sensitive emails.
- This feature cannot be used with throttling nor time-zone, and those scheduling options are not available when this setting is chosen.
Setup
- Go to the 'Advanced Scheduling' panel
- Check the 'Enable send time optimization' radio button.
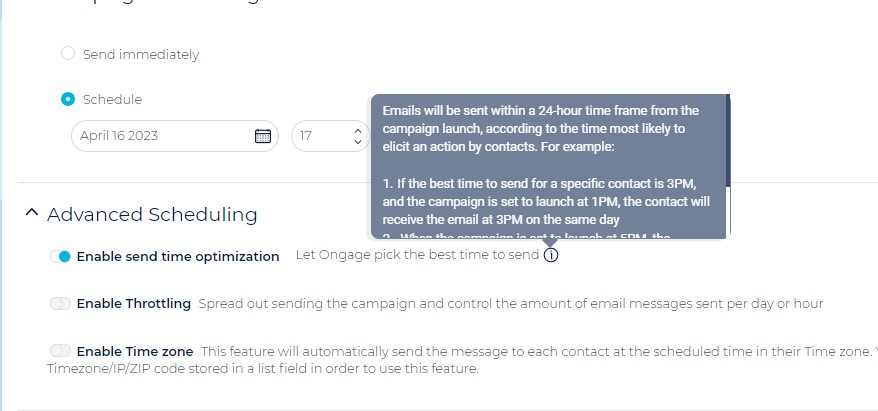
Campaign Throttling
Intro
- Throttling allows you to control the amount of email messages sent per hour for a given campaign.
- So for example, if you have a segment of 10,000 contacts, you can choose throttle (spread out) the campaign over 10 hours, in that case Ongage will send 1000 messages each hour for 10 hours.
- Campaign throttling may sometimes be used during the warm-up of a new IP/SMTP connection. Some marketers may also choose to use this feature when sending to less active segments.
Setup
- Go to the 'Advanced Scheduling' panel
- Check the 'Enable Campaign Throttling' radio button.
- Choose one of the three throttling methods. One of those methods also enables sending across multiple days, but only during a certain time range on each day. For example, send only during relevant waking hours of 8:00-23:00 on each day.

![]() You can also configure throttling and sending by timezone both at the same time. Simply enable both toggles on the scheduling page as shared in screenshot below.
You can also configure throttling and sending by timezone both at the same time. Simply enable both toggles on the scheduling page as shared in screenshot below.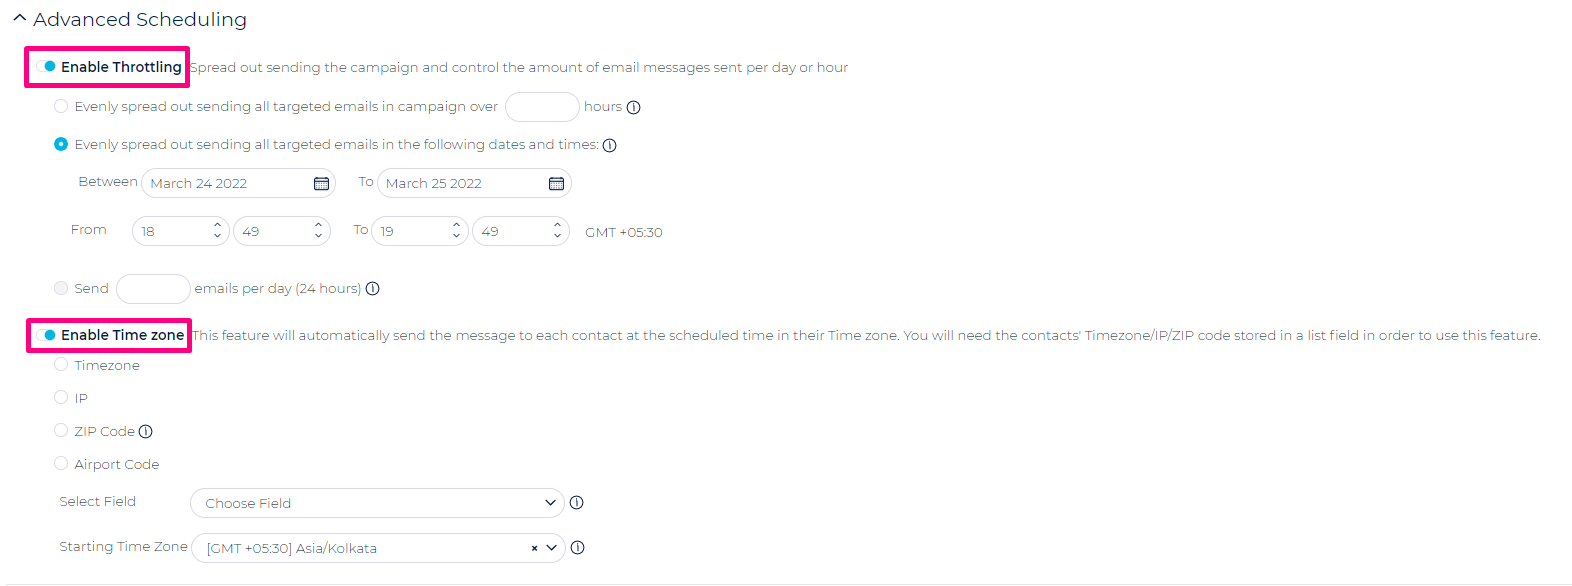
Dayparting Throttling
Ongage added day-parting method in June 2019 which enables marketers to throttle a single campaign over several days but to send only during a certain time range on each day.
To Setup Day-parting, go to Campaign Schedule Page >>> "Advanced Scheduling" option and use "Enable Throttling" with Day-Parting as mentioned in screenshot below.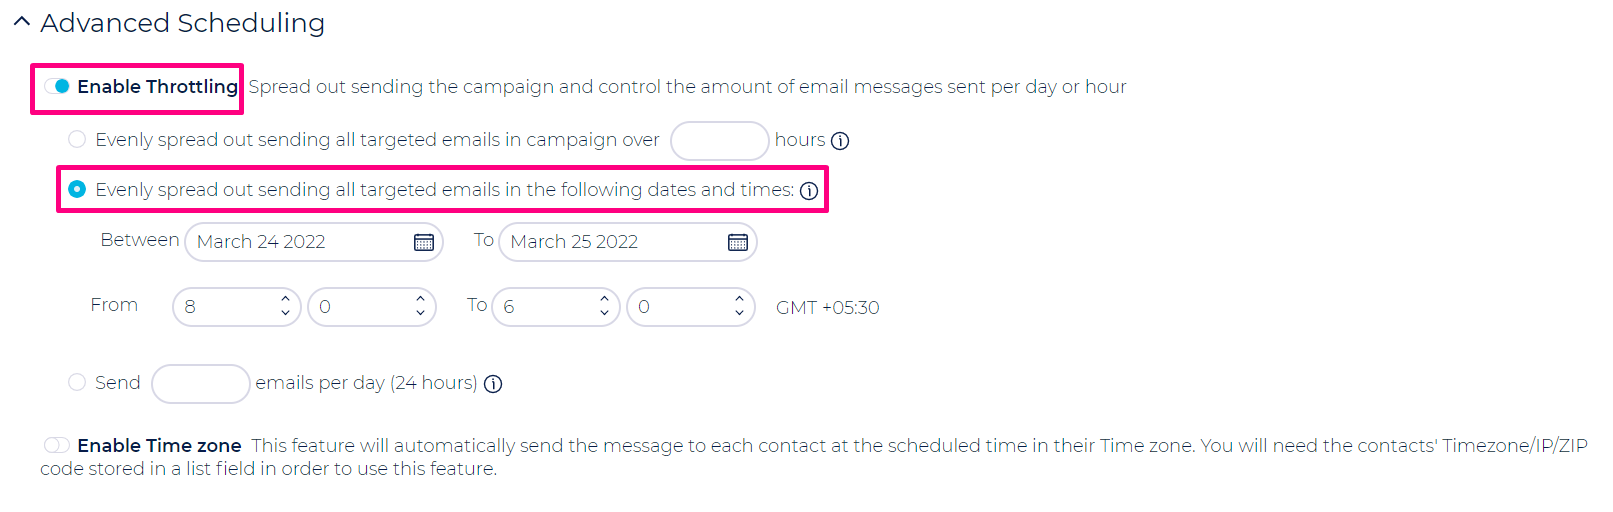
You can use this for example, to traverse through a segment of 1 million contacts, throttled for 10 days, so that each day 100,000 emails will get sent, during the hours indicated in the day-parting time-range, so that by the end of the 10th day, all 1 million contacts will have been sent.
![]() Note: For low volumes of high quality contacts this setup can be used for warm-up purposes as well.
Note: For low volumes of high quality contacts this setup can be used for warm-up purposes as well.
Send by Timezone
Intro
- This feature enables marketers to schedule one campaign that will send at different times, based on the time-zone (IP, ZIP Code or Airport Code) indicated in each contact's list field. So you can schedule one campaign that will send out at 8am ET to all contacts in ET, and then send at 8am CT to all contacts in CT, and so on and so forth.
- This feature requires that you have the timezone (or IP, or ZIP Code, or Airport Code) for each contact, that you will store it in a List field. For contacts that you don't have any timezone indication, they will receive the campaign at the indicated campaign start timezone time (see details below).
- The list field you create for storing the time-zone offset should be either numeric or string.
- In case of numeric, indicate number of minutes relative to GMT (e.g., 120 for GMT +02:00 and -300 for GMT -05:00).
- In case of string, use the tz database convention, for example: America/New_York, Europe/London, etc. This convention takes into account DST.
- If you don't have the time-zone of your contacts but do have either the IP, ZIP Code or Airport Code, then you can use a List field that contains one of these values in order to use this feature to send-by-timezone. In the case of ZIP codes, only US ZIP codes are supported.
Send by timezone setup
- On the 'Campaign Scheduling' page, select the time you'd like the campaign to launch at in each time-zone. Lets say for example 8:15am:
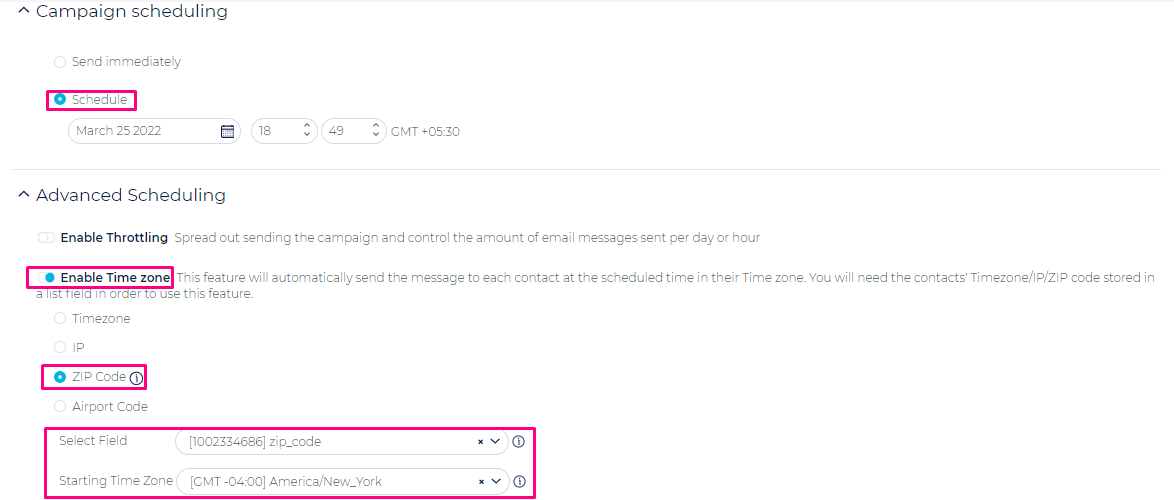
- Choose the List field that contains either the Time-Zone, IP, ZIP Code, or Airport Code, for each contact so that when the campaigns prepares to send it will look at the appropriate list-field to determine the time-zone for that contact.
- Select the campaign time-zone – indicates from what time-zone to start sending. In the case of North America, one would typically select East Coast Time, as the timezone for the campaign to start sending at.
![]() The reason for this last setting is as follows: lets say your DB is for North America, but (unintentionally) you have in your DB one contact who's timezone is Beijing China (GMT +8 hours). In such a case the campaign will start pre-processing at GMT +9 hours, send to that one contact, then suspend for over 12 hours (!!) and after that, continue sending to contacts in the East Coast of North America. By indicating that you want the campaign to start sending at East Coast time, you're telling the system to ignore anyone who might have a timezone prior to East Coast. If there are any (or if there are contacts with no timezone indication), they will get the email at the East Coast start time.
The reason for this last setting is as follows: lets say your DB is for North America, but (unintentionally) you have in your DB one contact who's timezone is Beijing China (GMT +8 hours). In such a case the campaign will start pre-processing at GMT +9 hours, send to that one contact, then suspend for over 12 hours (!!) and after that, continue sending to contacts in the East Coast of North America. By indicating that you want the campaign to start sending at East Coast time, you're telling the system to ignore anyone who might have a timezone prior to East Coast. If there are any (or if there are contacts with no timezone indication), they will get the email at the East Coast start time.
Note: You cannot use the general throttle options when you have used timezone throttling. Both the settings cannot be used simultaneously.
How To Stop and Resume a Campaign
- You can stop a campaign in progress.
- Having said that, it should be used with caution and should by and large be used as a last resort in order to prevent a campaign from going out, for whatever reason, e.g., incorrect info in the body of the email.
- If you stop a campaign during the pre-processing, i.e., prior to the schedule date, or up to and including 10% progress, you'll be able to completely stop the campaign from going out. Stopping a campaign anytime after that, will cause the campaign to stop sending, after some or most, of the emails have already been sent. The later you attempt to stop it, i.e., its progress status is in the high percentages, the less chance there is of stopping it.
- You can resume a campaign after it was stopped. The same cautions apply as in the 2nd bullet noted above.

Campaign Statuses
![]() You can hover over the status of a campaign, in the Status column in order to get more info about that campaign's status
You can hover over the status of a campaign, in the Status column in order to get more info about that campaign's status
- New: a new campaign, is one that you started setting up, you saved the configuration (step 3) but did not yet set a schedule date.
- Scheduled: a new campaign that is scheduled for sometime in the future, and has not yet started to send.
- In Progress: a campaign that is getting ready or has started to send (which first includes pre-processing, and then the actual sending process. See our FAQ on pre-processing here).
- Stopped: is a campaign that a user clicked on the 'Stop' button icon (see more details in section above).
- Completed: campaign completed successfully.
- Error: campaign was not sent at all, due to an error, hover over the error status of that campaign to get more info about the error.
- Completed with Errors: campaign was sent, but there are some errors, and not all emails were sent. Hover over error status of that campaign to get more info about the error.
- Cancelled: When you delete a Scheduled or Stopped campaign, those campaigns will get a Cancelled status. When you choose this filter from your campaign dashboard you can view campaigns with this status.
- Deleted: Campaigns that were deleted from your dashboard. When you choose this filter from your campaign dashboard you can view campaigns that were deleted.
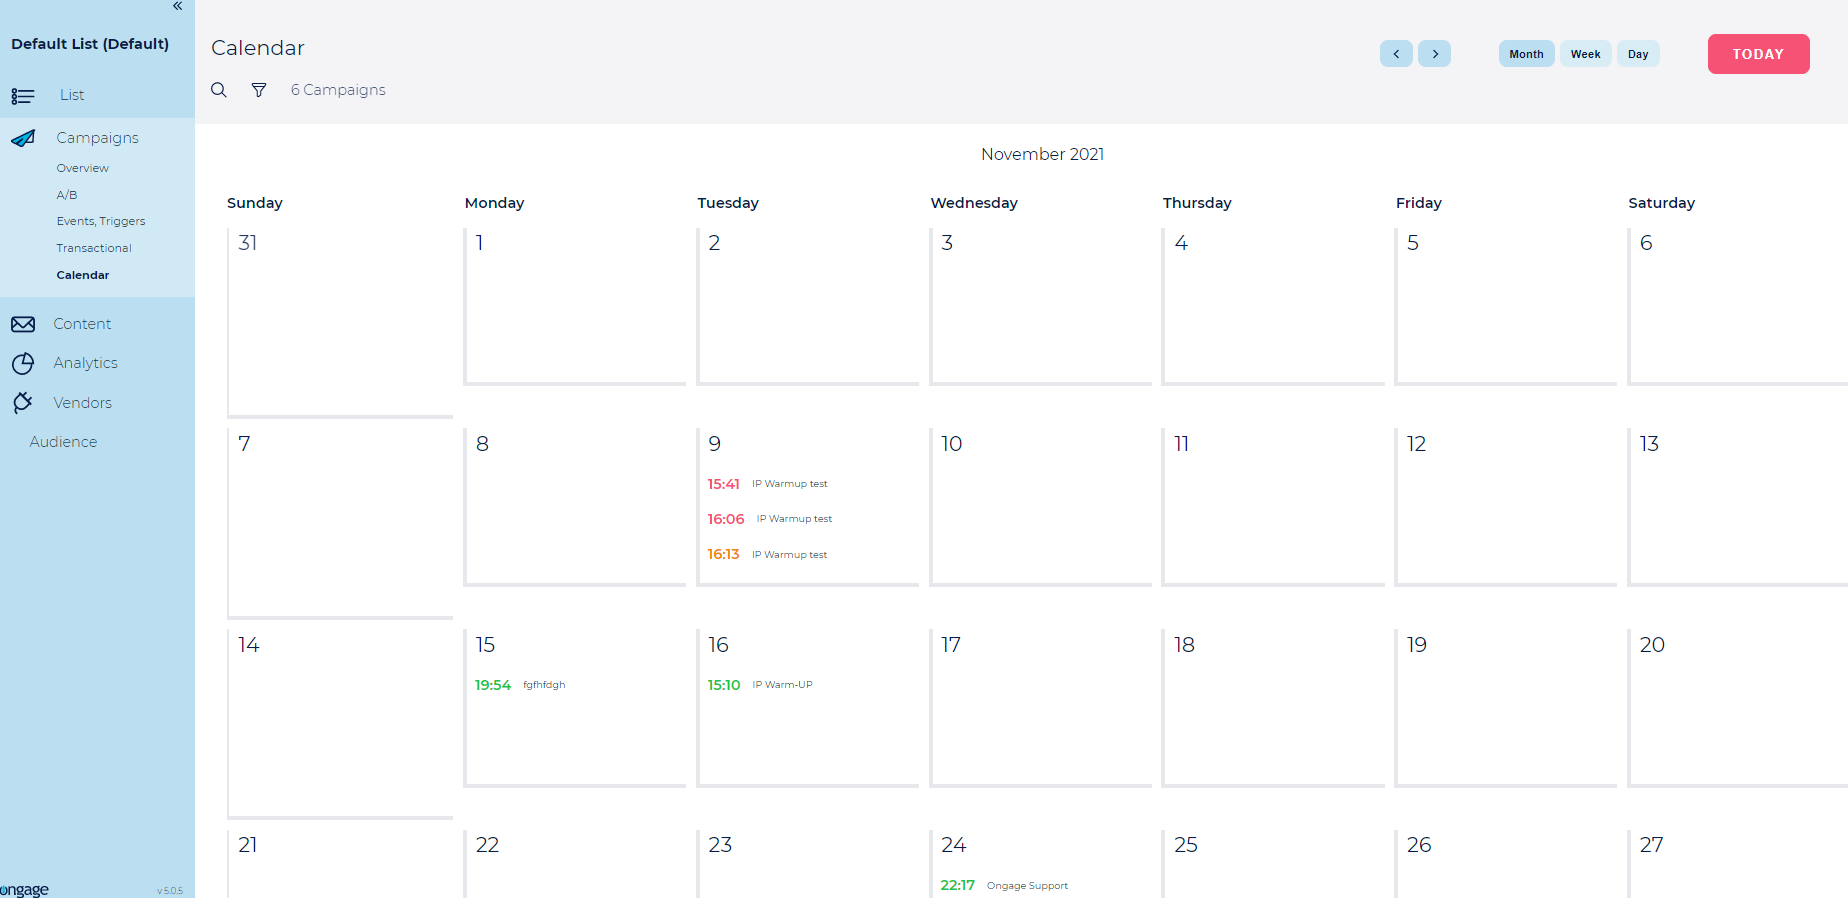
Calendar
To have a calendar view of the campaigns you have sent you can go to Campaigns >> Calendar. It displays the campaigns that you have sent and also your scheduled campaigns.![]() NOTE: It does not include events, recurring campaigns, and transactional campaigns.
NOTE: It does not include events, recurring campaigns, and transactional campaigns.