Amazon SES Setup Tutorial
Table of Contents:
You may want to first review the general Vendor Settings online help page, prior to following this specific vendor tutorial.
API Credentials
![]() Following are the steps required to retrieved the API credentials needed to connect your Ongage vendor connection to your Amazon SES account.
Following are the steps required to retrieved the API credentials needed to connect your Ongage vendor connection to your Amazon SES account.
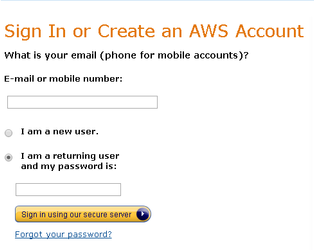
Login to Amazon AWS at https://aws.amazon.com/
Enter your username and password
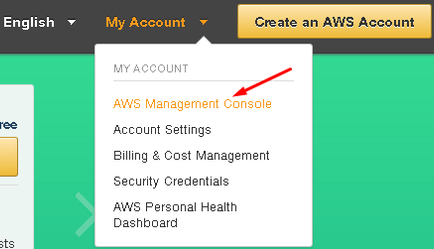
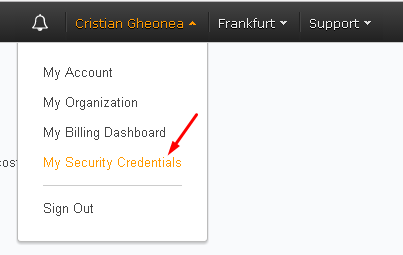
Click 'My Account/Console' and then 'Security Credentials' option
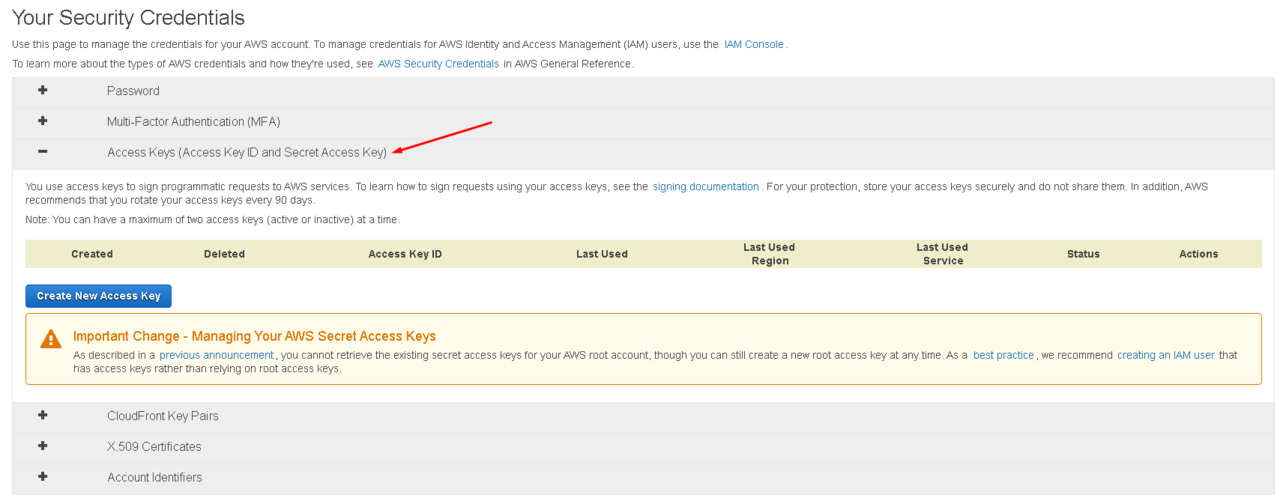
Click the Access Keys section in the middle of the page
You can only get the secret key when a new key is created.
You also may have only 2 keys at a given time, both Active and Inactive.
If you already have two keys and you do not know the secret key, you would have to delete one before you create the new one. If you do not have two keys in place, simply create a new one by clicking the ‘Create New Access Key’ button.
After clicking Create New Access Key button a new window would pop. At this point your key is already created.
To show the access key and secret key simply click the Show Access Key link.
Copy the Access Key ID and the Secret Access Key to Ongage platform.

 We also recommend you keep a copy of the secret key in a safe offline place for future reference.
To retrieve your SMTP username and password you would have to login into Amazon AWS
Enter your username and password
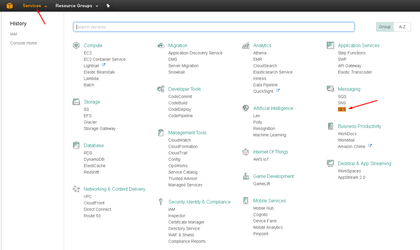
Click SES link under App Services section
Click SMTP Settings on the left menu
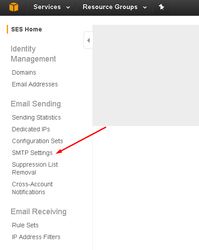
Click ‘Create My SMTP Credentials’ button
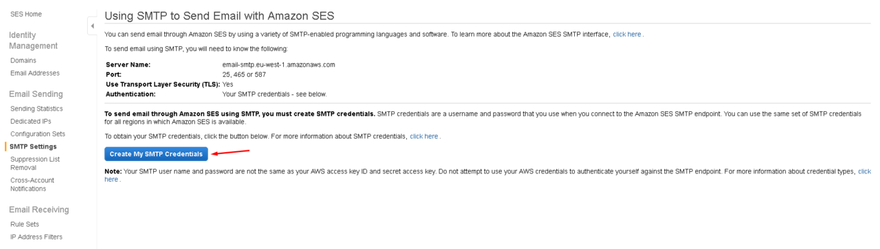
A new window would open. Click the ‘Create’ button

Your SMTP has been created successfully. Click the ‘Show User SMTP Security Credentials’ link
Copy the Username and Password to Ongage platform. We also recommend you keep a copy of the secret key in a safe offline place for future reference

Email/Domain Verification Procedures
The following procedures shows how to use the Amazon SES console to verify and view verified sending email addresses.
How to verify a sending email address
Go to your email address list in the Amazon SES console, or follow these instructions to navigate to it:
Sign in to the AWS Management Console and open the Amazon SES console at https://console.aws.amazon.com/ses.
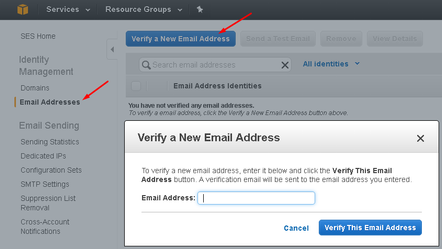
In the navigation pane, under Identity Management, choose Email Addresses.
Choose Verify a New Email Address.
In the Verify a New Email Address dialog box, type your email address in the indicated field, and then choose Verify This Email Address.
In your email client, open the message from Amazon SES asking you to confirm that you are the owner of this email address.
Click the link in the message.
Note
The link in the verification message expires 24 hours after your original verification request.
The status of the email address in the Amazon SES console will change from "pending verification" to "verified".
You can now use Amazon SES to send email from this address. To send a test email, check the box next to the verified email address, and then choose Send a Test Email.
Go to your email address list in the Amazon SES console, or follow these instructions to navigate to it:
Sign in to the AWS Management Console and open the Amazon SES console at https://console.aws.amazon.com/ses.
In the navigation pane, under Identity Management, choose Email Addresses.
In the list of verified email addresses, you can expand one or more email addresses to view the details.
What's the difference between a verified domain and verified email address
![]() To be noted: One can remove the verified email address from the Amazon SES account, so long as the domain is a verified domain and thus it will apply for all email address with that domain.
To be noted: One can remove the verified email address from the Amazon SES account, so long as the domain is a verified domain and thus it will apply for all email address with that domain.
Amazon SES Sandbox Account
How do I know if my Amazon SES account is a sandbox account
- Step 1: Go to Amazon AWS Dashboard
- Step 2: Click "Simple Email Service" link under "Services".
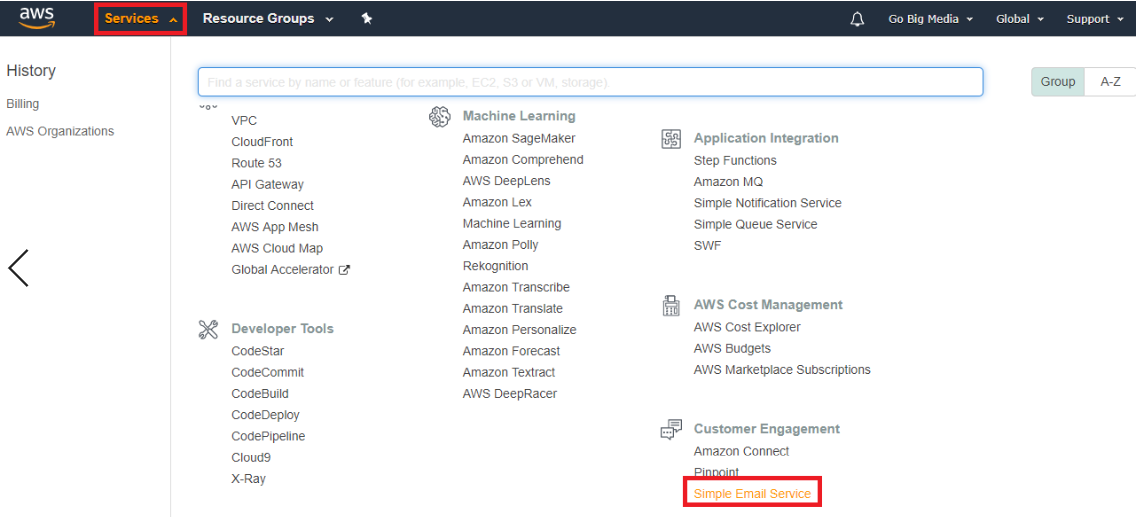
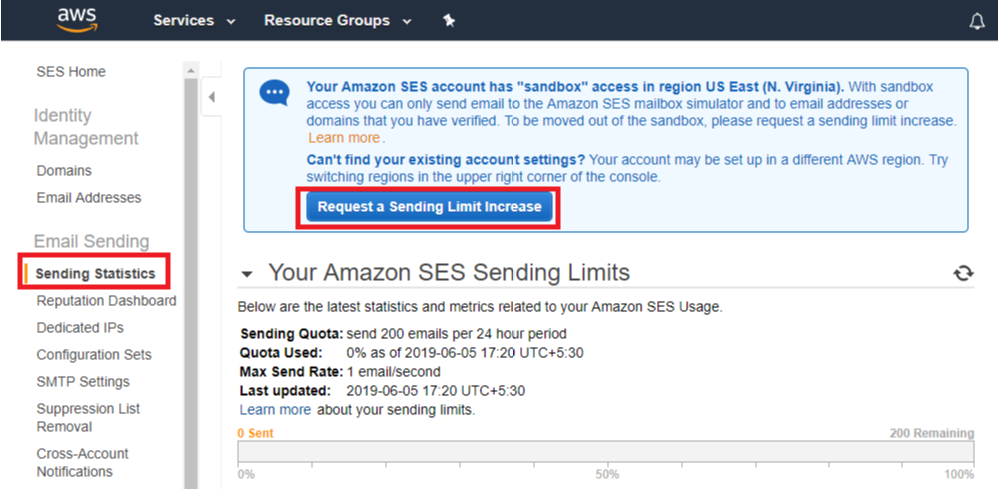
- Step 3: Under the "Sending Statistics" option, you will be able to see if the account is a sandbox or not.
About Amazon SES Sandbox Accounts
![]() Amazon places all new Amazon SES account in "sandbox" access.
Amazon places all new Amazon SES account in "sandbox" access.
While your account is in sandbox, you can use all of the features of Amazon SES. However, the following restriction applies:
- You can only send mail to verified email addresses and domains, or to the Amazon SES mailbox simulator.
Therefore you'll need to move your Amazon SES account out of Sandbox, and you can refer to the following Link in order to do so: https://docs.aws.amazon.com/ses/latest/dg/request-production-access.html